YouTube video guide on how to create Lottie animations using SVGator
In this article we will show you how easy it is to create Lottie animations and export them right away without the need for plugins or any third party apps.
What you will learn:
- How to start a new project in SVGator
- How to edit element and set up keyframes on the timeline
- How to use the stroke offset animator
- How to create a seamless looping effect
- How to export your animation
In this tutorial we will create a toaster animation with a loader on it. Watch the full video tutorial from above, or read the short step by step description below.
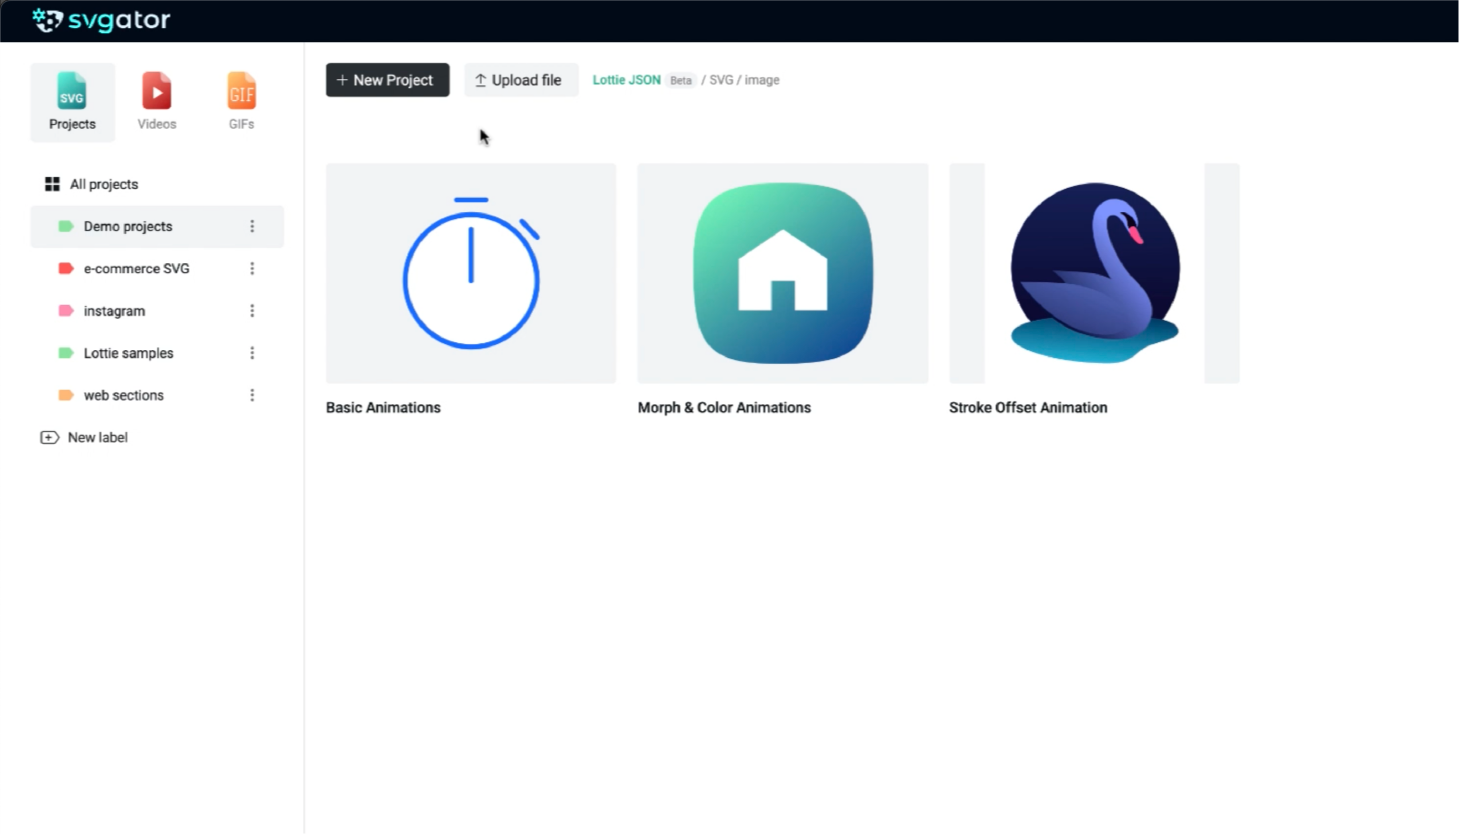
Step 1 - Start a New Project
Click on the New project button. You can start a project from scratch by setting a size for the canvas or you can upload an existing file from your computer. In the left panel, you can see the list of all your elements.
You can organize them into groups and name them accordingly. To open a group, simply click on it and access the elements inside. You can create new groups or organize existing ones at any time.
Step 2 - Edit elements
Working with the elements on the canvas is really easy. At the second step we made some fill color changes to the toaster group’s elements to demonstrate this.

Discover more about our Lottie features!
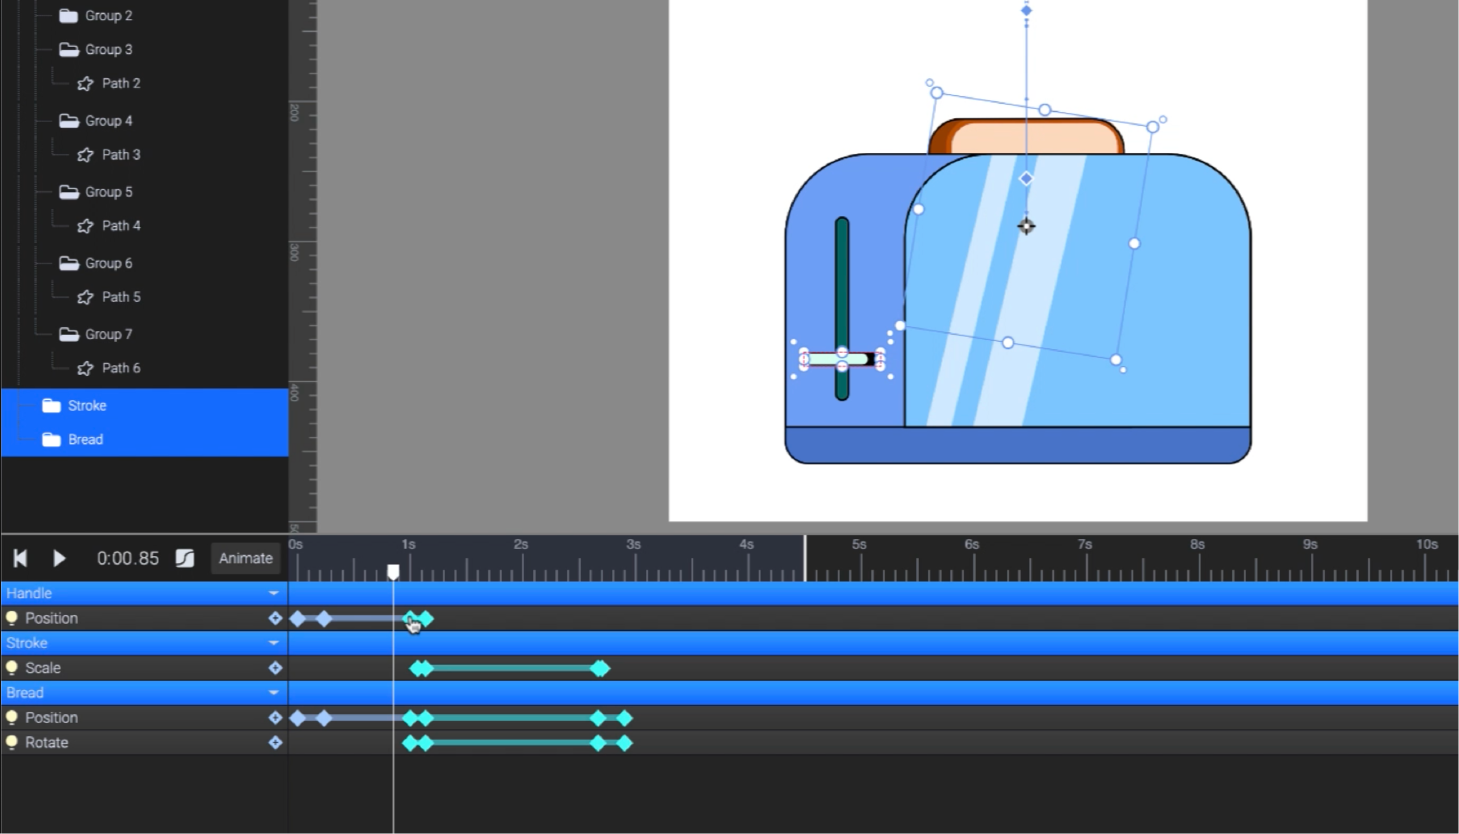
Step 3 - Set the Keyframes for the animations
The most exciting part is the animation process: all you have to do is to set up keyframes on the timeline for every animation effect you want to achieve.
For a smoother transition, hold down the shift key on your keyboard while scrubbing the play head. To extend the timeline's duration, grab this marker and drag it.
Select all the key frames after that time segment and move them all together to the right to have more time before the bread slice will pop out.
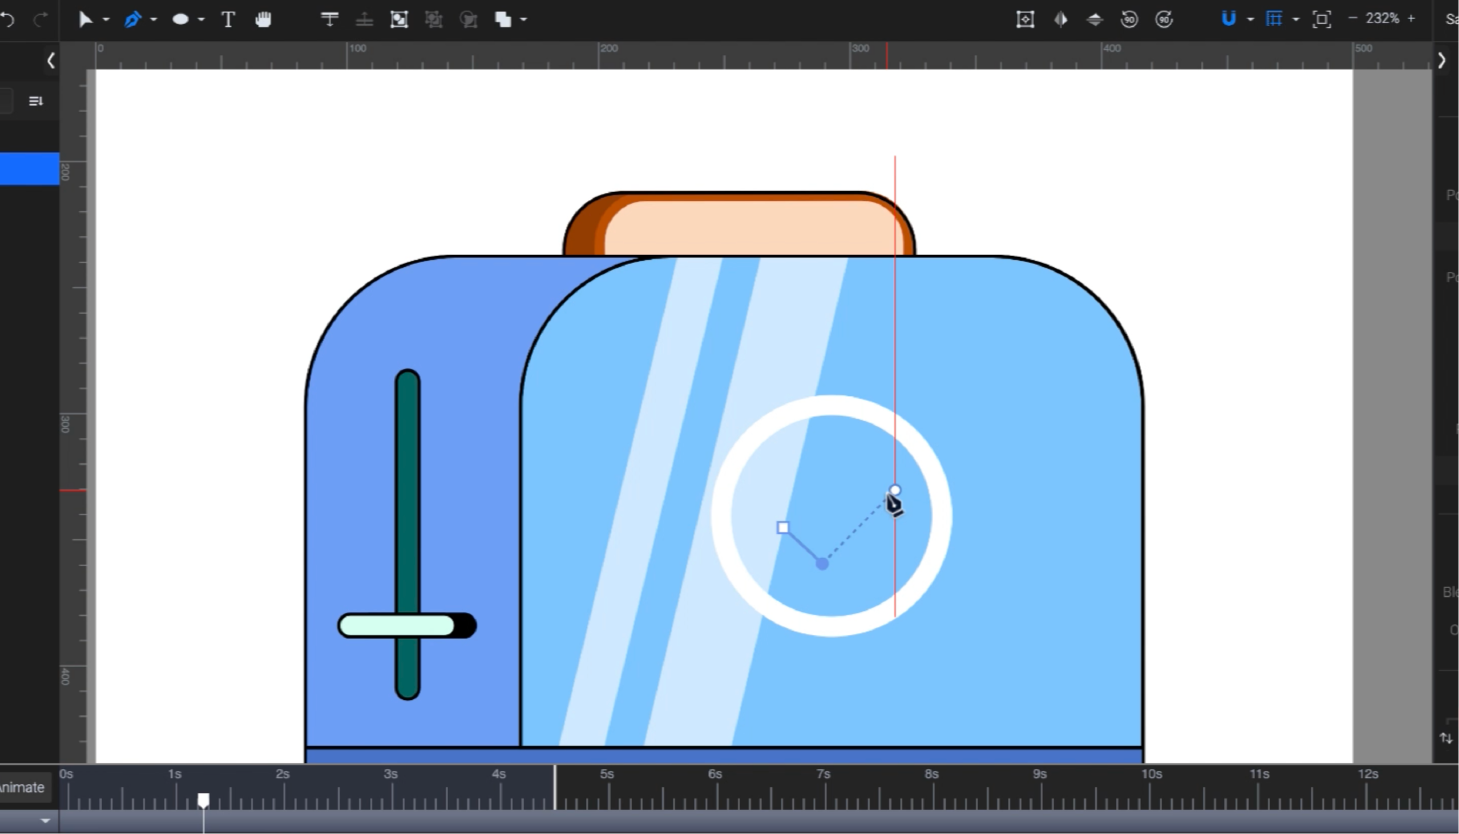
Step 4 - Create a Loading animation
First, you need to draw the loader:
- Choose the ellipse from the Shapes drop down and draw a circle in the middle of the toaster's front shape. To create a perfect circle starting from its center, hold down, shift and option or alt on your keyboard while dragging the cursor to draw the circle.
- Then go to the fill and stroke properties, change the fill color to white.
- Then click on those arrows to swap the color from fill to stroke.
- Pick the pen tool to draw a check mark.
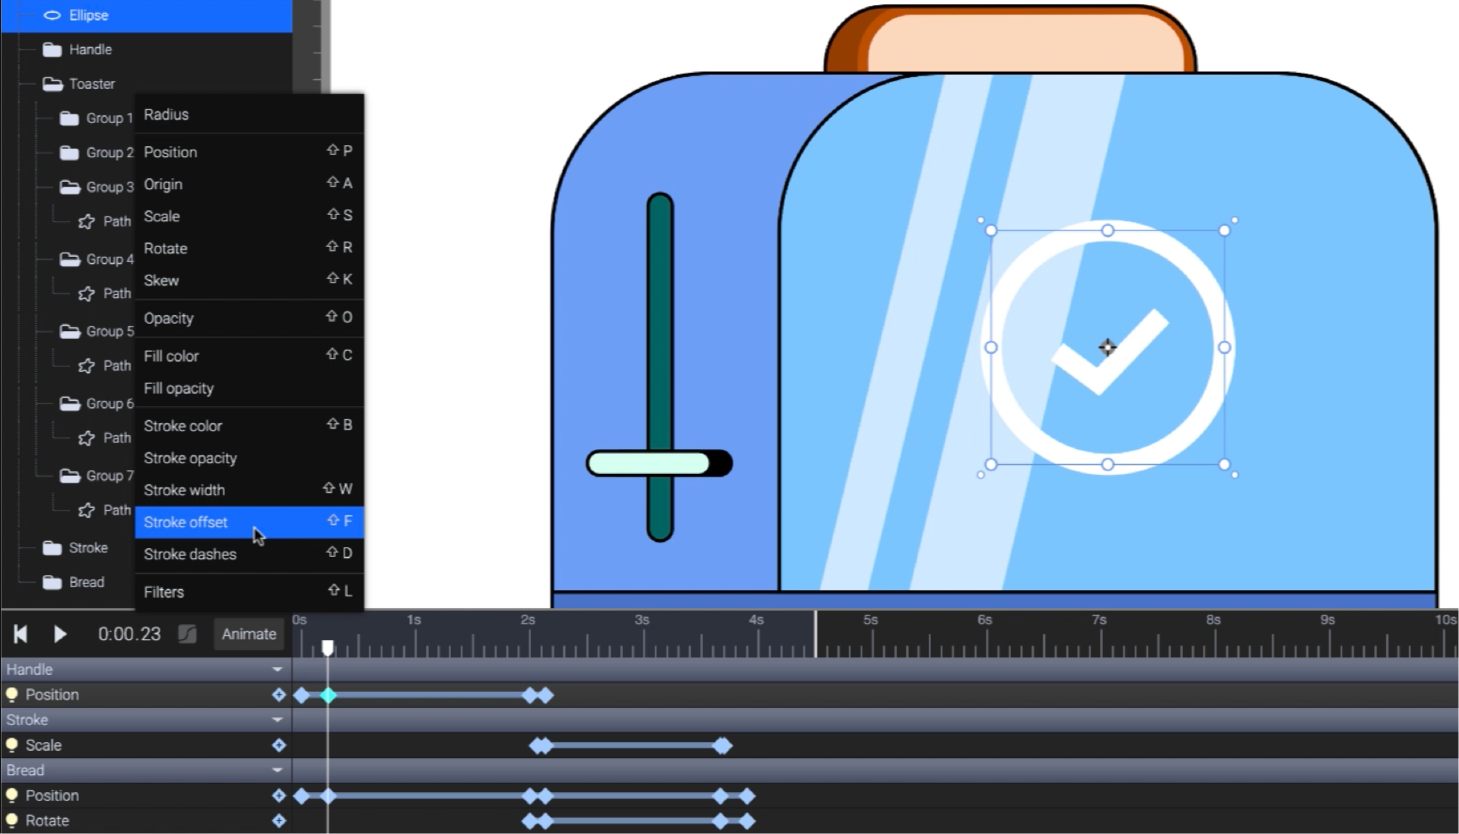
Animate the circle and have its stroke offset filled in along the path to make it look like a loader.
Start this animation from the point when the bread slice dropped inside the toaster.
Step 5 - Use the Stroke Offset animator
You can start this loader animation from the point the bread slice drops inside the toaster.
Select the circle and open the animator’s list by clicking the “Animate” button. Using the “Stroke Offset” animator for the circle and the checkmark elements.
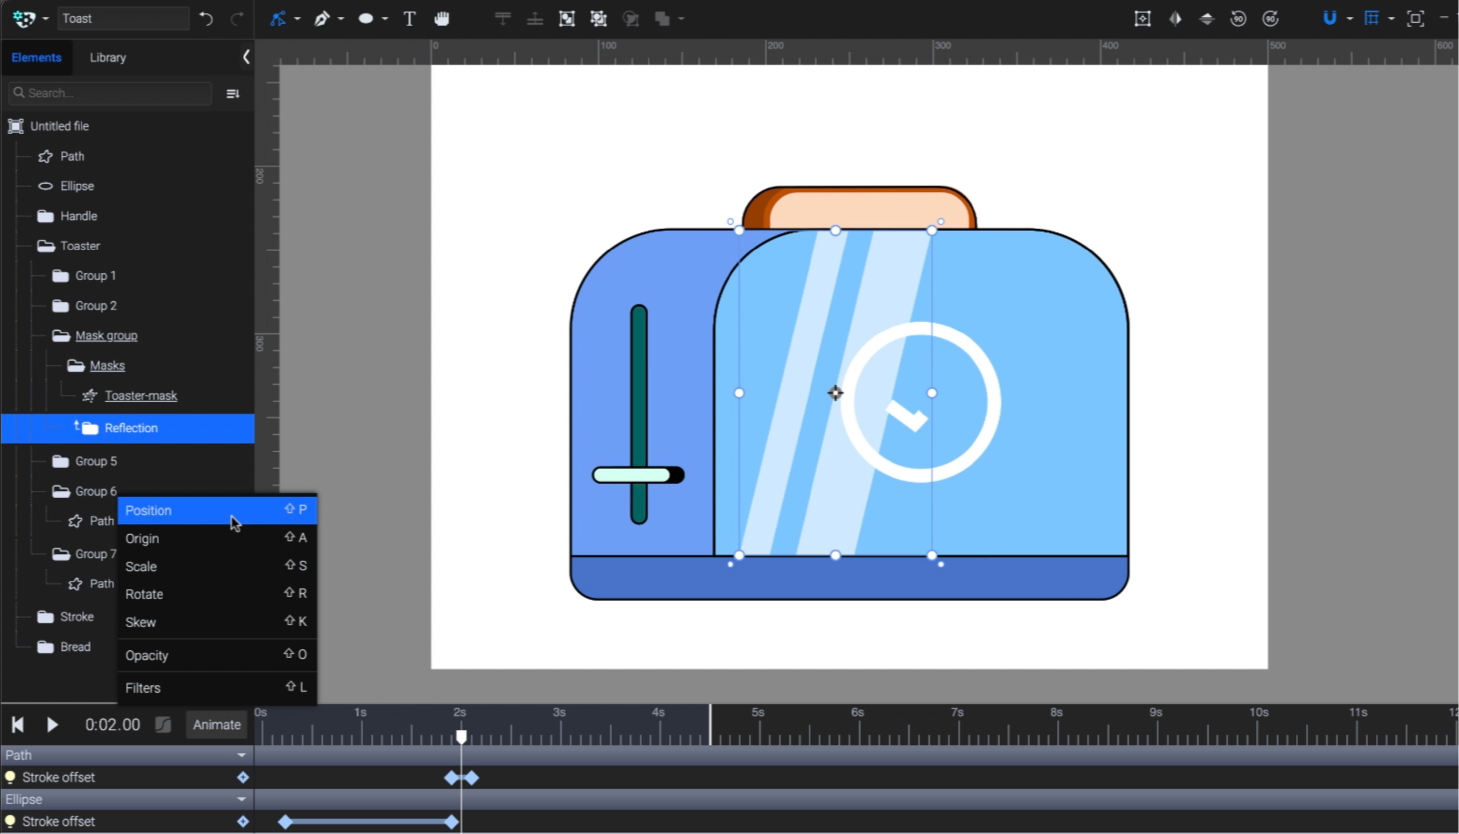
Step 6 - Animate the reflections
You can also animate the Reflection group on the front element of the toaster, using a clipping mask. Identify your Toaster Front element, and duplicate the shape. Name it to keep things organized. Select the “Toaster Mask” and “Relefection” groups, right click, and then hit the Create Mask button to turn it into a mask.
Use the Position animator to completely hide the “Reflection” element from view. Move the playhead all the way to the end of the animation, and drag the “Reflection” element to the right across the mask, until it goes out of the view again.
Step 7 - Create a seamless Looping effect
In order to have a seamless looping effect, you might want to have the loader vanish at the end of the animation.
Select both the checkmark and the circle and create a group with them. Use the Opacity and Scale animators to achieve the desired results.

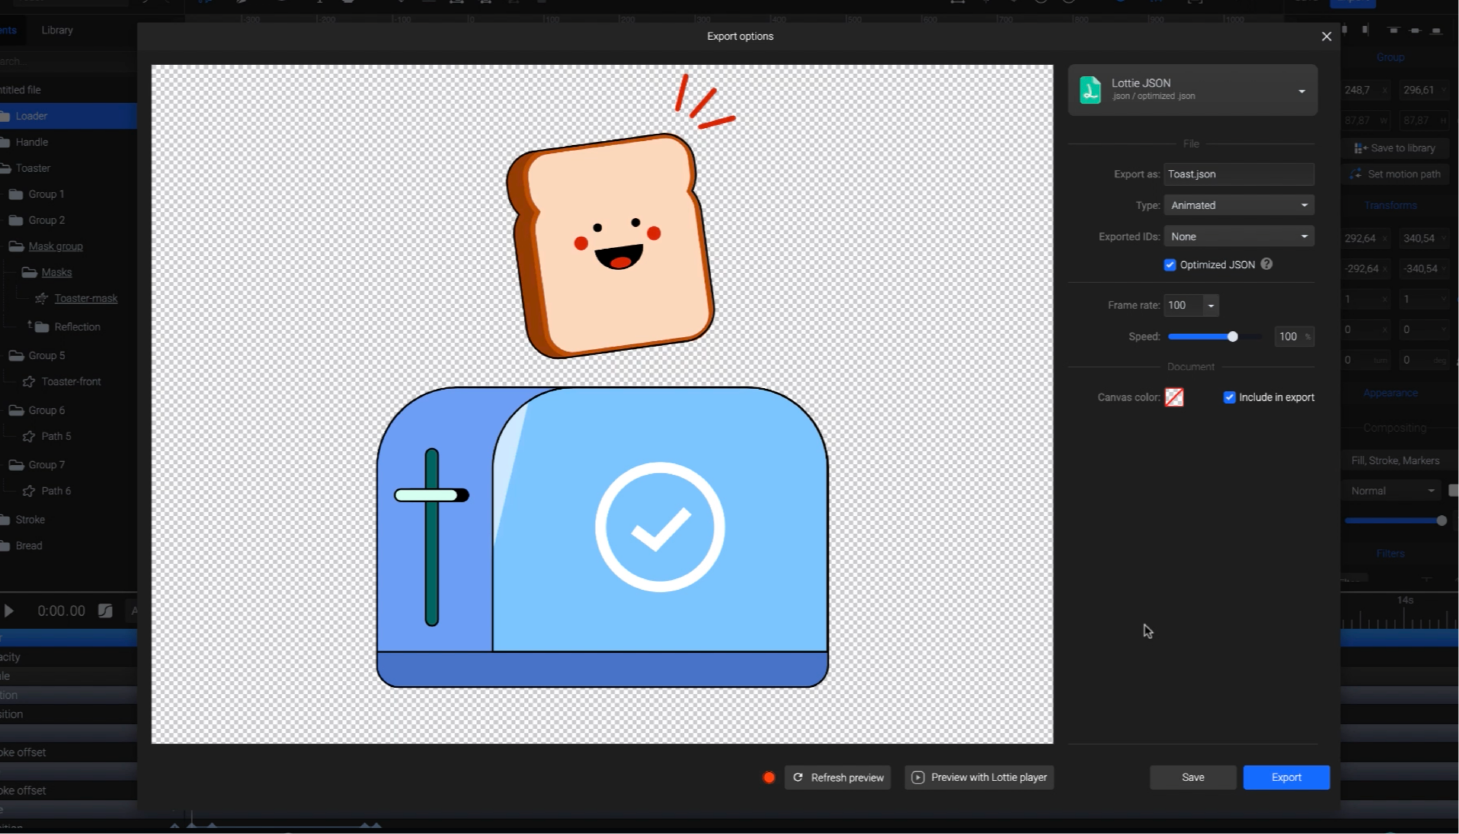
Step 8 - Export the Lottie animation
All that's left is to export your Lottie animation. At the export panel you can choose settings such as frames per second, then hit the Export button to get your final Lottie animation.
We hope that this short tutorial will help you to create Lottie animations. If you have any questions feel free to reach out to us at contact@svgator.com.
Don’t forget to share your work with us on social media: Facebook, X (Twitter), and Instagram. We’d love to hear from you!
Want to learn more about the Lottie format? Check out the related articles from below:
Learn about the Lottie file format!