Learn how to create your own animated handwriting text. Download a free SVG example and follow along with the step-by-step guide. An impressive no-code technique that you can master right now!
Animated handwriting text has the same striking visual impact in the virtual space as calligraphy has when executed by someone with years of calligraphic practice under their belt. Luckily, creating a handwriting animation from scratch is far easier to get the hang of, thanks to no-code SVG animation tools like SVGator.
The handwriting effect has had trend-setting surges in popularity over the years, and it has also sometimes been put on the backburner by a shift toward other types of kinetic typography. Nevertheless, the enchanting nature of animated handwriting and its ability to draw attention have never dwindled.
Learning the ropes behind SVG handwriting will add an extremely versatile animation technique to your skillset. Follow along with our guide and you’ll be able to put any calligraphy font in motion!
You will learn the following:
- How to easily trace text with as few nodes as possible ✅
- How to animate strokes to create the handwriting effect ✅
- A shortcut to animate lots of strokes at the same time
Get your pen ready 🖋️
To begin with, create your own path-based text from scratch in SVGator, or download our free example .svg from below.
As a background, we used a cropped version of this photo from Unsplash. You can download it, or choose any other backdrop for your project – the workflow will be pretty much the same either way.

Learning how to make handwriting animation work for any font is a breeze once you nail down this technique. Creating a handwriting animation is an easy 3-step process:
- Typing out a text / Importing your text
- Tracing over the text with a minimal number of paths
- Setting up keyframes to animate your handwriting SVG
Step 1. Choosing a Font / Importing Your Text
We chose to use “Meow Script” from Google Fonts as a reference for this example. It has the perfect single-line look that we’re after for smooth SVG handwriting. You can also import your own text, or custom signature, to trace over. Just keep in mind: the more uniform the thickness of the letters, the better!
Other handwriting Google Fonts that work great with this effect are Cookie, Dancing Script, or Norican. The single-line style allows us to connect more of the letters in a single, longer, more fluid stroke when tracing over the text.
Tip: After typing out your text, you can center the Origin point by pressing Ctrl/Cmd+Shift+O.
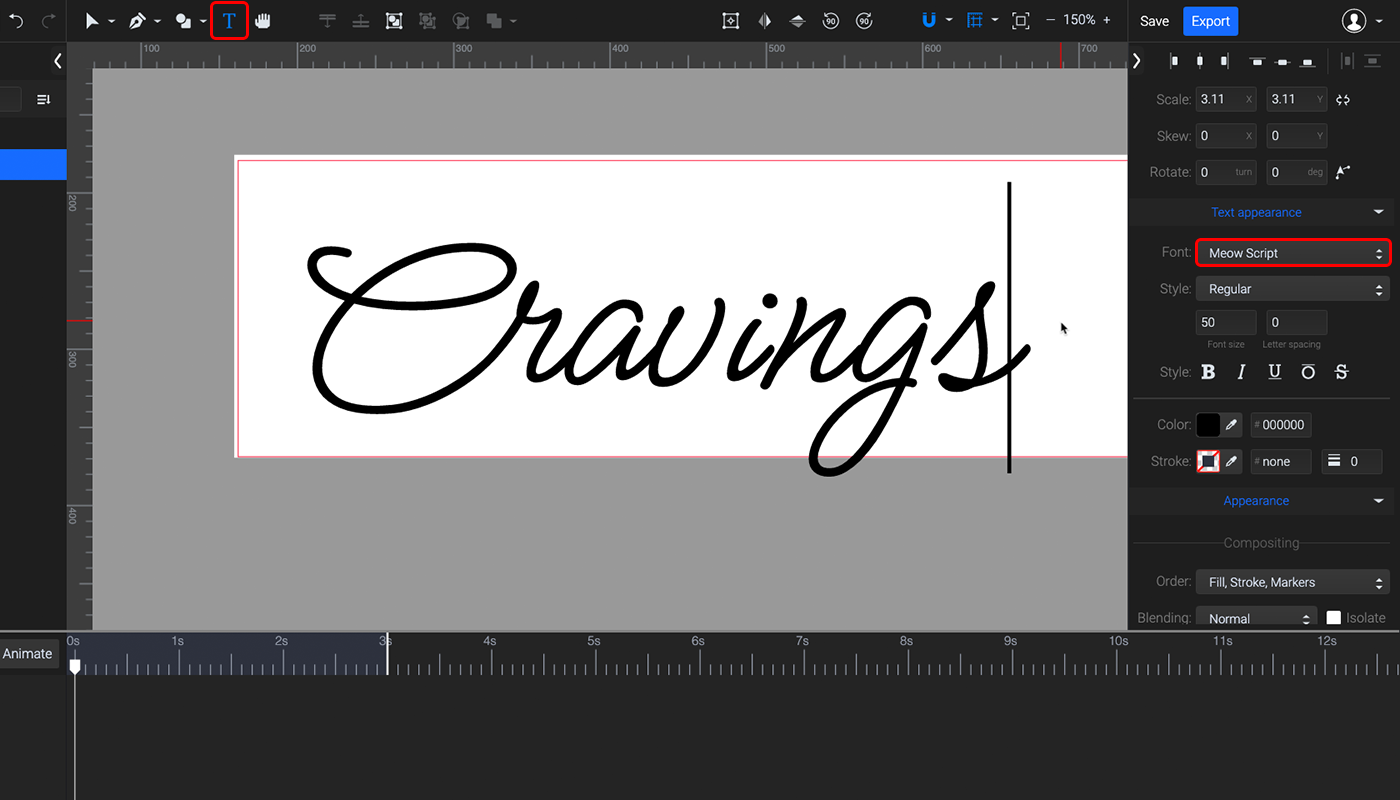
Click on Canvas and set the background to a dark color, as the final handwriting text will be white.

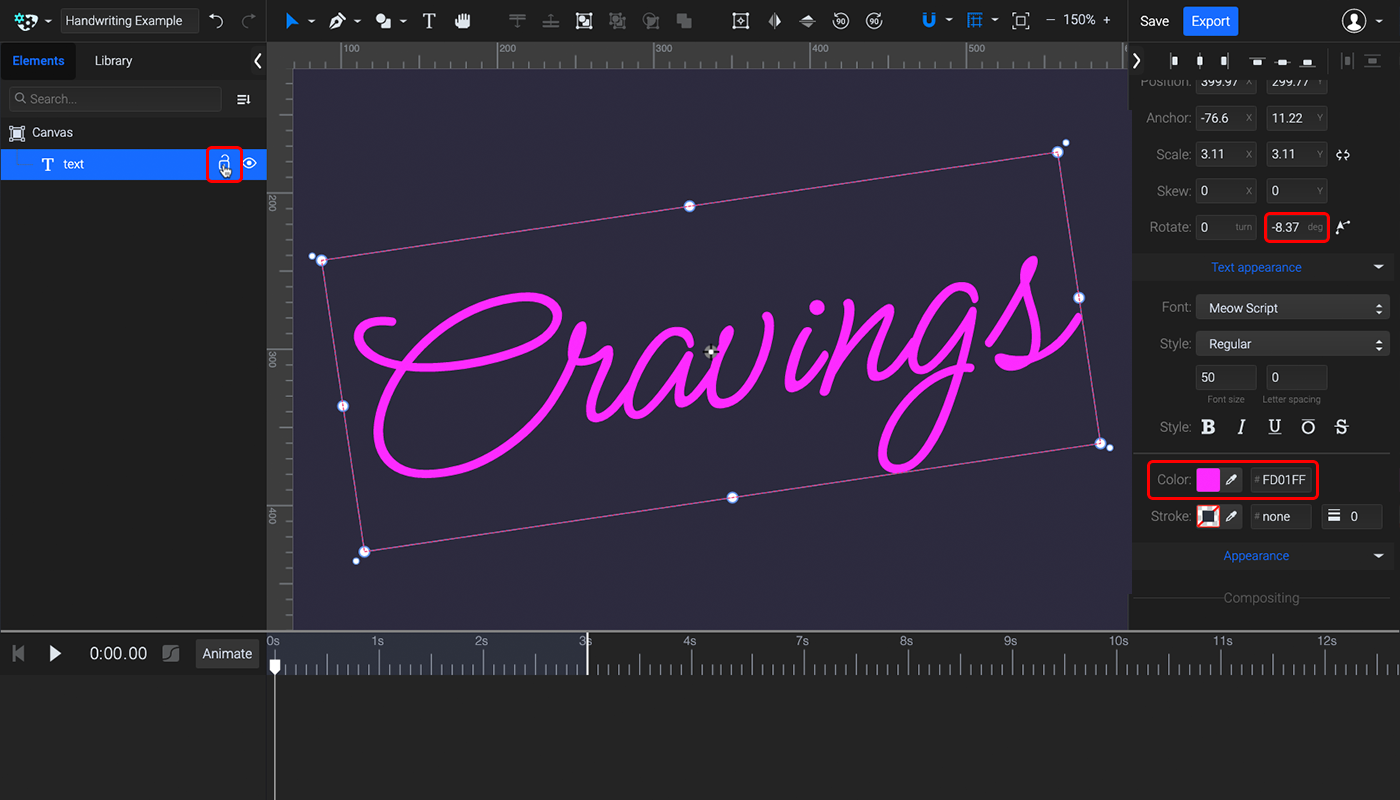
Tip: It helps to change the reference text color to something bright, like magenta or cyan. This will make it easier for you to see it clearly as you trace over the text.
Rotate the reference text slightly if you’d like, and lock it so you don’t accidentally select or move it.
Step 2. Trace Over the Text
Use the Pen tool to draw paths that match the script. A great trick when tracing letters is to keep the node handles perfectly vertical or horizontal. A few of the nodes will have to be diagonal, but try to use as few of them as possible.
While dragging the handles of new nodes, you can use the following modifier keys to make drawing easier:
- Shift + drag to constrain handles to 45 degree increments
- Ctrl/Cmd + drag to move and reposition the current node on the canvas
- Alt + drag to drag one of the handles while the other stays frozen
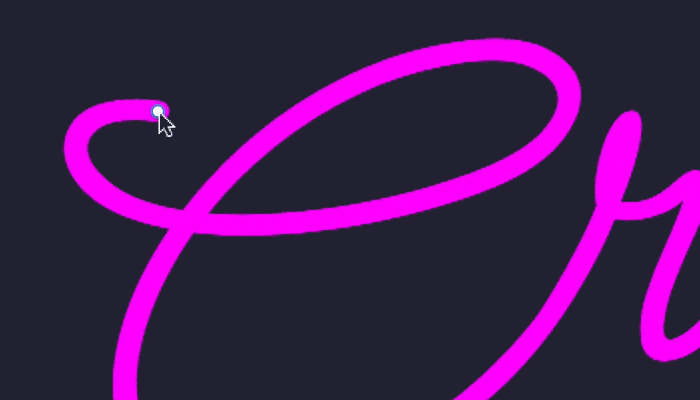
Trace over all the letters or letter groups. The handwriting effect looks better if all the letters are joined together, so feel free to get creative while drawing. You don’t have to follow the reference text perfectly. The fewer strokes you end up with, the easier it will be to animate.
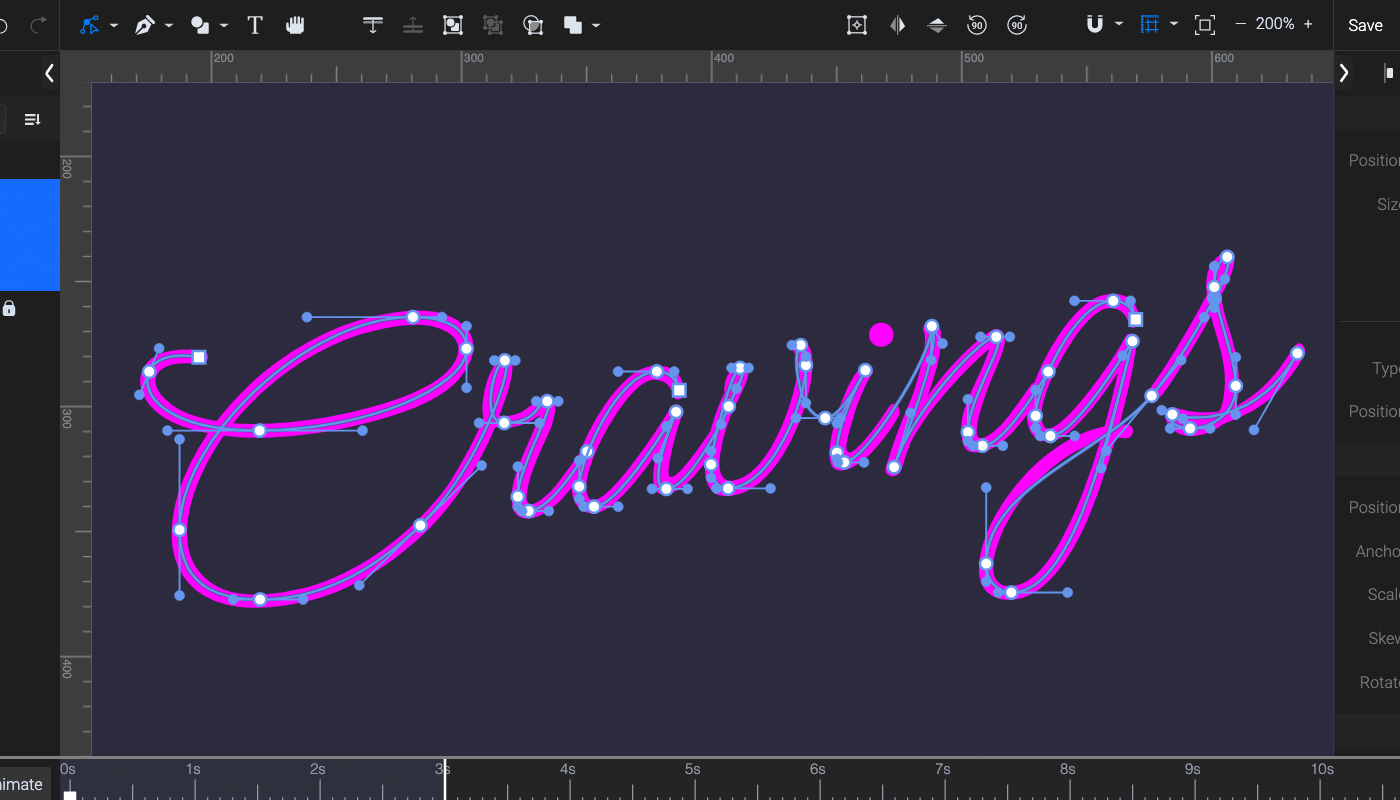
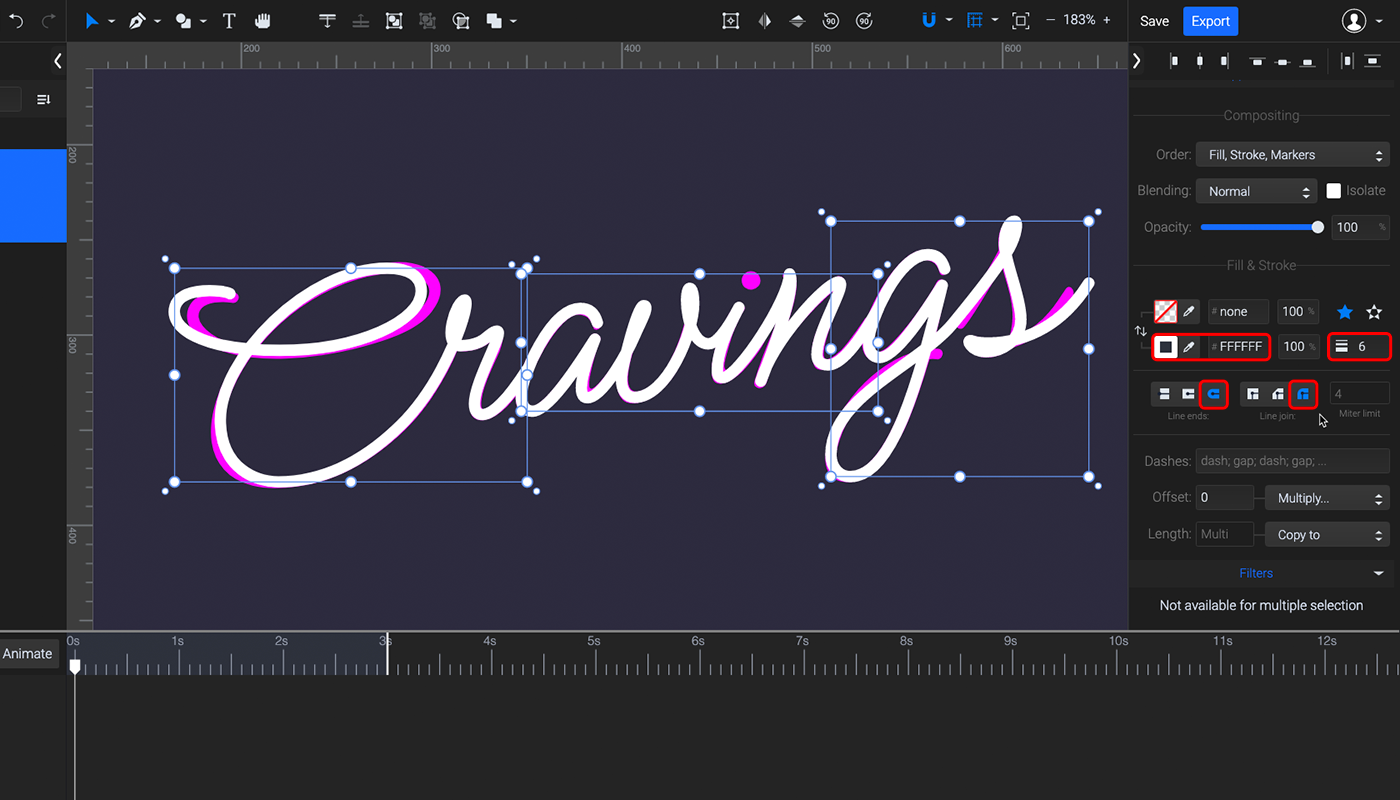
Select all your strokes, change the stroke color to white, and set the stroke width to match the thickness of the script. Next, set the Line ends and Line join to Round.
Add some final tweaks if needed. As you can see, our handwriting SVG is made of three paths at this point, which look fully connected. We changed the first and last letters slightly.
For the dot on the “i” draw a simple circle. Add a curved underline beneath the word if you want.
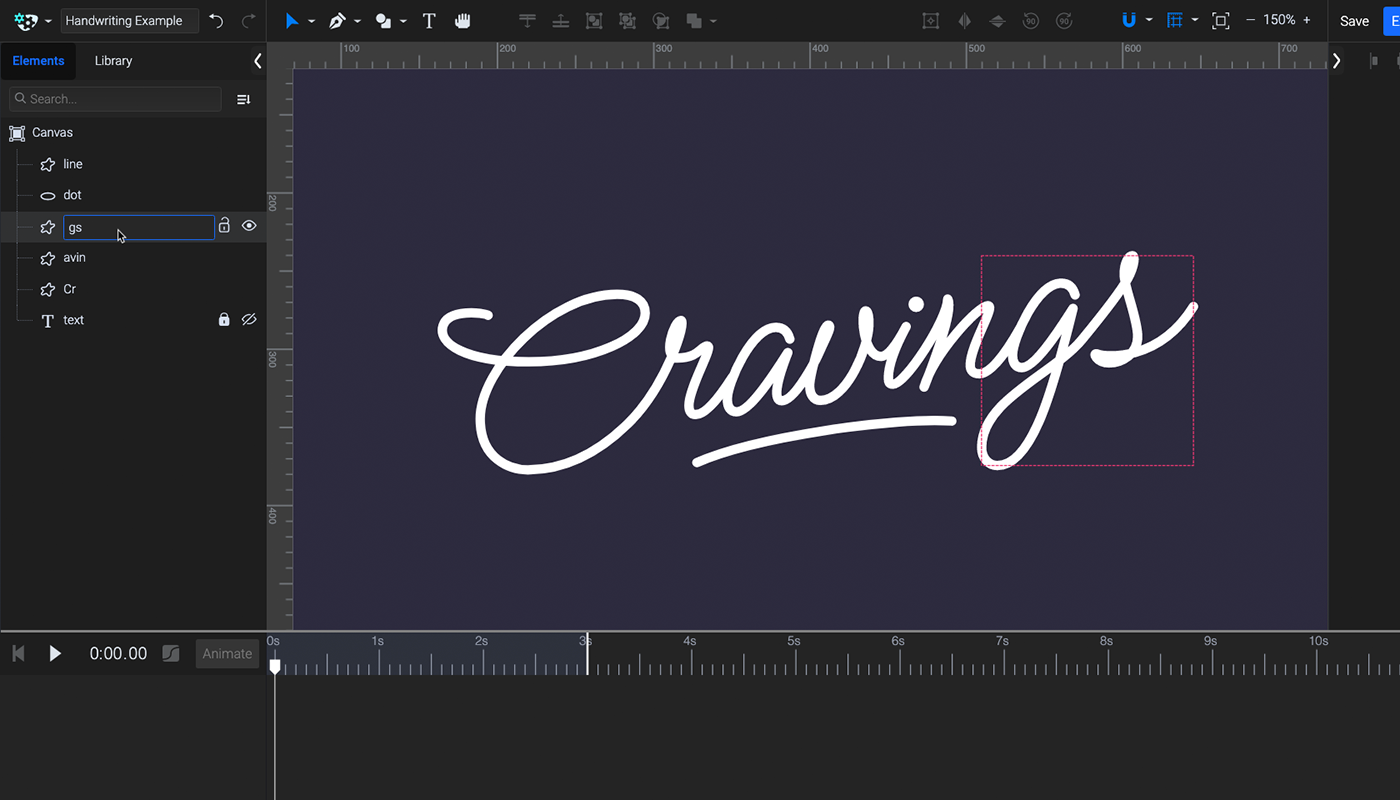
You can double-click the elements in the Elements list to rename them.
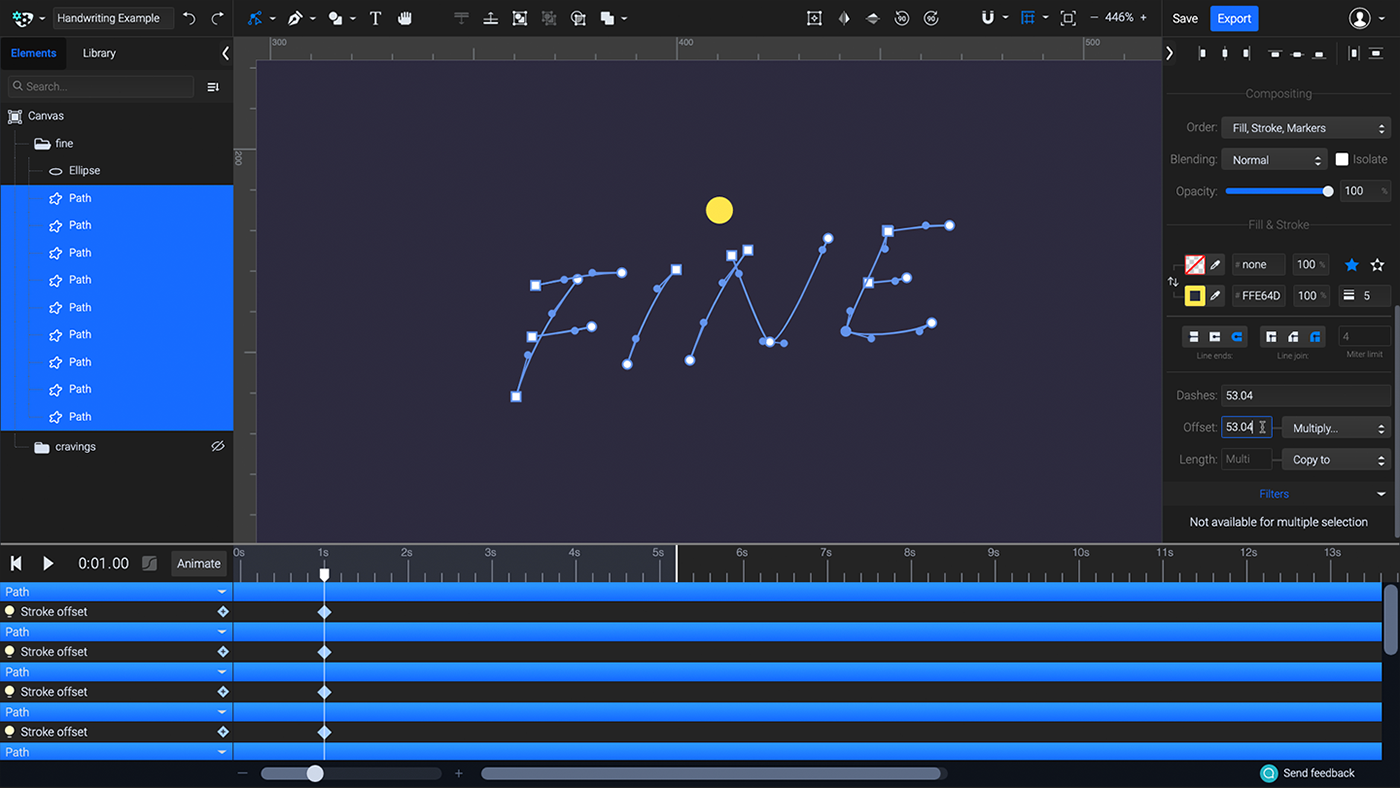
This is what we’re left with after hiding the reference text layer.
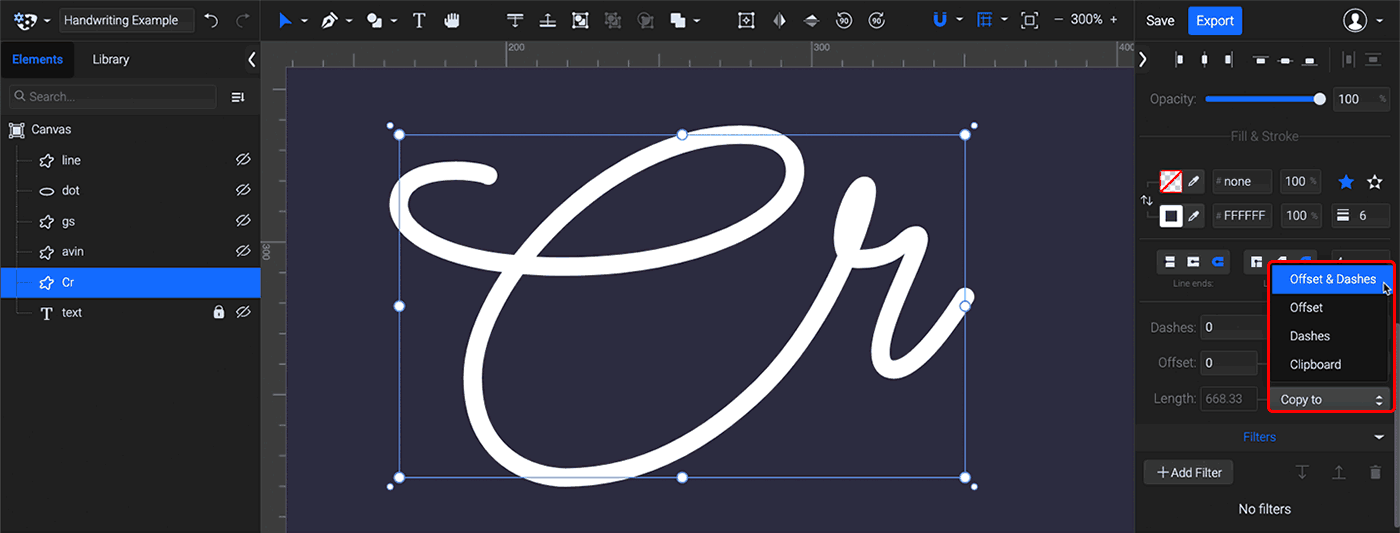
Step 3. Animate the Strokes
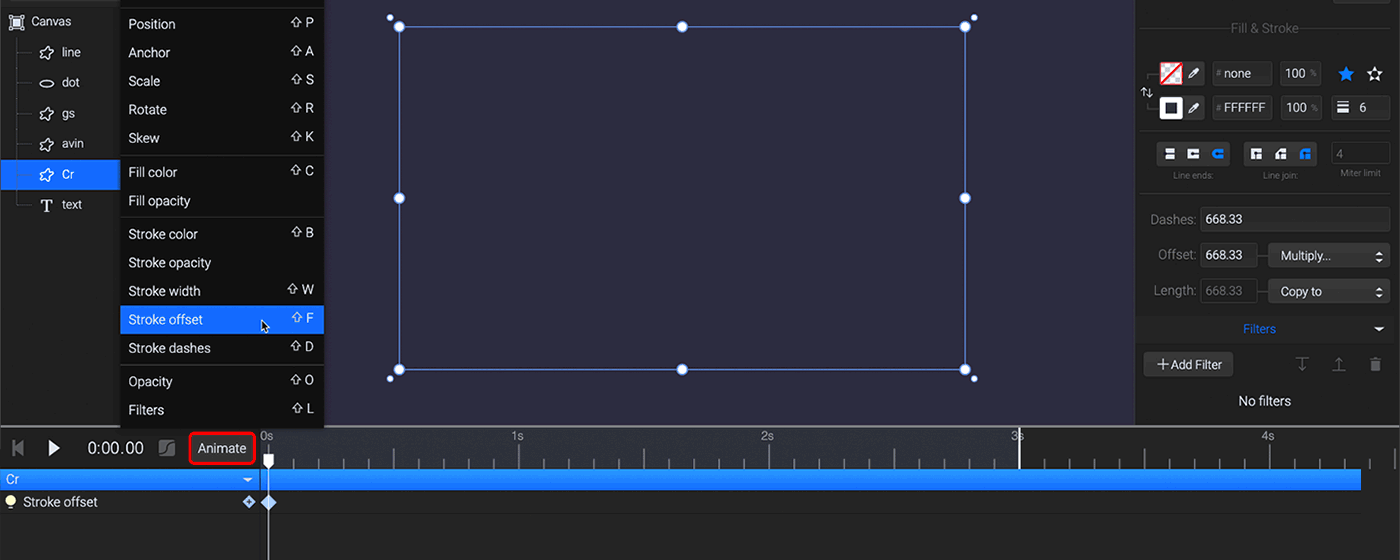
With the first segment selected, copy the path Length value to Dashes and Offset as shown below. If you have a single value in the Dashes field, the same value will get set as a gap automatically.
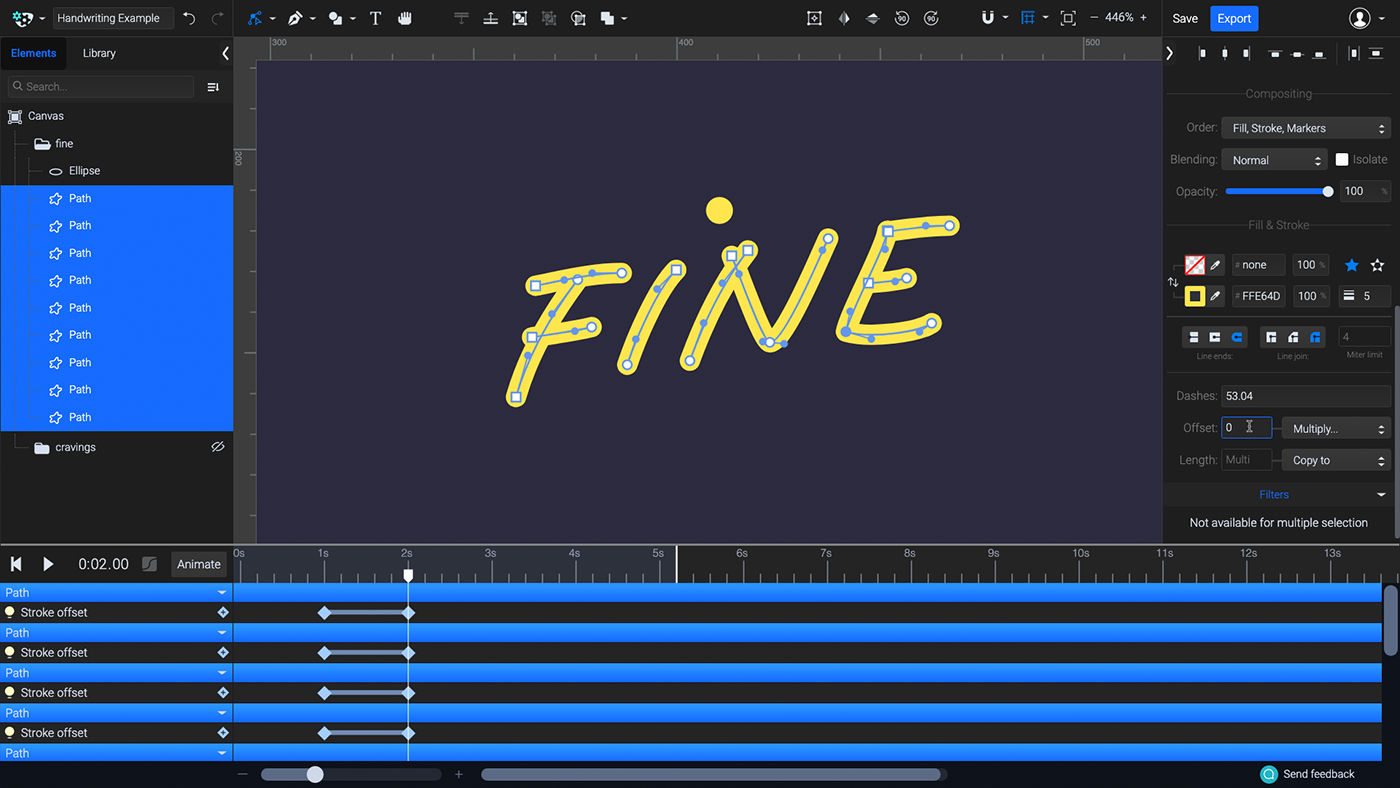
The stroke will look like it is disappearing, but we can reveal it by adding a Stroke offset animator.
Note: Sometimes decimals get rounded down, and a dot may be visible at the end of your stroke. There is an easy fix for this! Add an extra Opacity animator to your strokes, or try tweaking the values slightly to make sure that the gap value is equal to or slightly longer than the path Length.
Add a Stroke offset animator. Move the playhead on the timeline and set the Offset value to 0. A keyframe will be added to the timeline automatically, and the path should now animate in the direction you drew them in. If the handwriting animation is going in the opposite direction, all you have to do is swap the two keyframes.

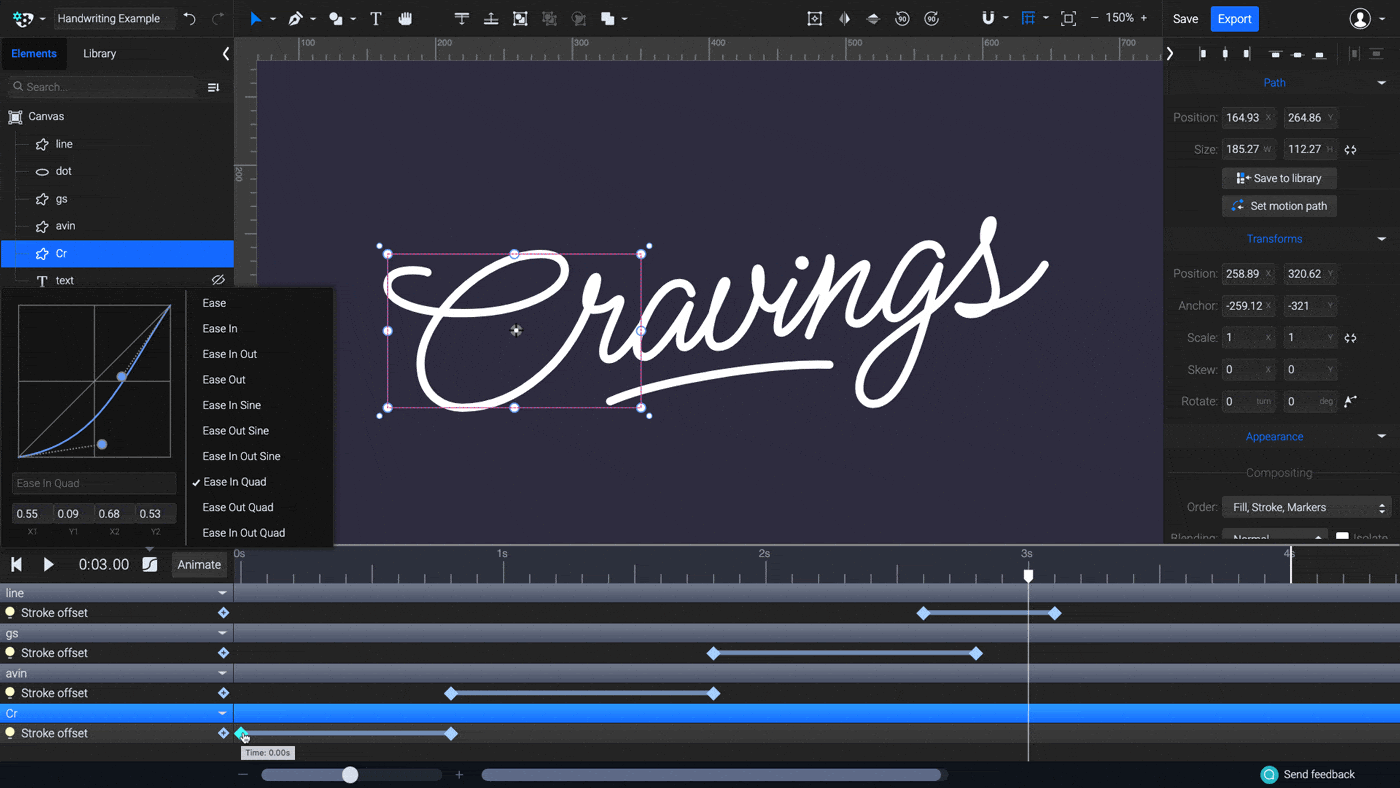
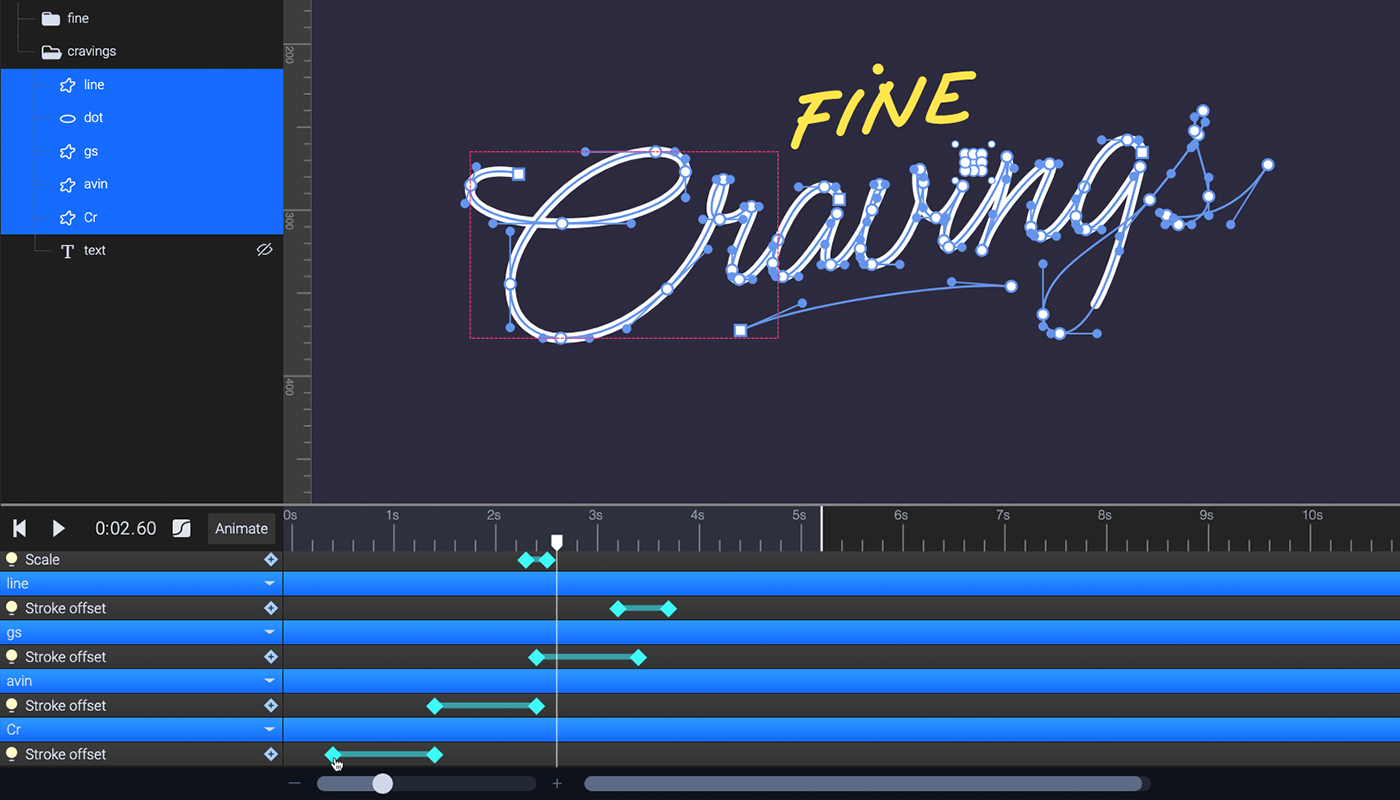
Now, repeat the steps for all the other paths. Keep an eye on the path Length values to see if there is a significant difference between path lengths. Longer paths should take longer to animate compared to shorter ones.
This is how the timeline looks once all the paths are animated. If you need to make the timeline longer, just drag the white duration mark from the default 3 second mark to where you’d like it to be.
To make the handwriting effect look a lot more natural, have your animation start with Ease in and end with Ease Out. Play around with the easing settings and choose whichever works best, or try adding your own custom easing.
We used Ease In Quad for the first path, Ease Out Quad for the last segment, and custom easing for the underline to really accentuate the slow ending.
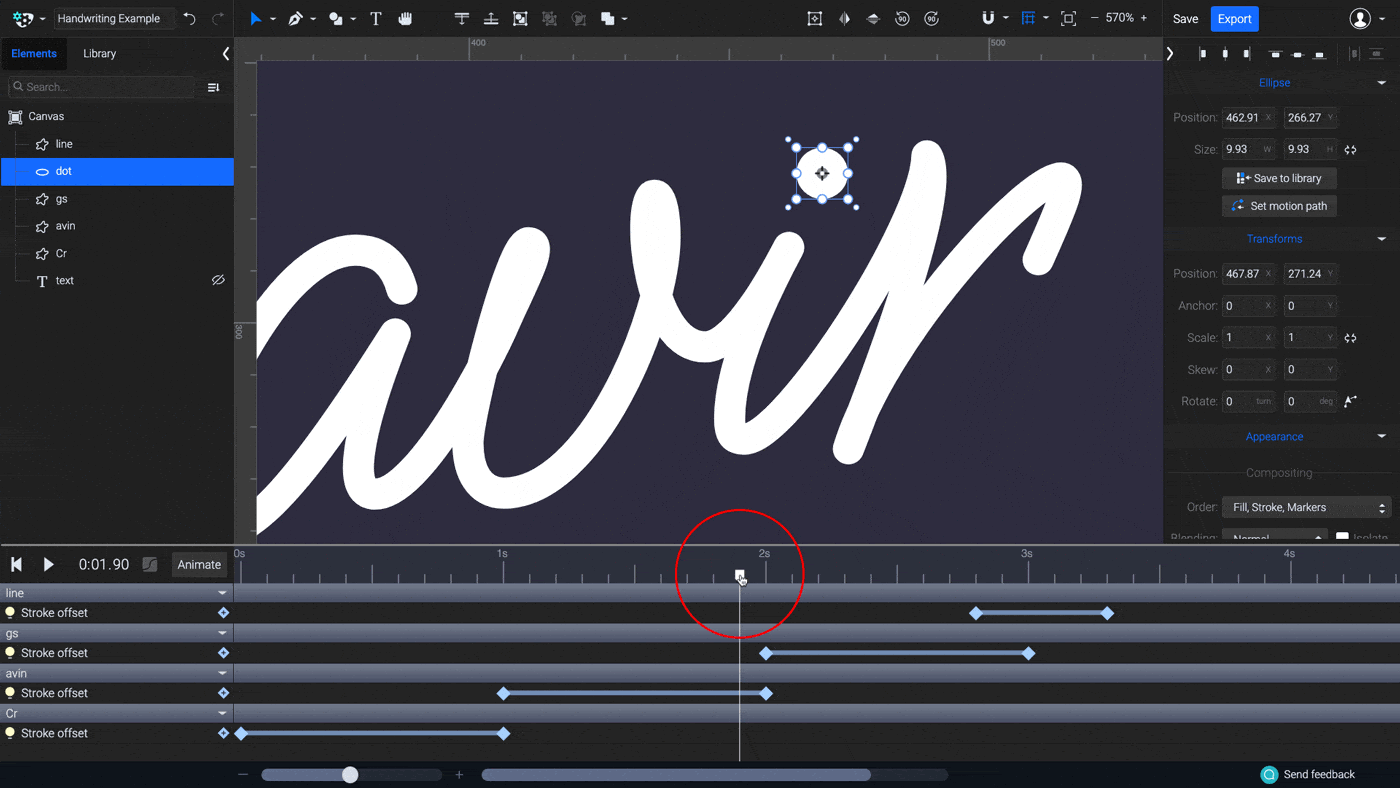
To animate the dot on the “i”, select it, move the playhead on the timeline to roughly the timing when the “i” is supposed to be drawn, and click on Animate>Scale. As the dot (circle) is already in place, you can just move the now-created keyframe a little to the right, and set the scale to 0 in the Transforms panel on the right.
Tip: Set the easing to Ease Out Back to give it a bouncy look.
The handwriting animation is complete at this stage. All that’s left to do is add some finishing touches – a bit of personal flair, if you will!
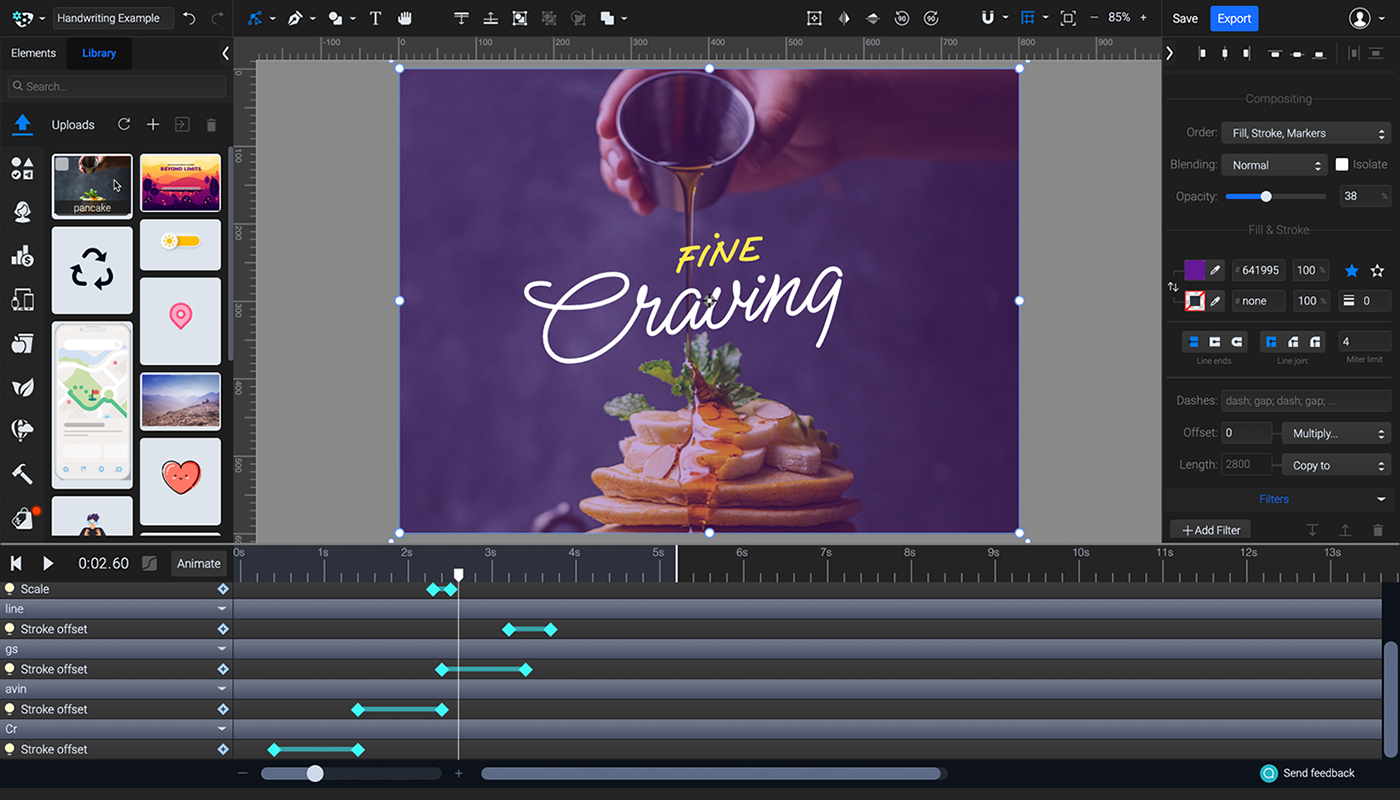
You can draw the word “FINE” directly, using the Pencil tool. Adjust the nodes to make the text look exactly like you want it to. After changing the stroke color and thickness, group it and animate it (Animate>Scale) scaling up. Set the easing as Ease Out Back.
This is a great way to combine the self-drawing effect with other animators to bump up the visual hold of your final project. No need to limit yourself to just one type of typography animation effect! This trick also helps you avoid ending up with an animation that is too long for the hasty way in which we tend to consume digital content.
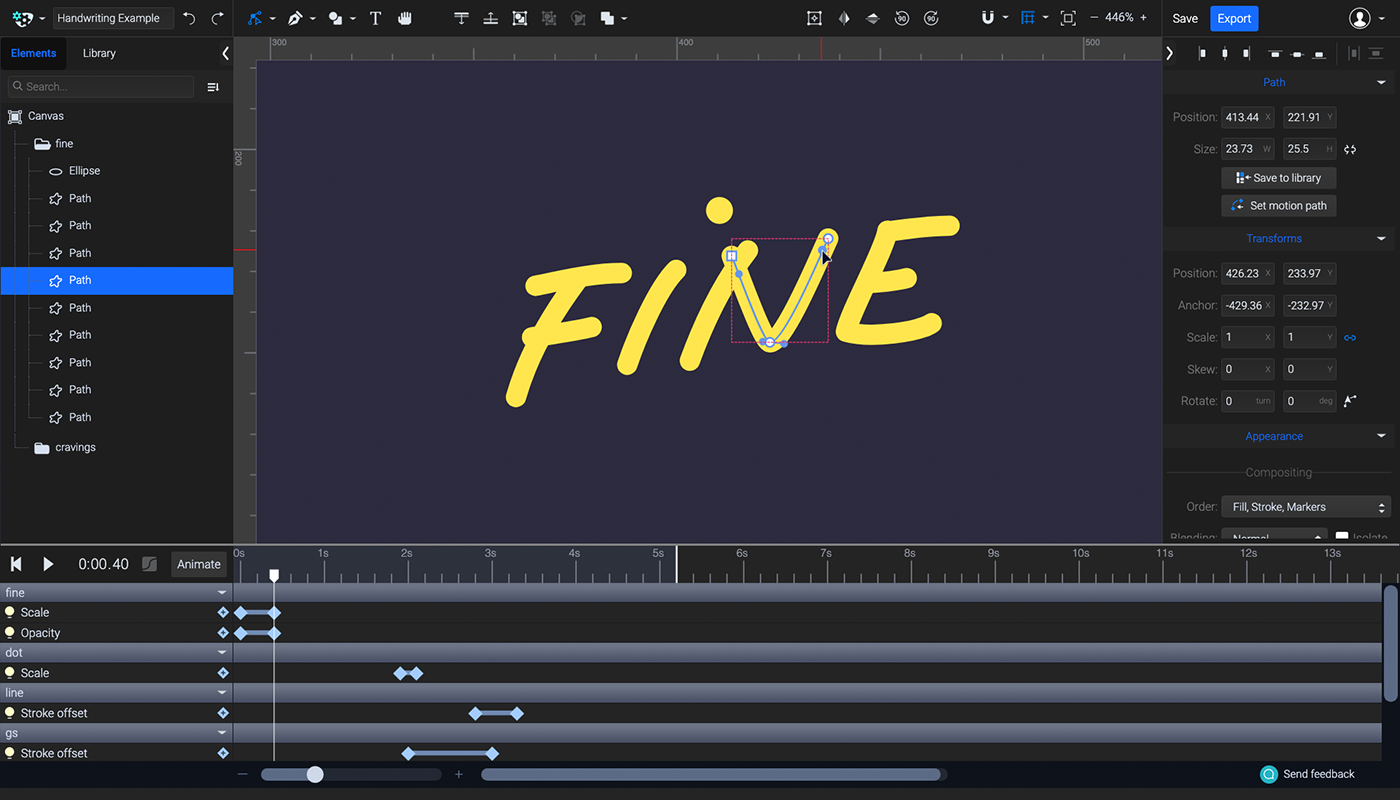
Select the keyframes of the self-drawing paths and move them to the right on the timeline so that they start animating after the word “FINE” has appeared.
You can import your background photo through SVGator’s Library. For extra dazzle, put a purple rectangle over it and set the opacity to 40% for the final look.
Shortcut: How to Animate Several Strokes at the Same Time
There is a “workaround” technique for animating text, which works best for cases when you are not using a cursive script. This shortcut allows you to animate lots of strokes at the same time.
If you have a lot of paths that need to be animated in order to give your text a self-drawing effect, these are the steps you need to take:
- Find the longest path and copy its Length value to the clipboard
- Select all the paths that you want to animate
- Paste the aforementioned Length value to the Dashes and Offset fields, for all the paths
- Click Animate>Offset
- Keyframes will be added to every path
Move the playhead, then, with all the paths still selected, write 0 in the Offset field. This is a very quick way to add a self-drawing effect to a lot of paths at the same time.
Extra perk: the self-drawing pace will be the same for all of the paths!
The paths will start animating at the same time, but you can also easily move the keyframes in the timeline and put them in the exact order that you want the paths to animate. This is the only finicky part of the process, but overall, it’s a great time-saving shortcut for text animation.
Final Thoughts
That’s a wrap! You now know how to animate handwriting SVG text in three easy steps 🎊, and you’ve also learned a nifty workaround to animate several strokes at the same time. You’re ready to set the tone of any message you’re trying to convey in a dazzling way with the help of path animation.
If you’ve followed along with this step-by-step tutorial, come show off your work! We usually hang out on Instagram, Facebook, Twitter and Reddit, and are always down to chat or show #MadeWithSVGator projects some love.