Getting Started With The SVGator Figma Plugin
We've developed a Figma plugin specifically for SVGator users who work extensively in Figma and need to quickly add their animations to Figma projects. This free plugin works with any SVGator account, whether you're on a free or paid plan.
Install the plugin in Figma
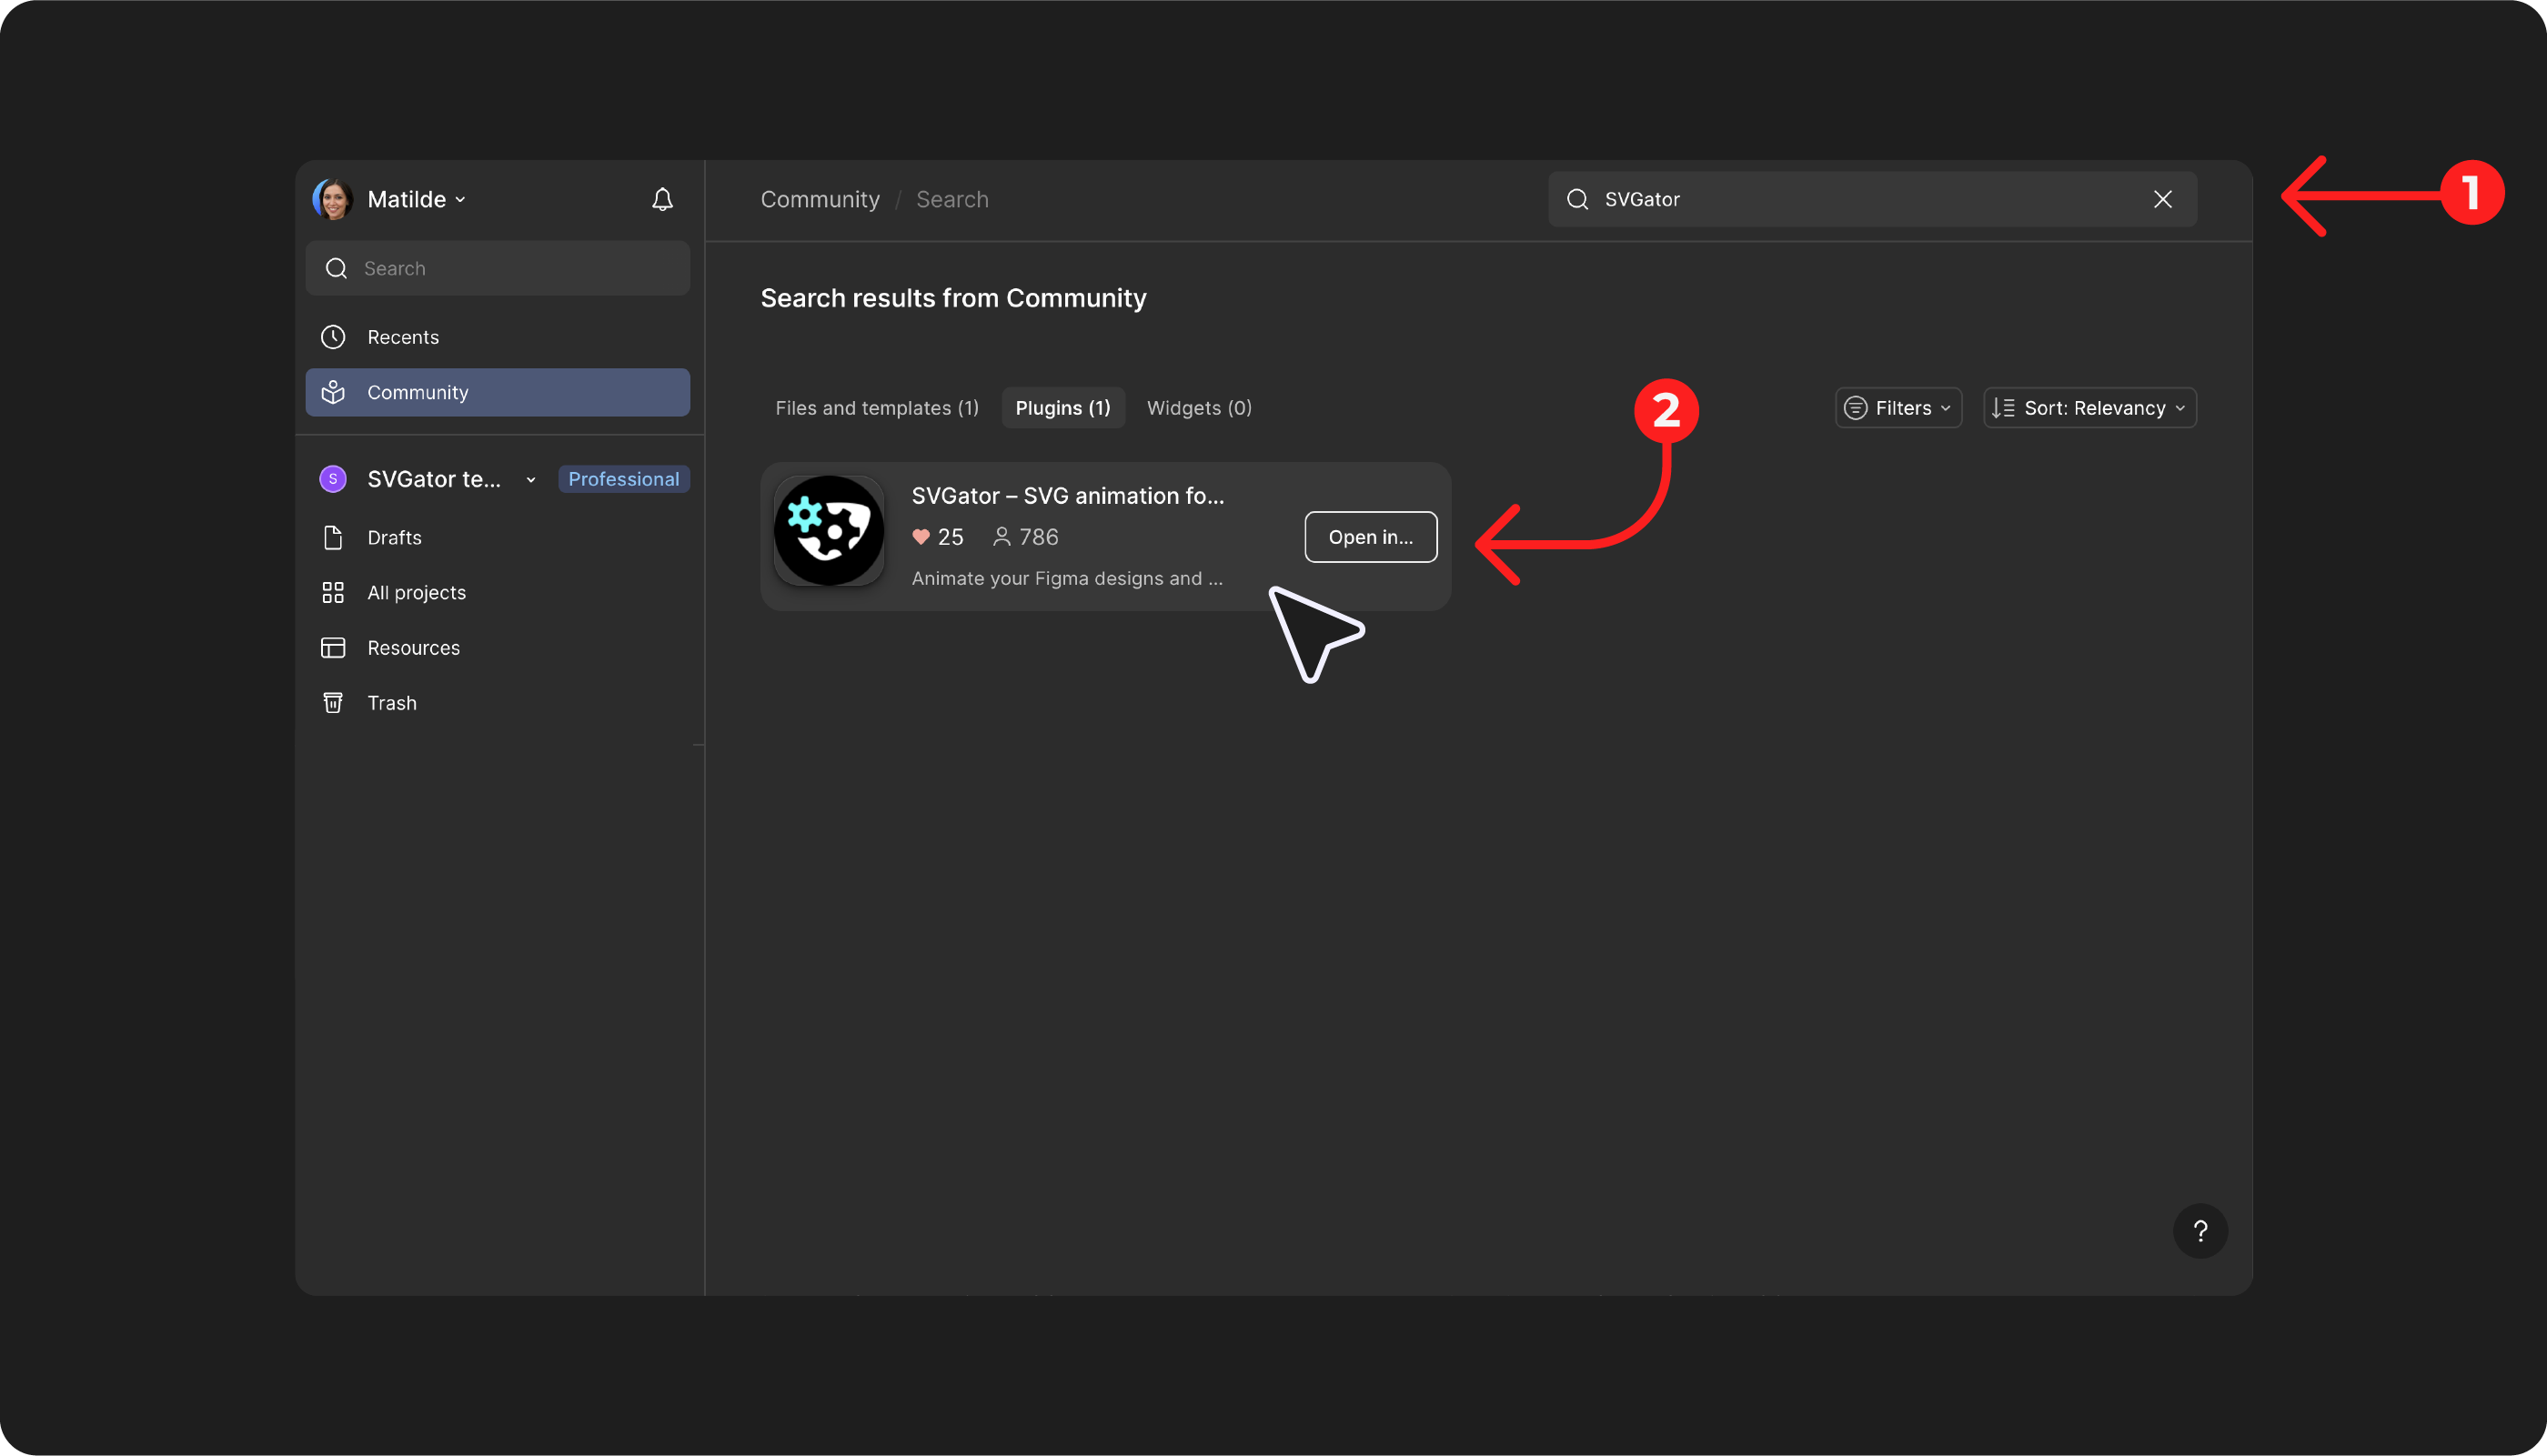
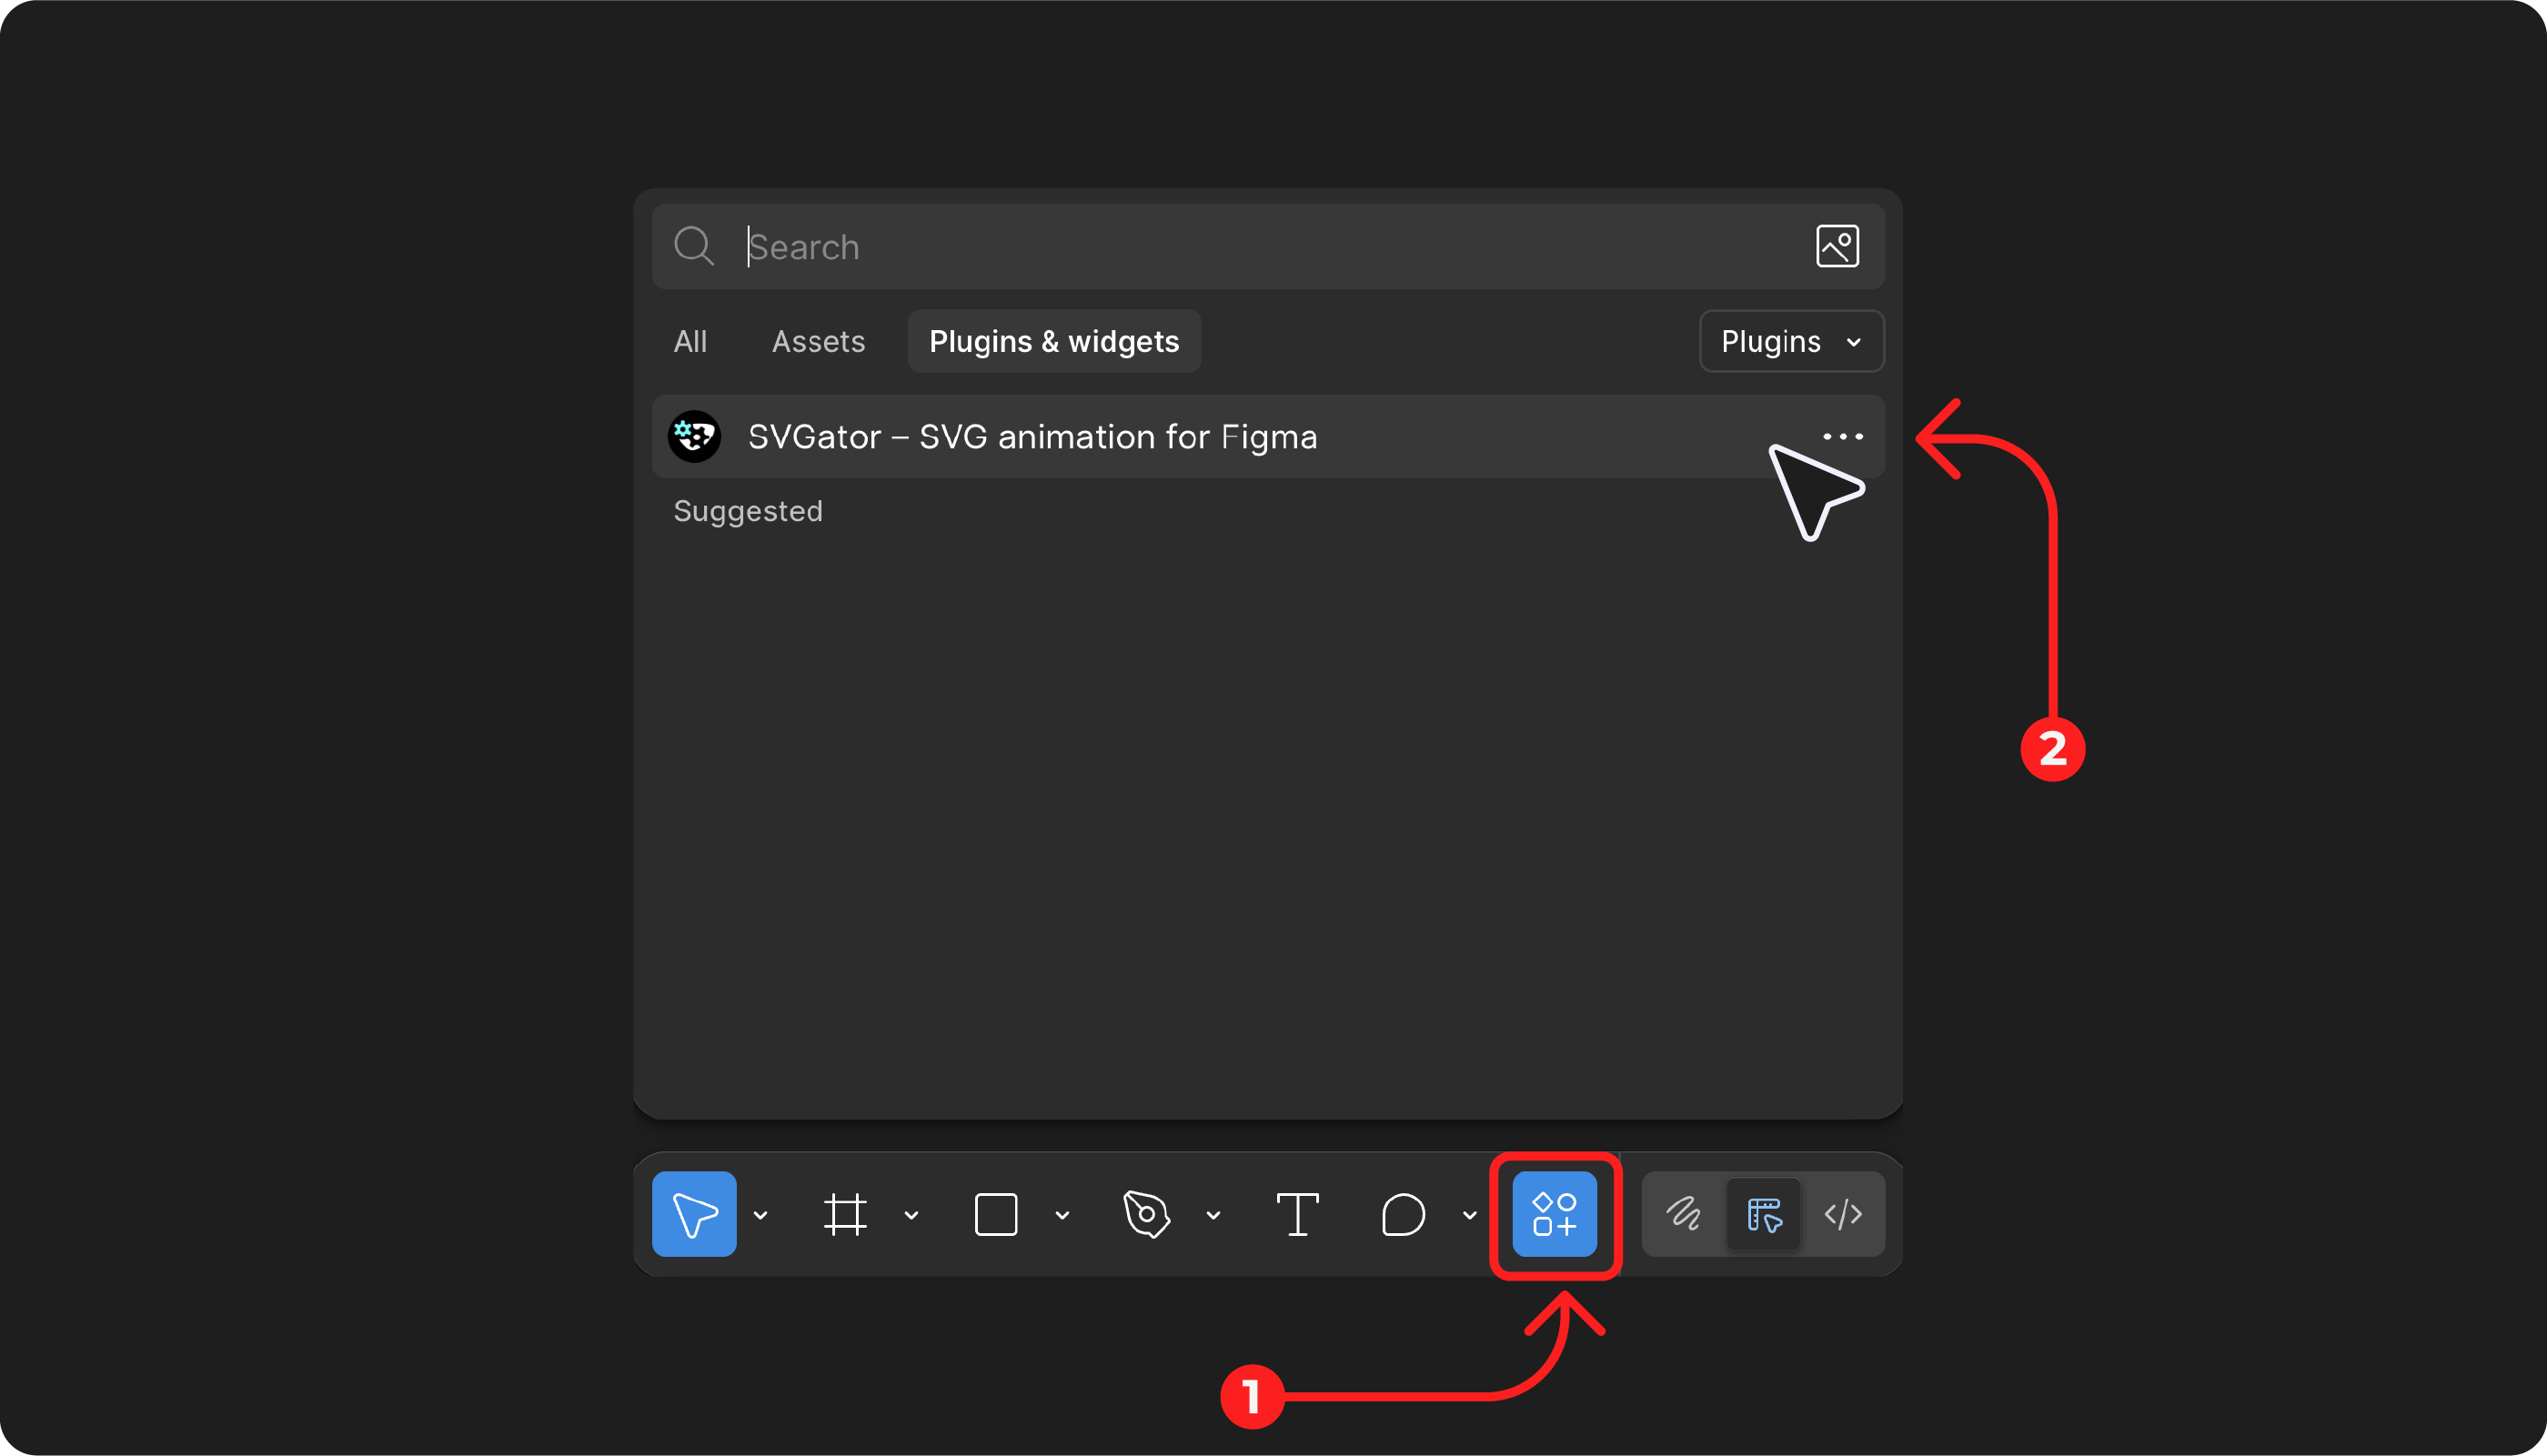
To install the SVGator plugin in your Figma account, navigate to Community → Plugins + Widgets → See more plugins, then enter “SVGator” in the search bar.
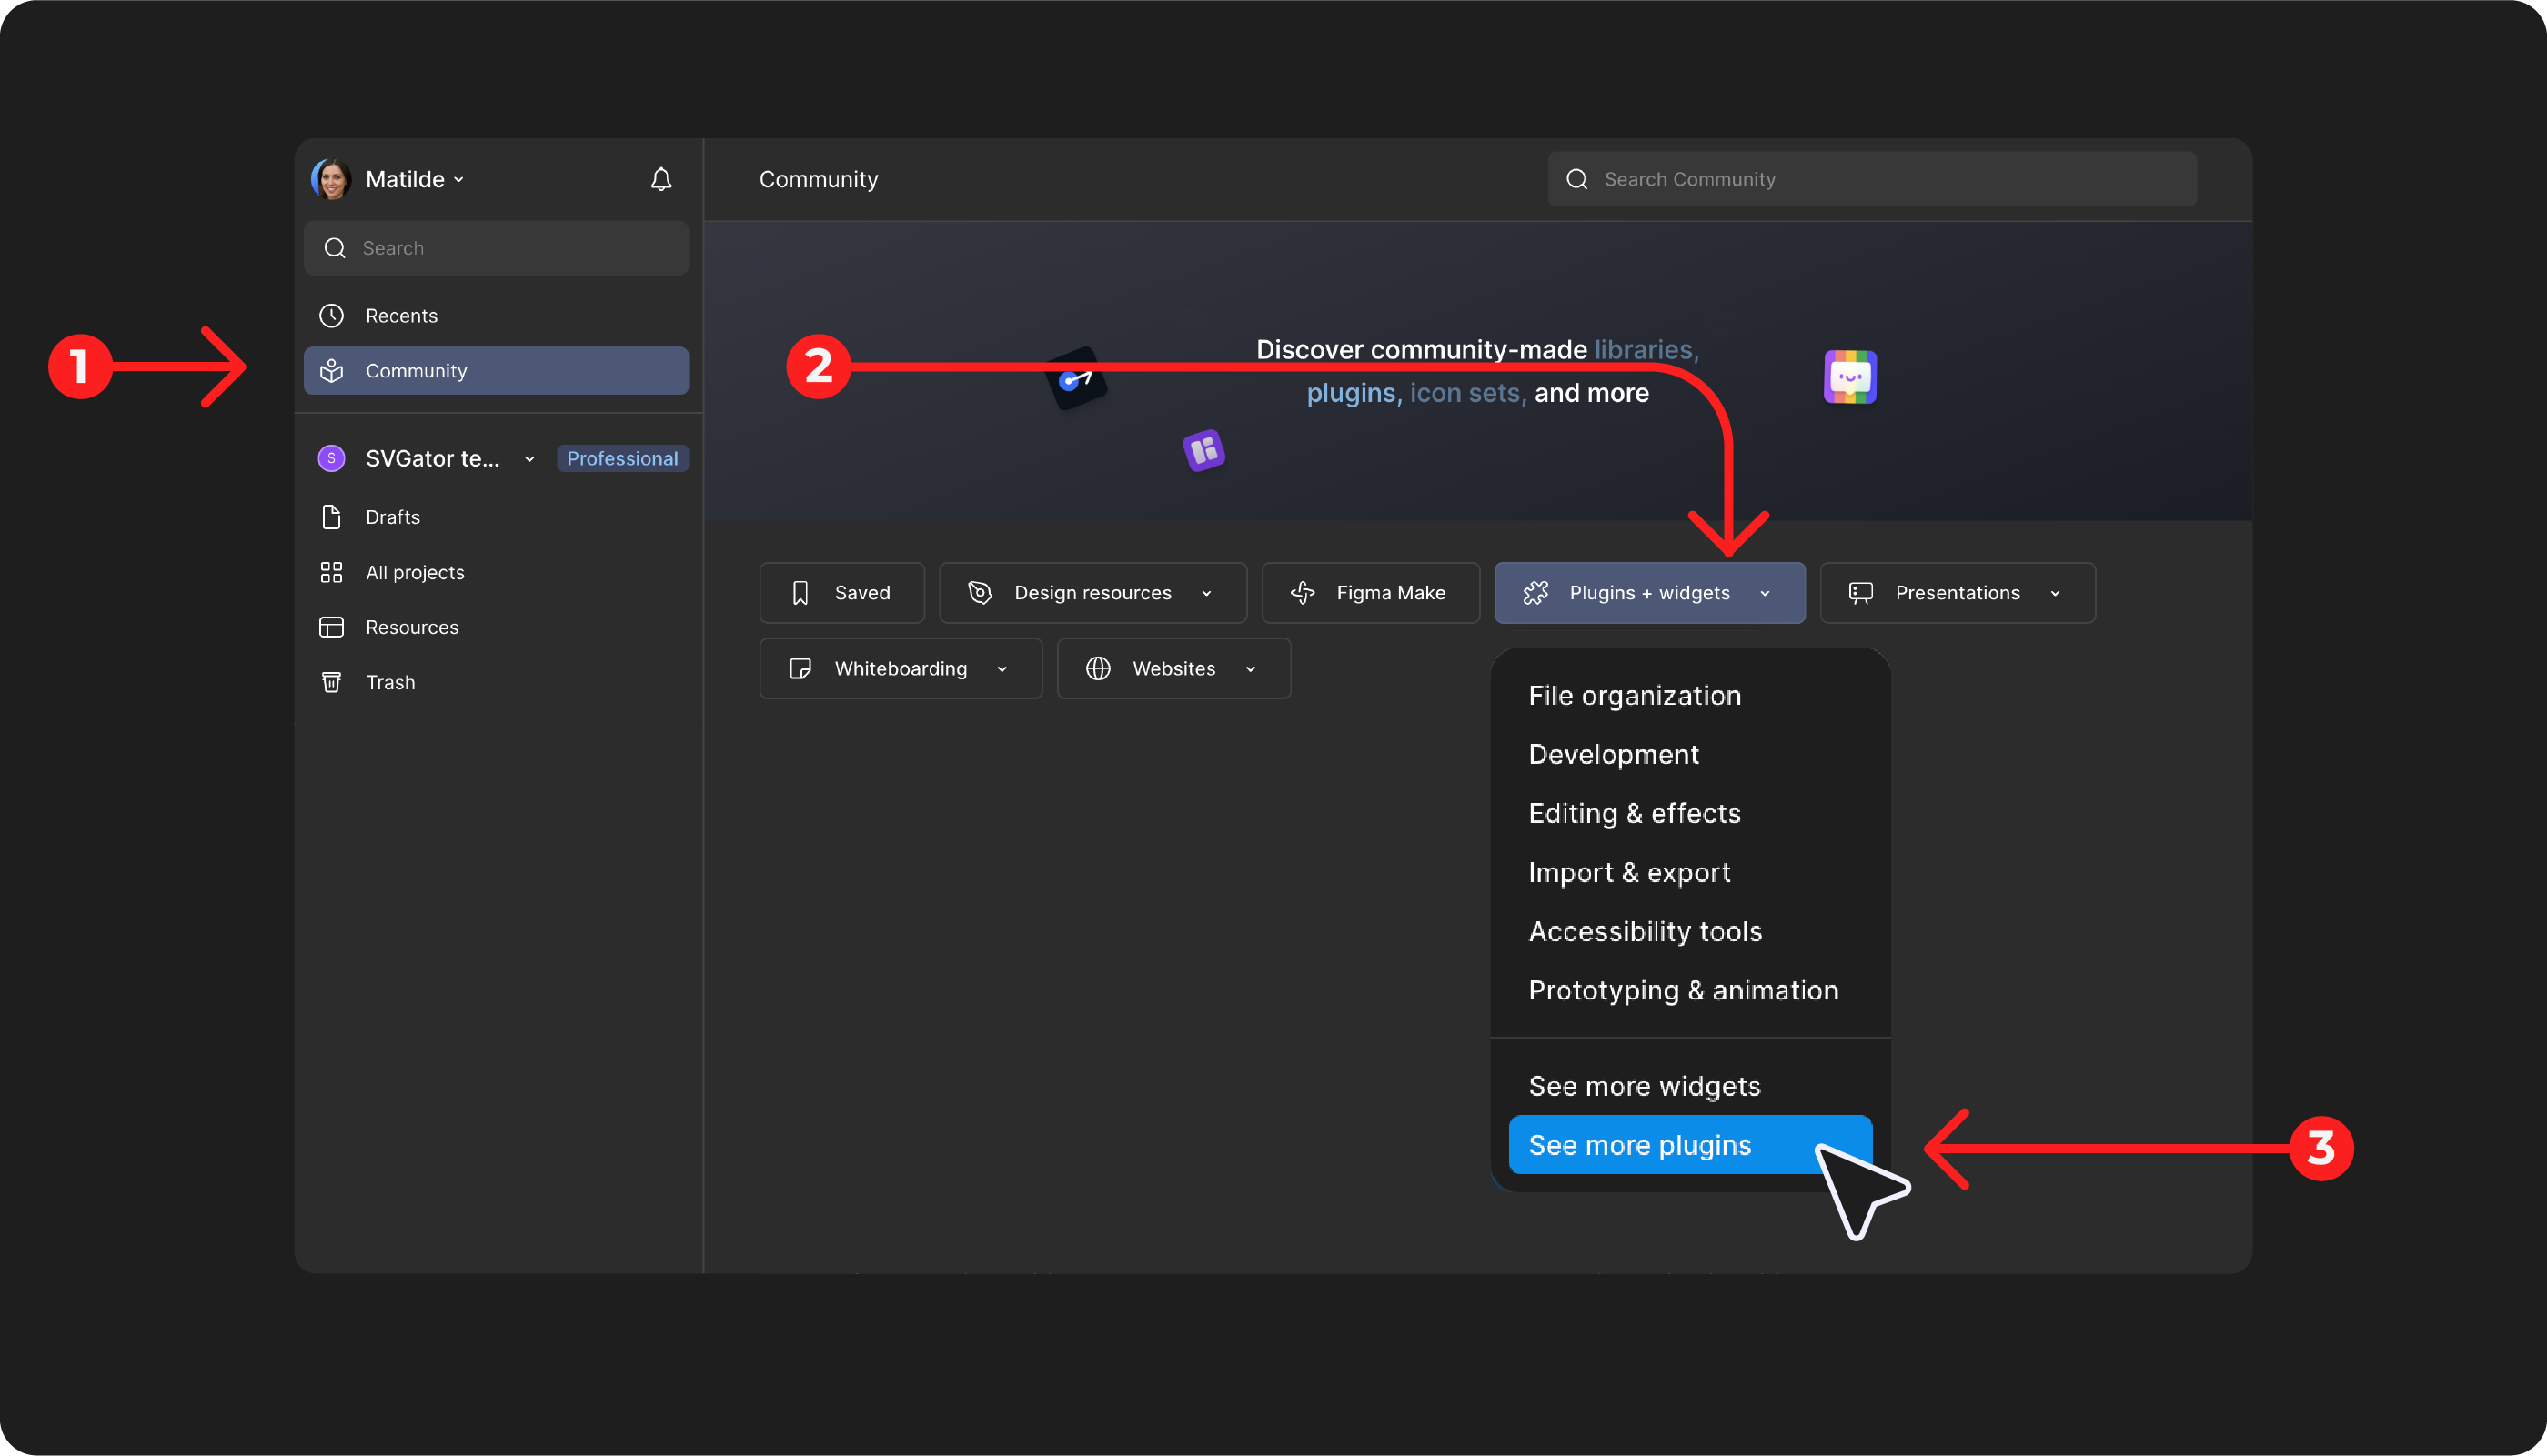
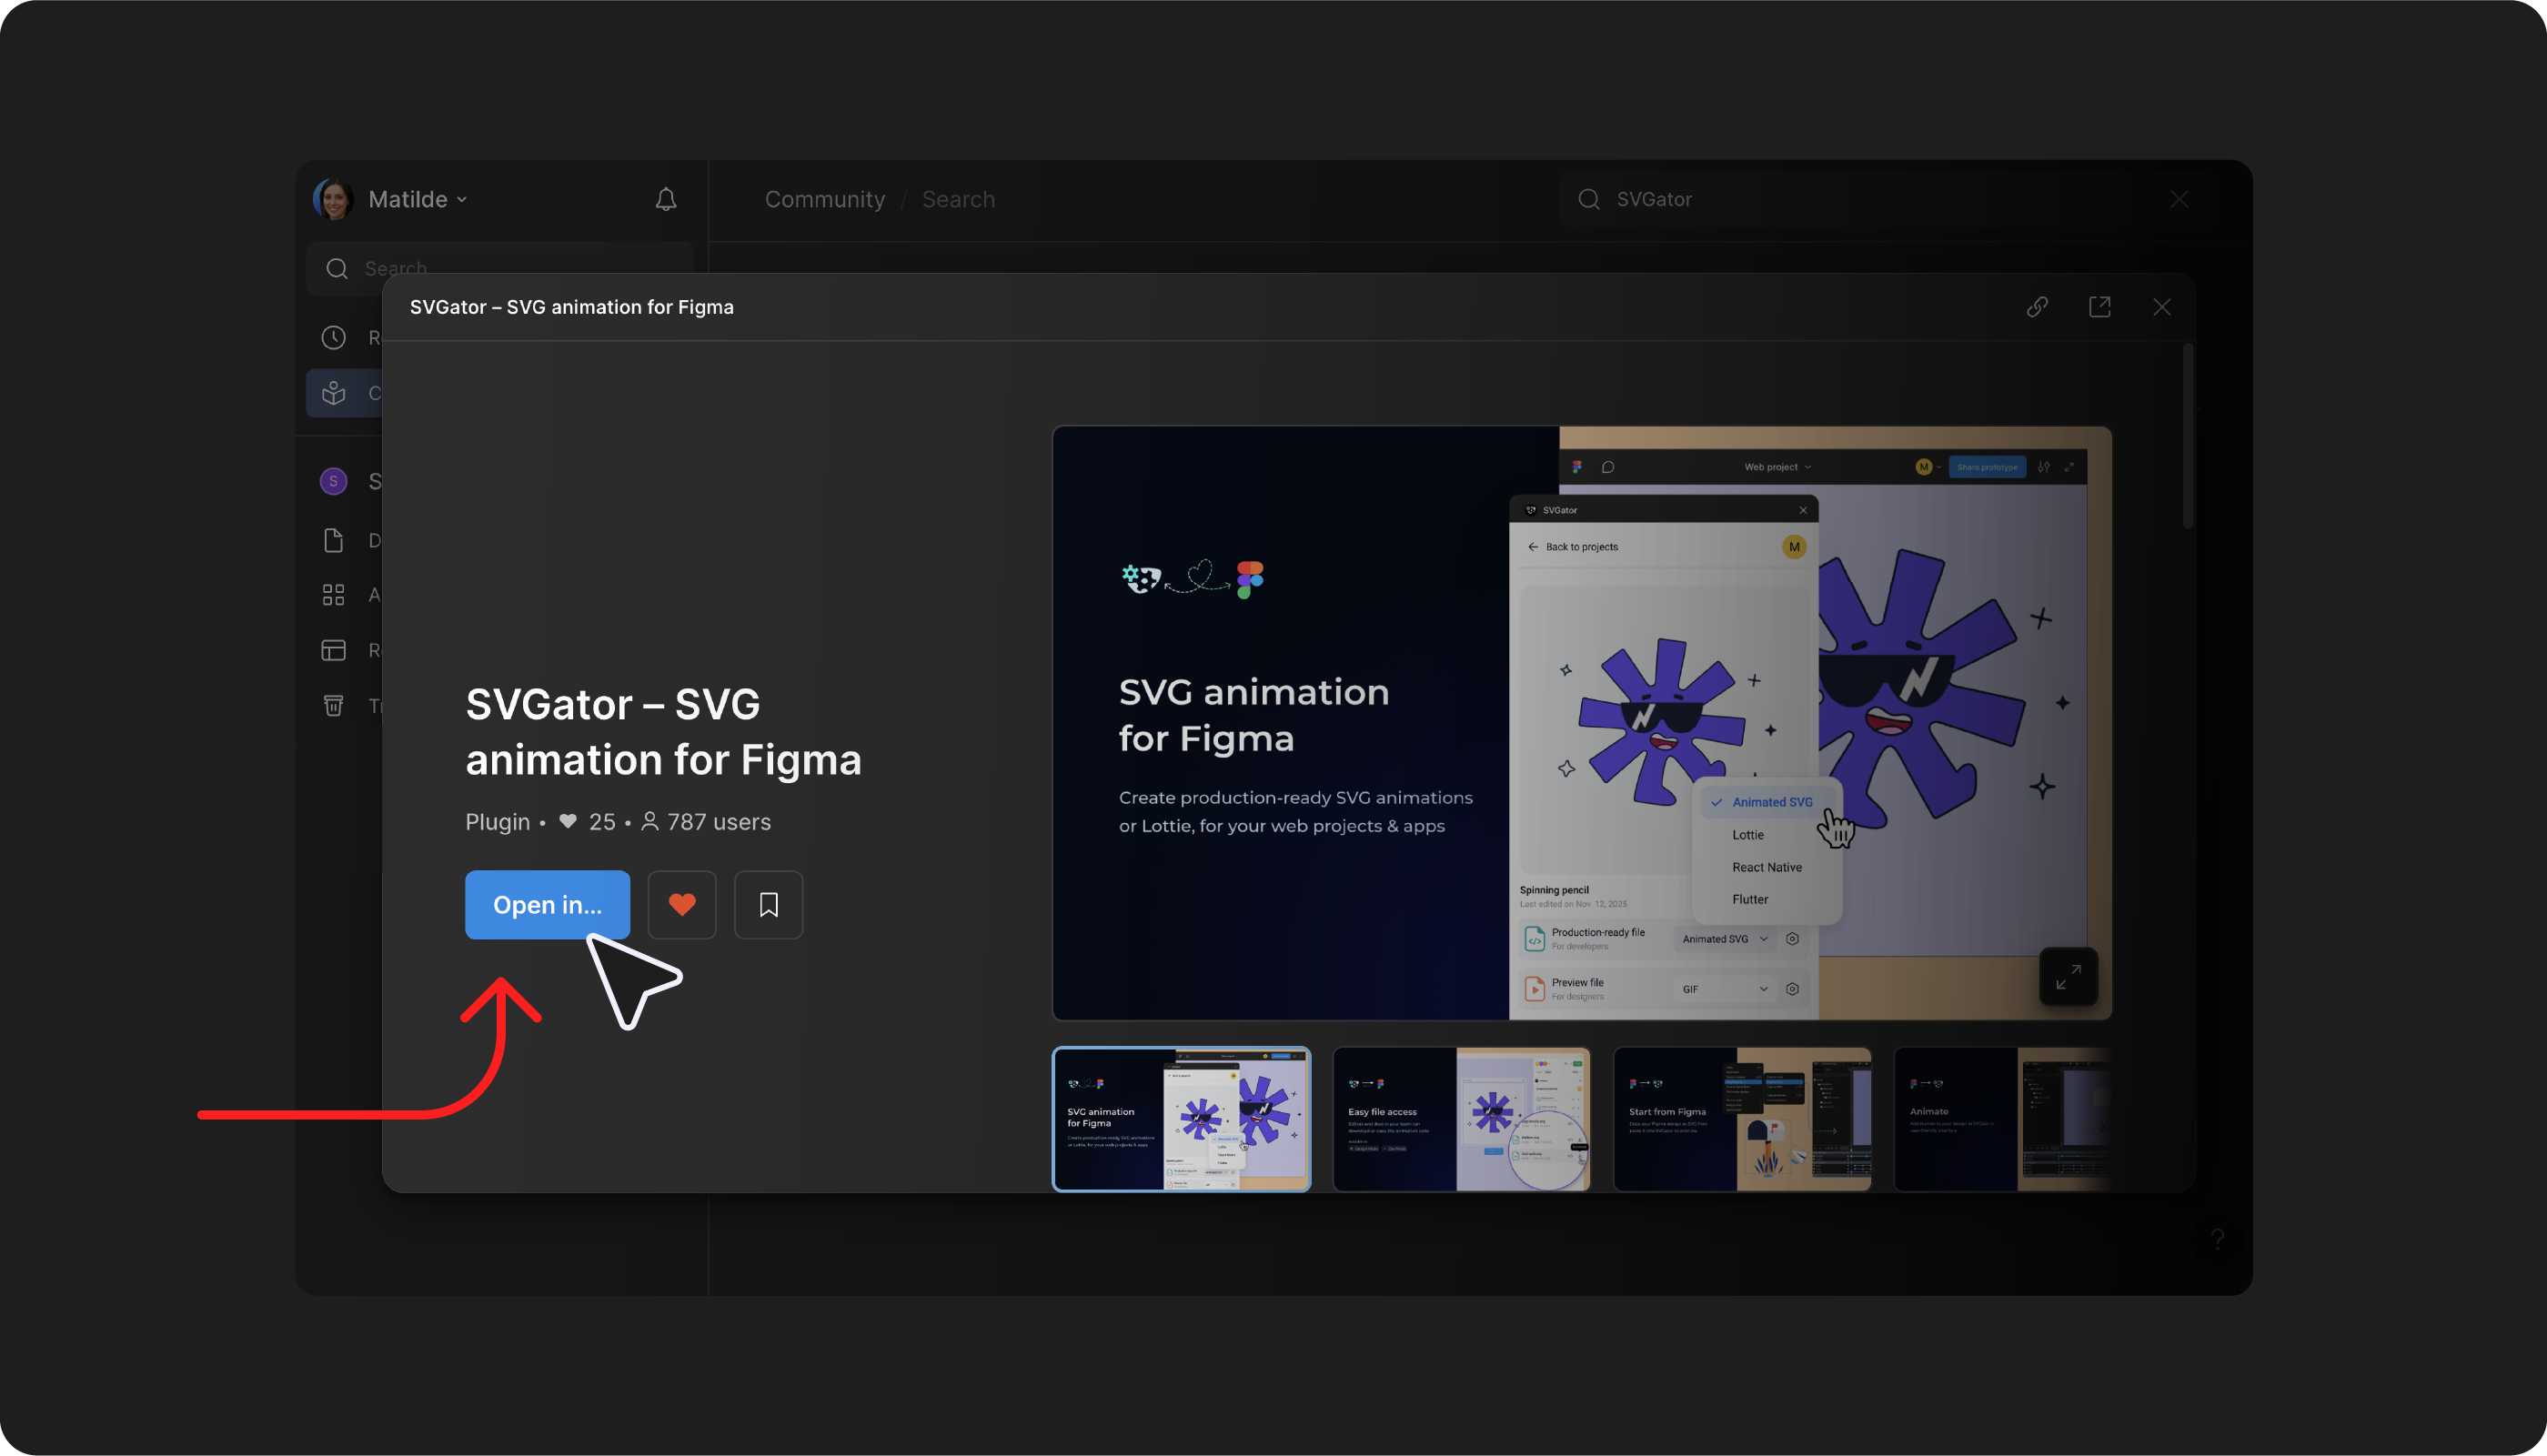
Under Plugins you’ll find “SVGator - SVG animation for Figma”. Select Open in… → Choose file → Run.

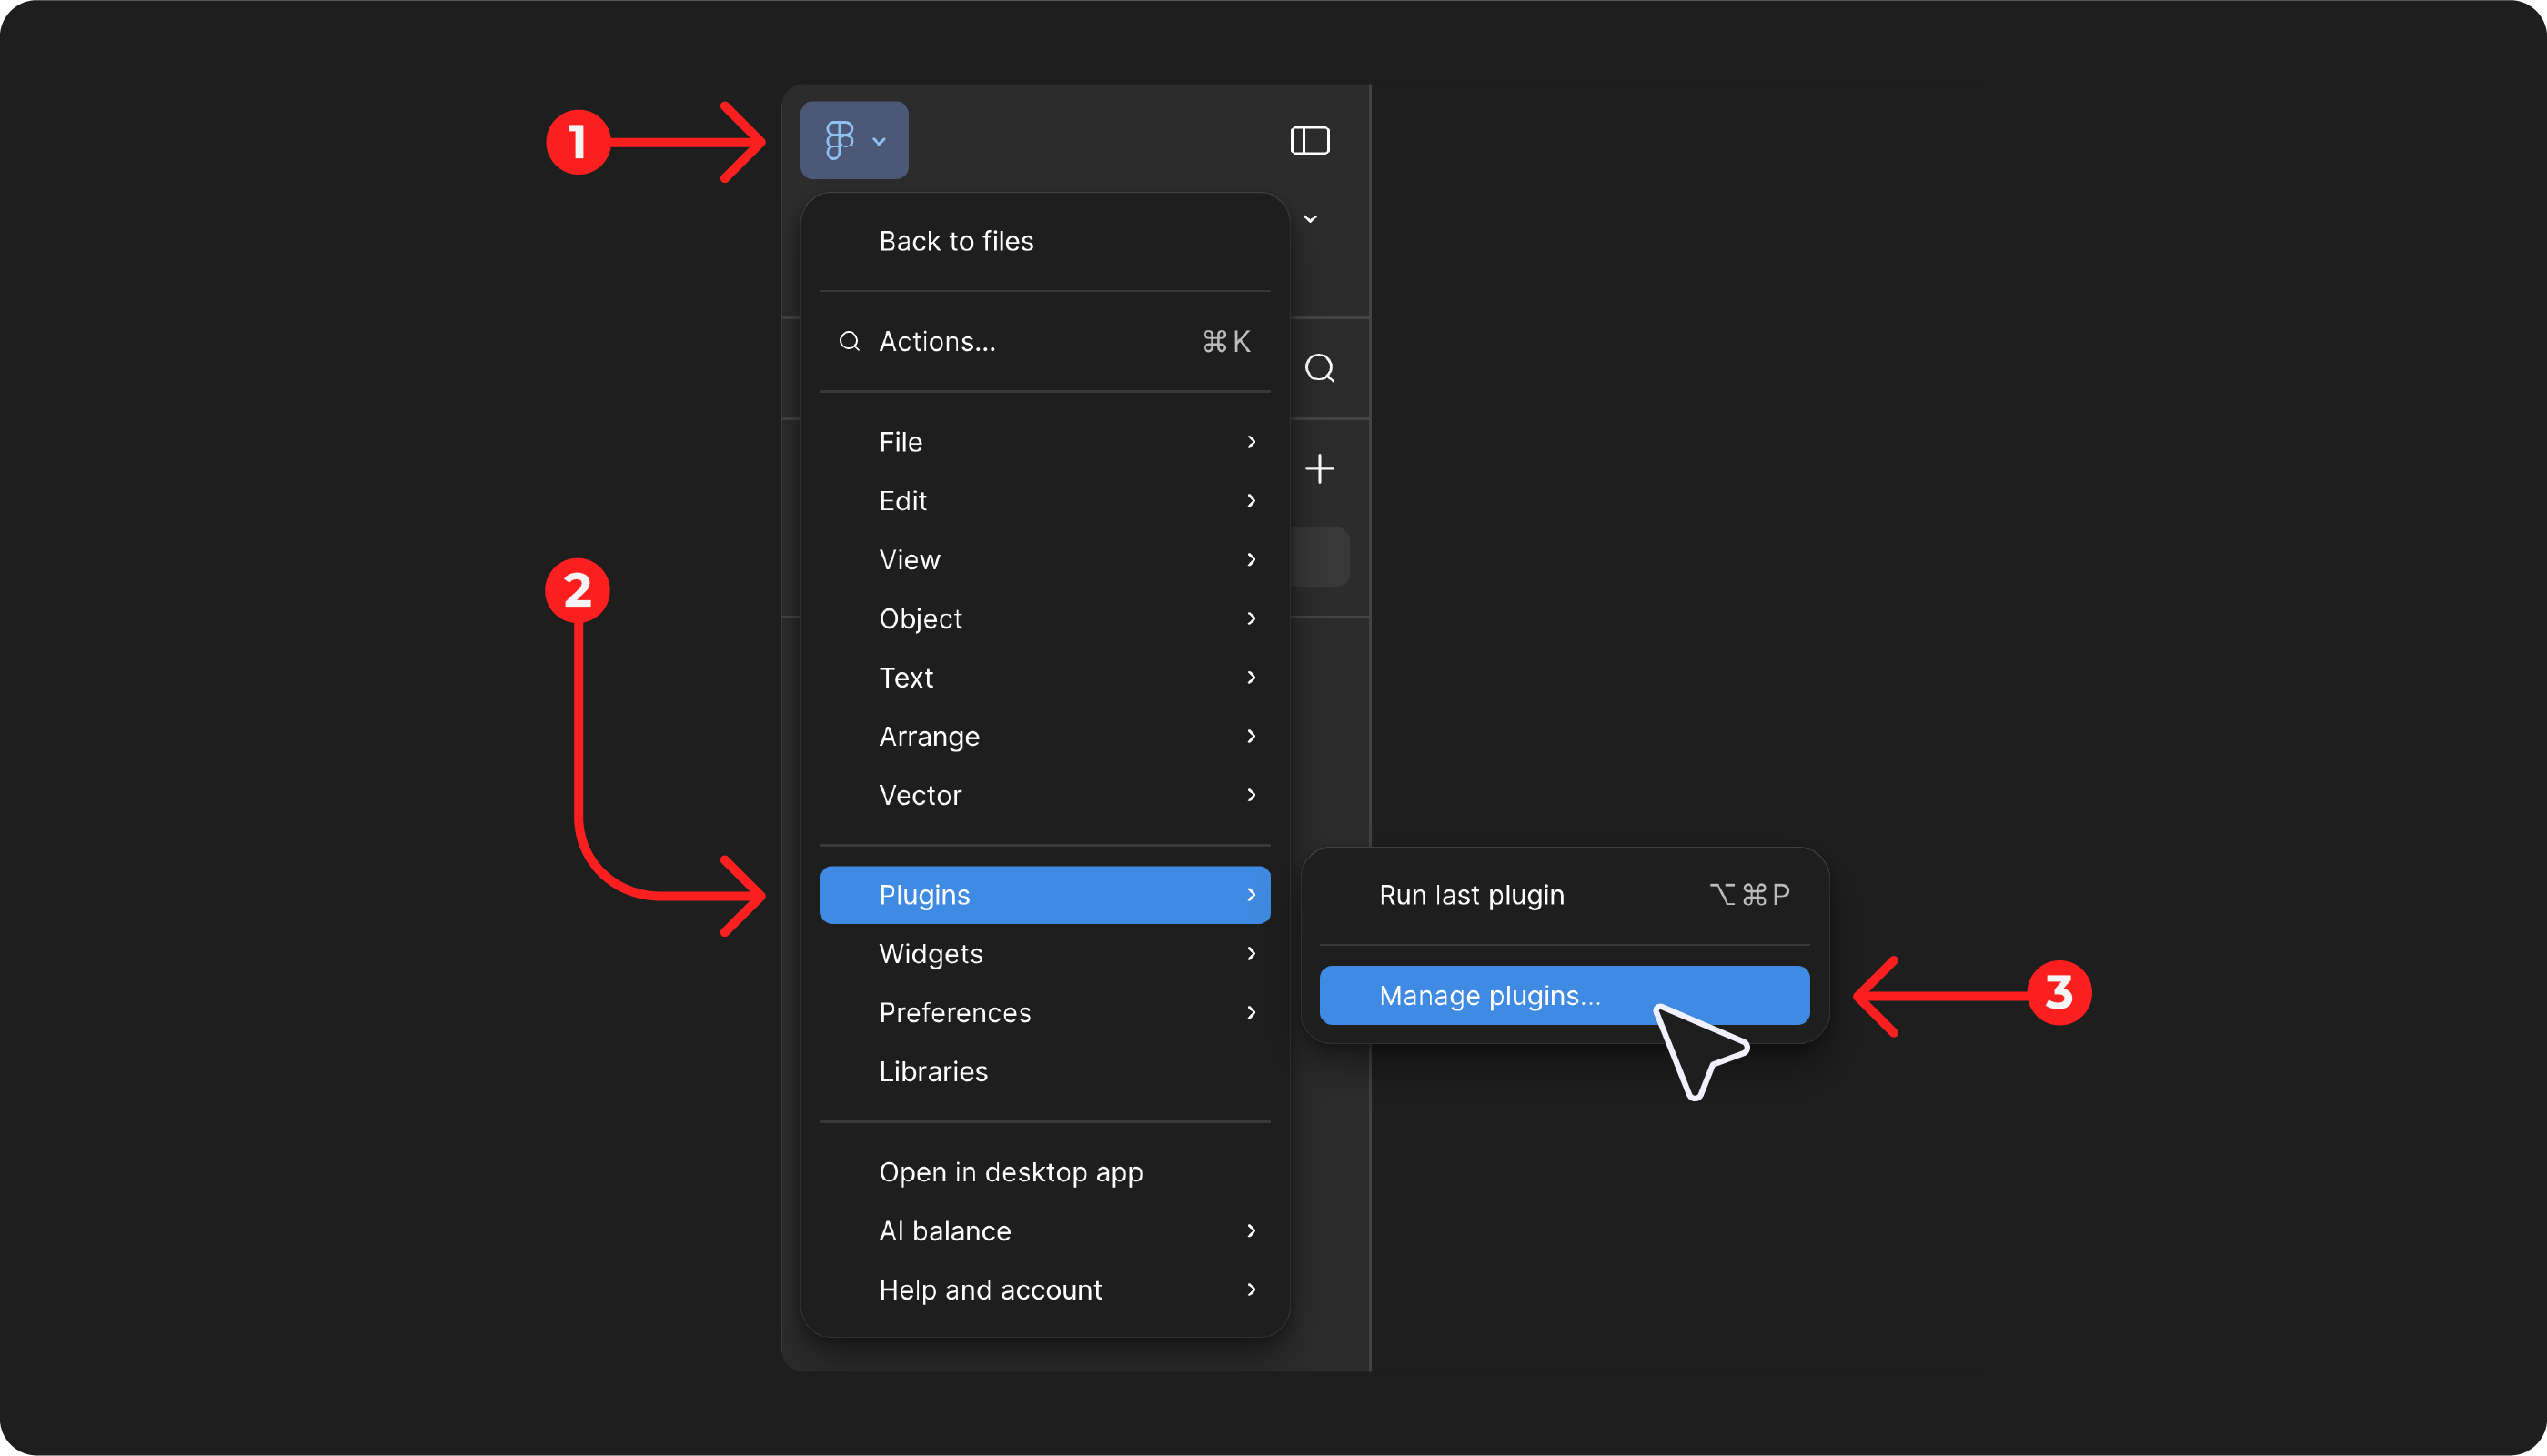
If you are already working within a project, open the Figma menu → Plugins → Manage plugins, search for “SVGator”, select it from the results, and click Run. Later, you can find the plugin in the Actions panel, whenever you need it.

Log In To The Plugin
The next step is to click the Log in button, then, in the page that opens, click Authorize to allow the SVGator plugin to access your SVGator account and its content.
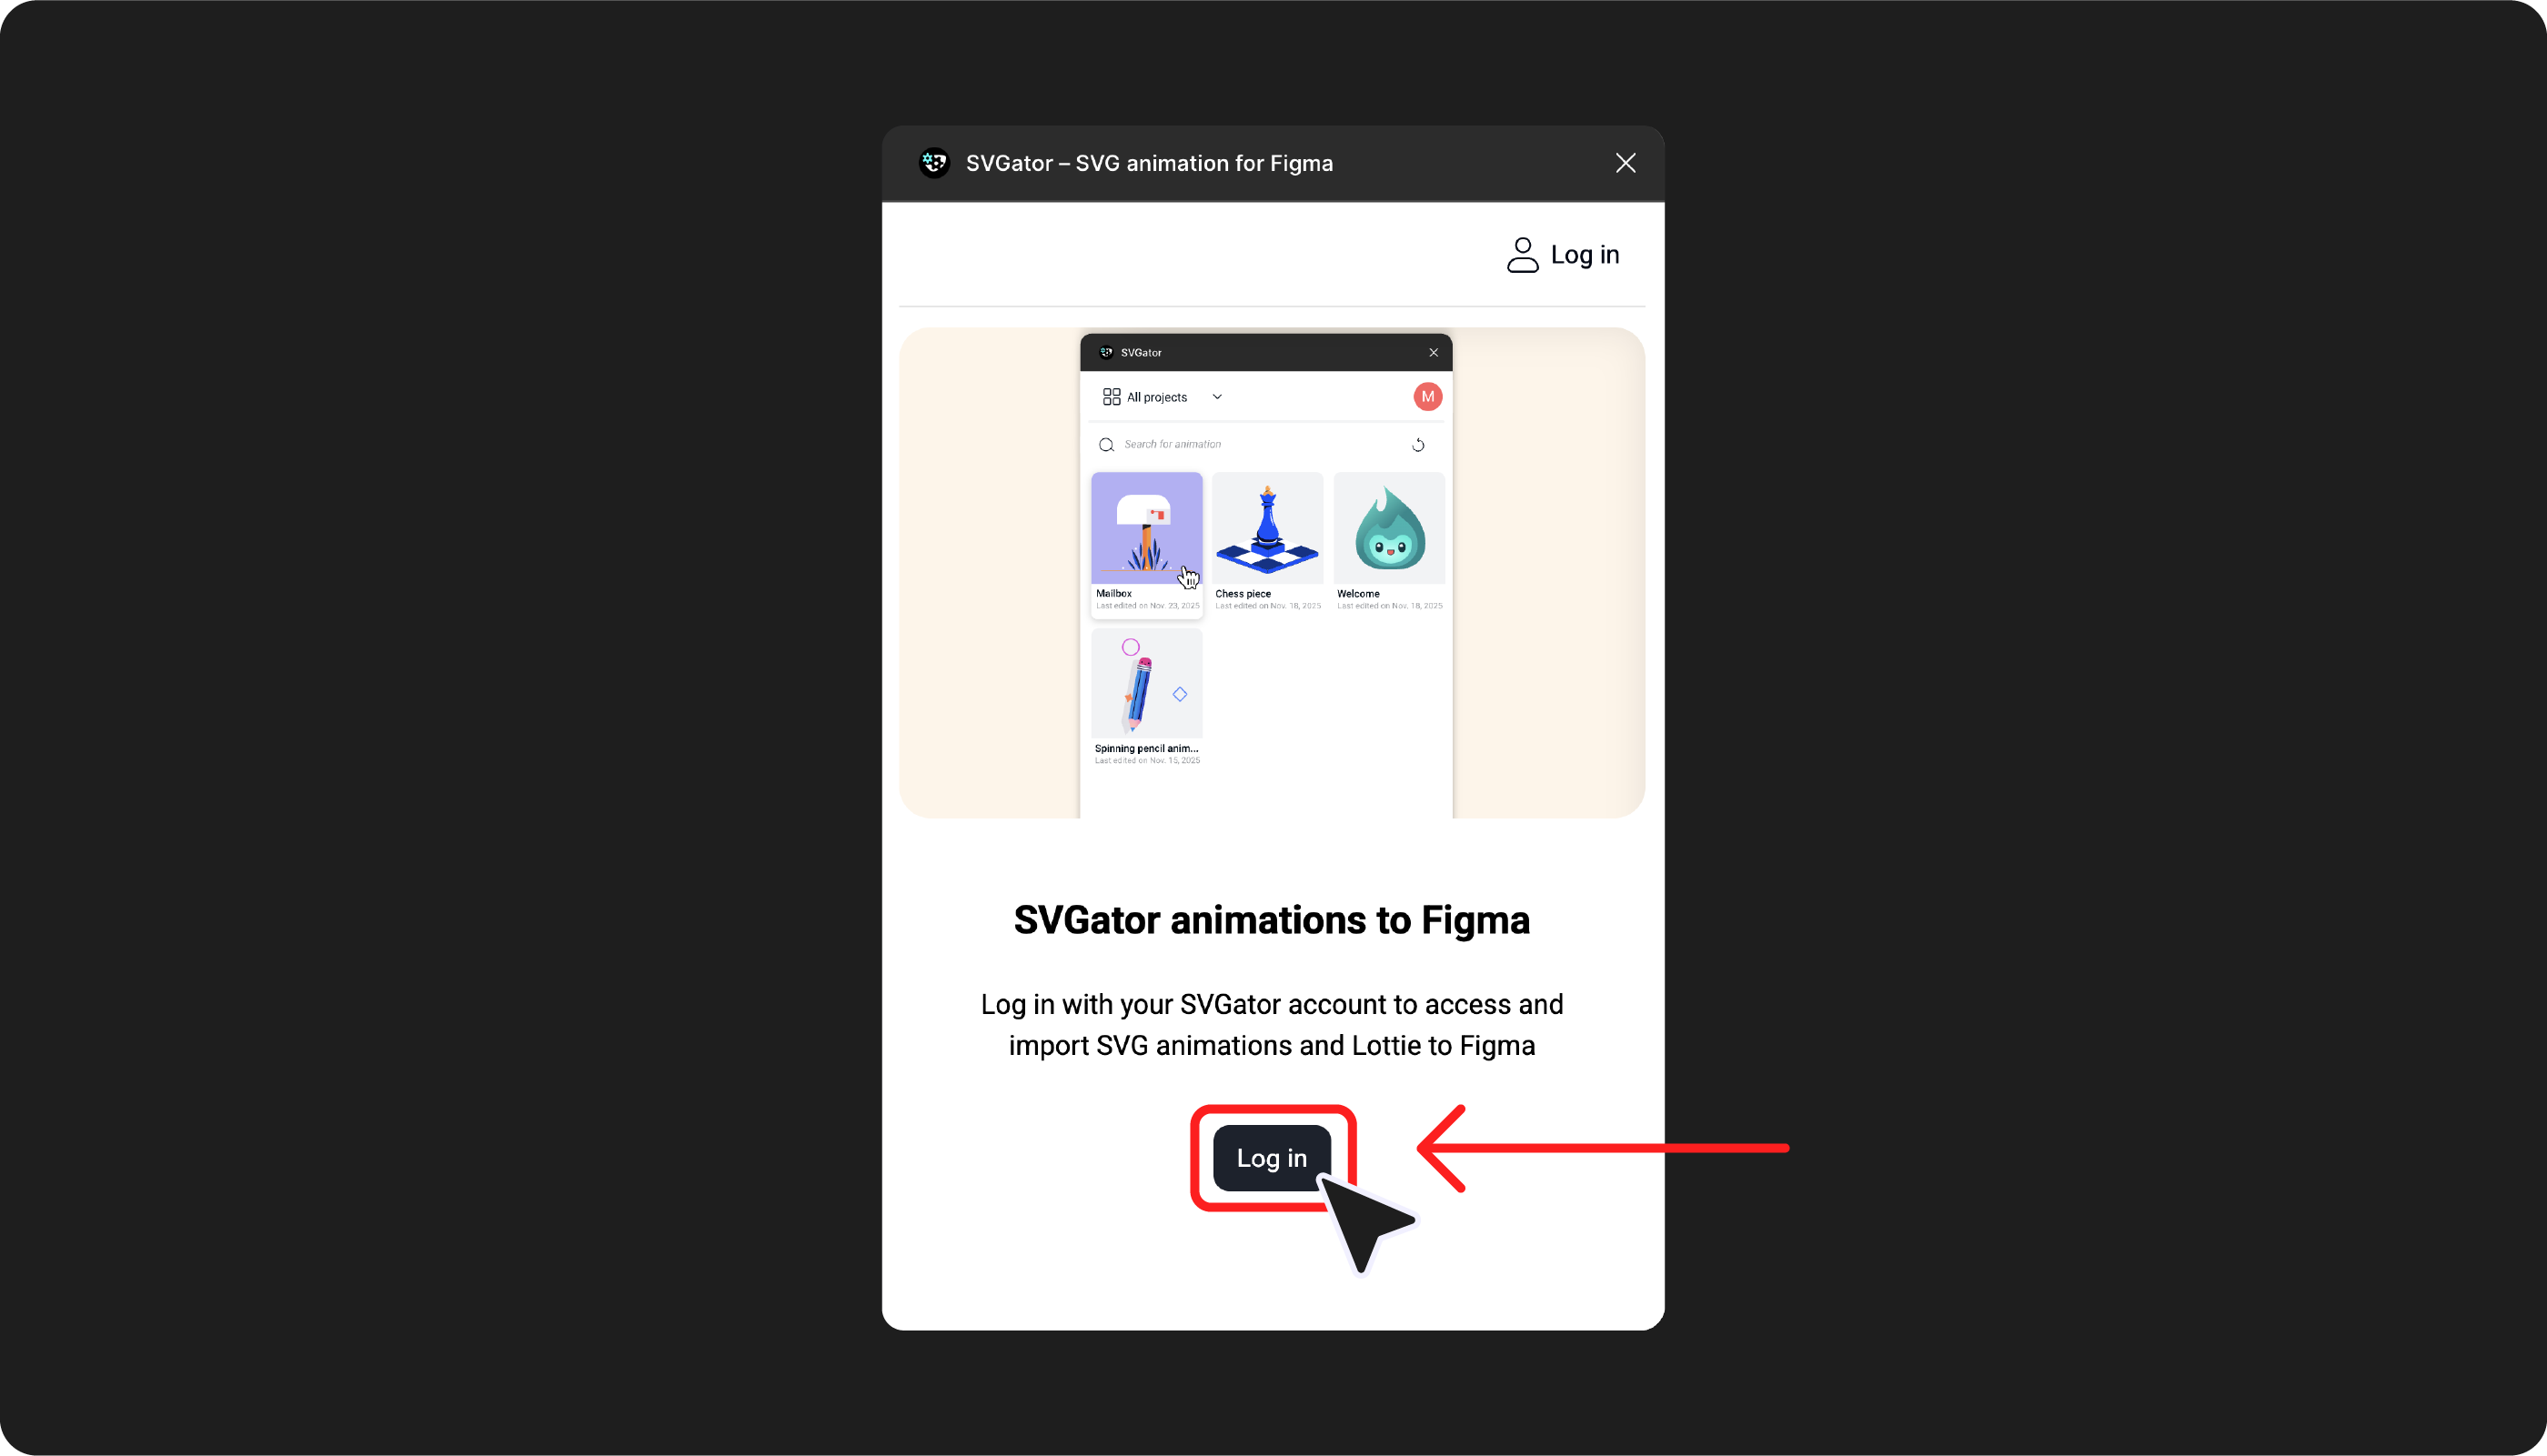

After authorizing the plugin, you will be able to access all your projects, your renders, and any projects shared within your SVGator Team (if you are part of one) directly through the plugin.
If you don’t have an SVGator account yet, you can create one by completing the Sign-up form.
For developers: If you only need production-ready files, an SVGator account is not required. Install the plugin, open your Figma project, select the animation layer, click the Actions button, choose the SVGator plugin, and download the production-ready file.
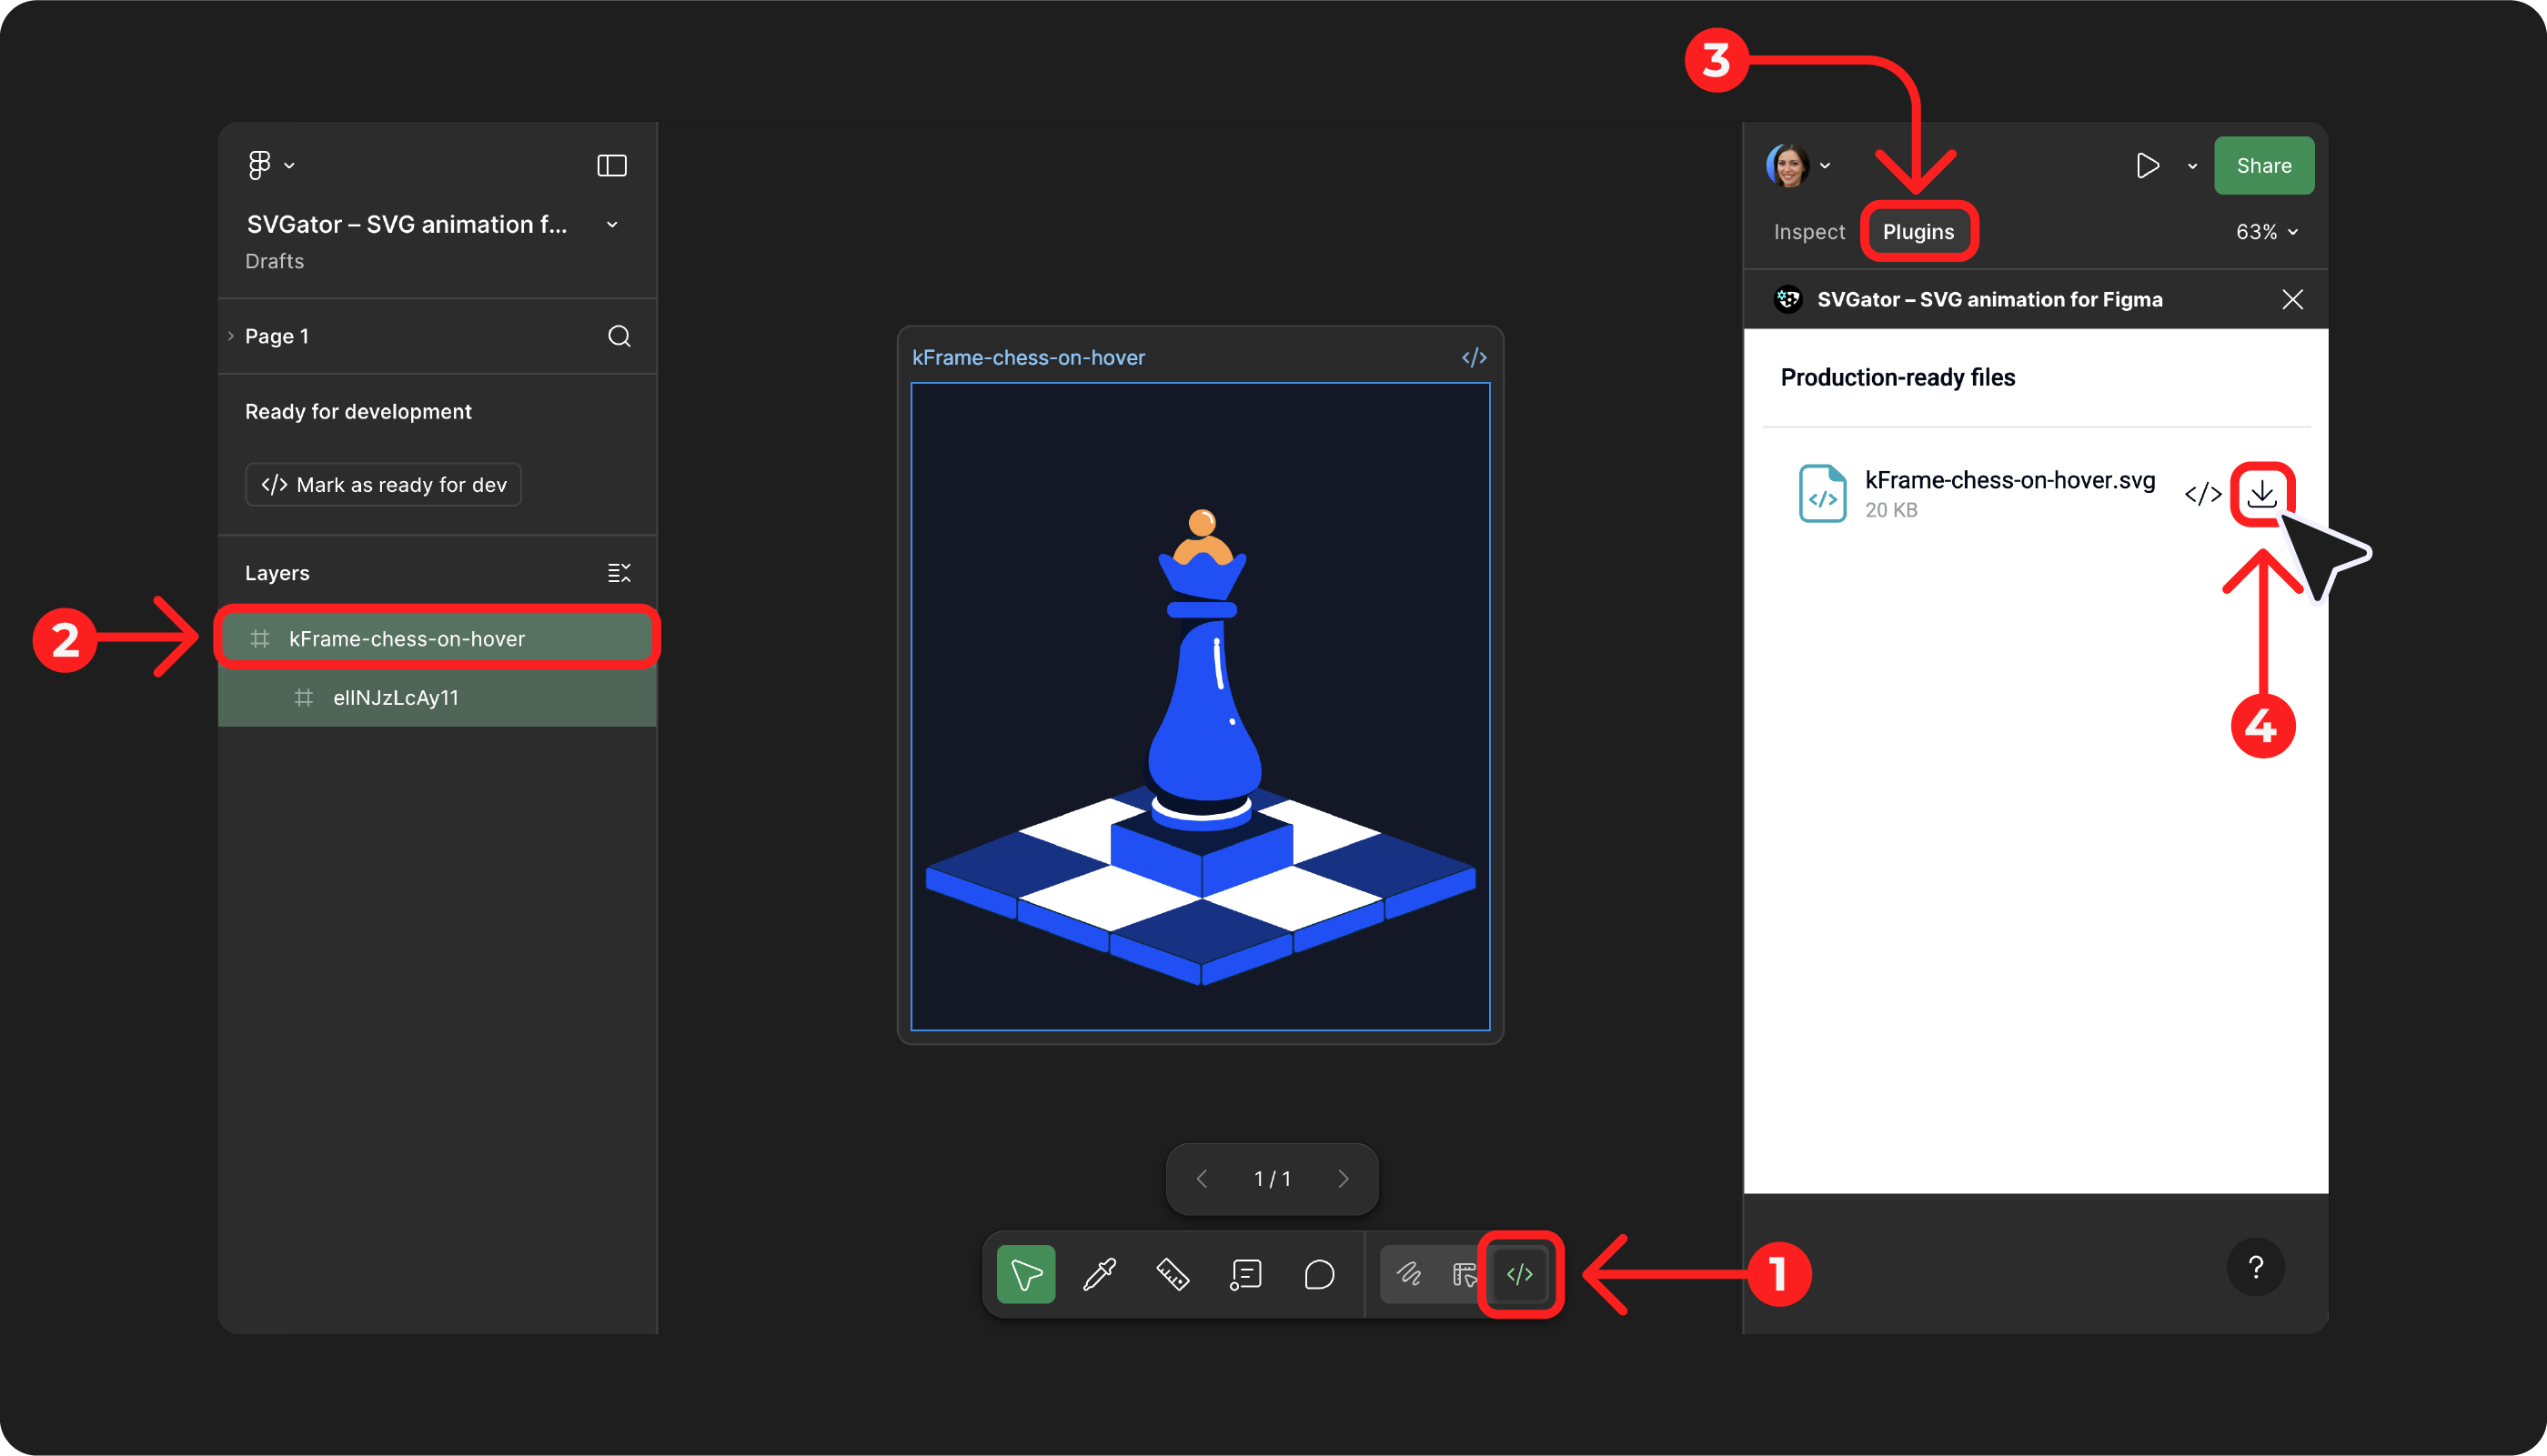
Note: Any Figma user can access the production-ready files through the plugin as long as they have Edit access to that specific Figma project.
Bring Your Project To Figma
To add a project to Figma or download it from the plugin, select the thumbnail of the project you need.
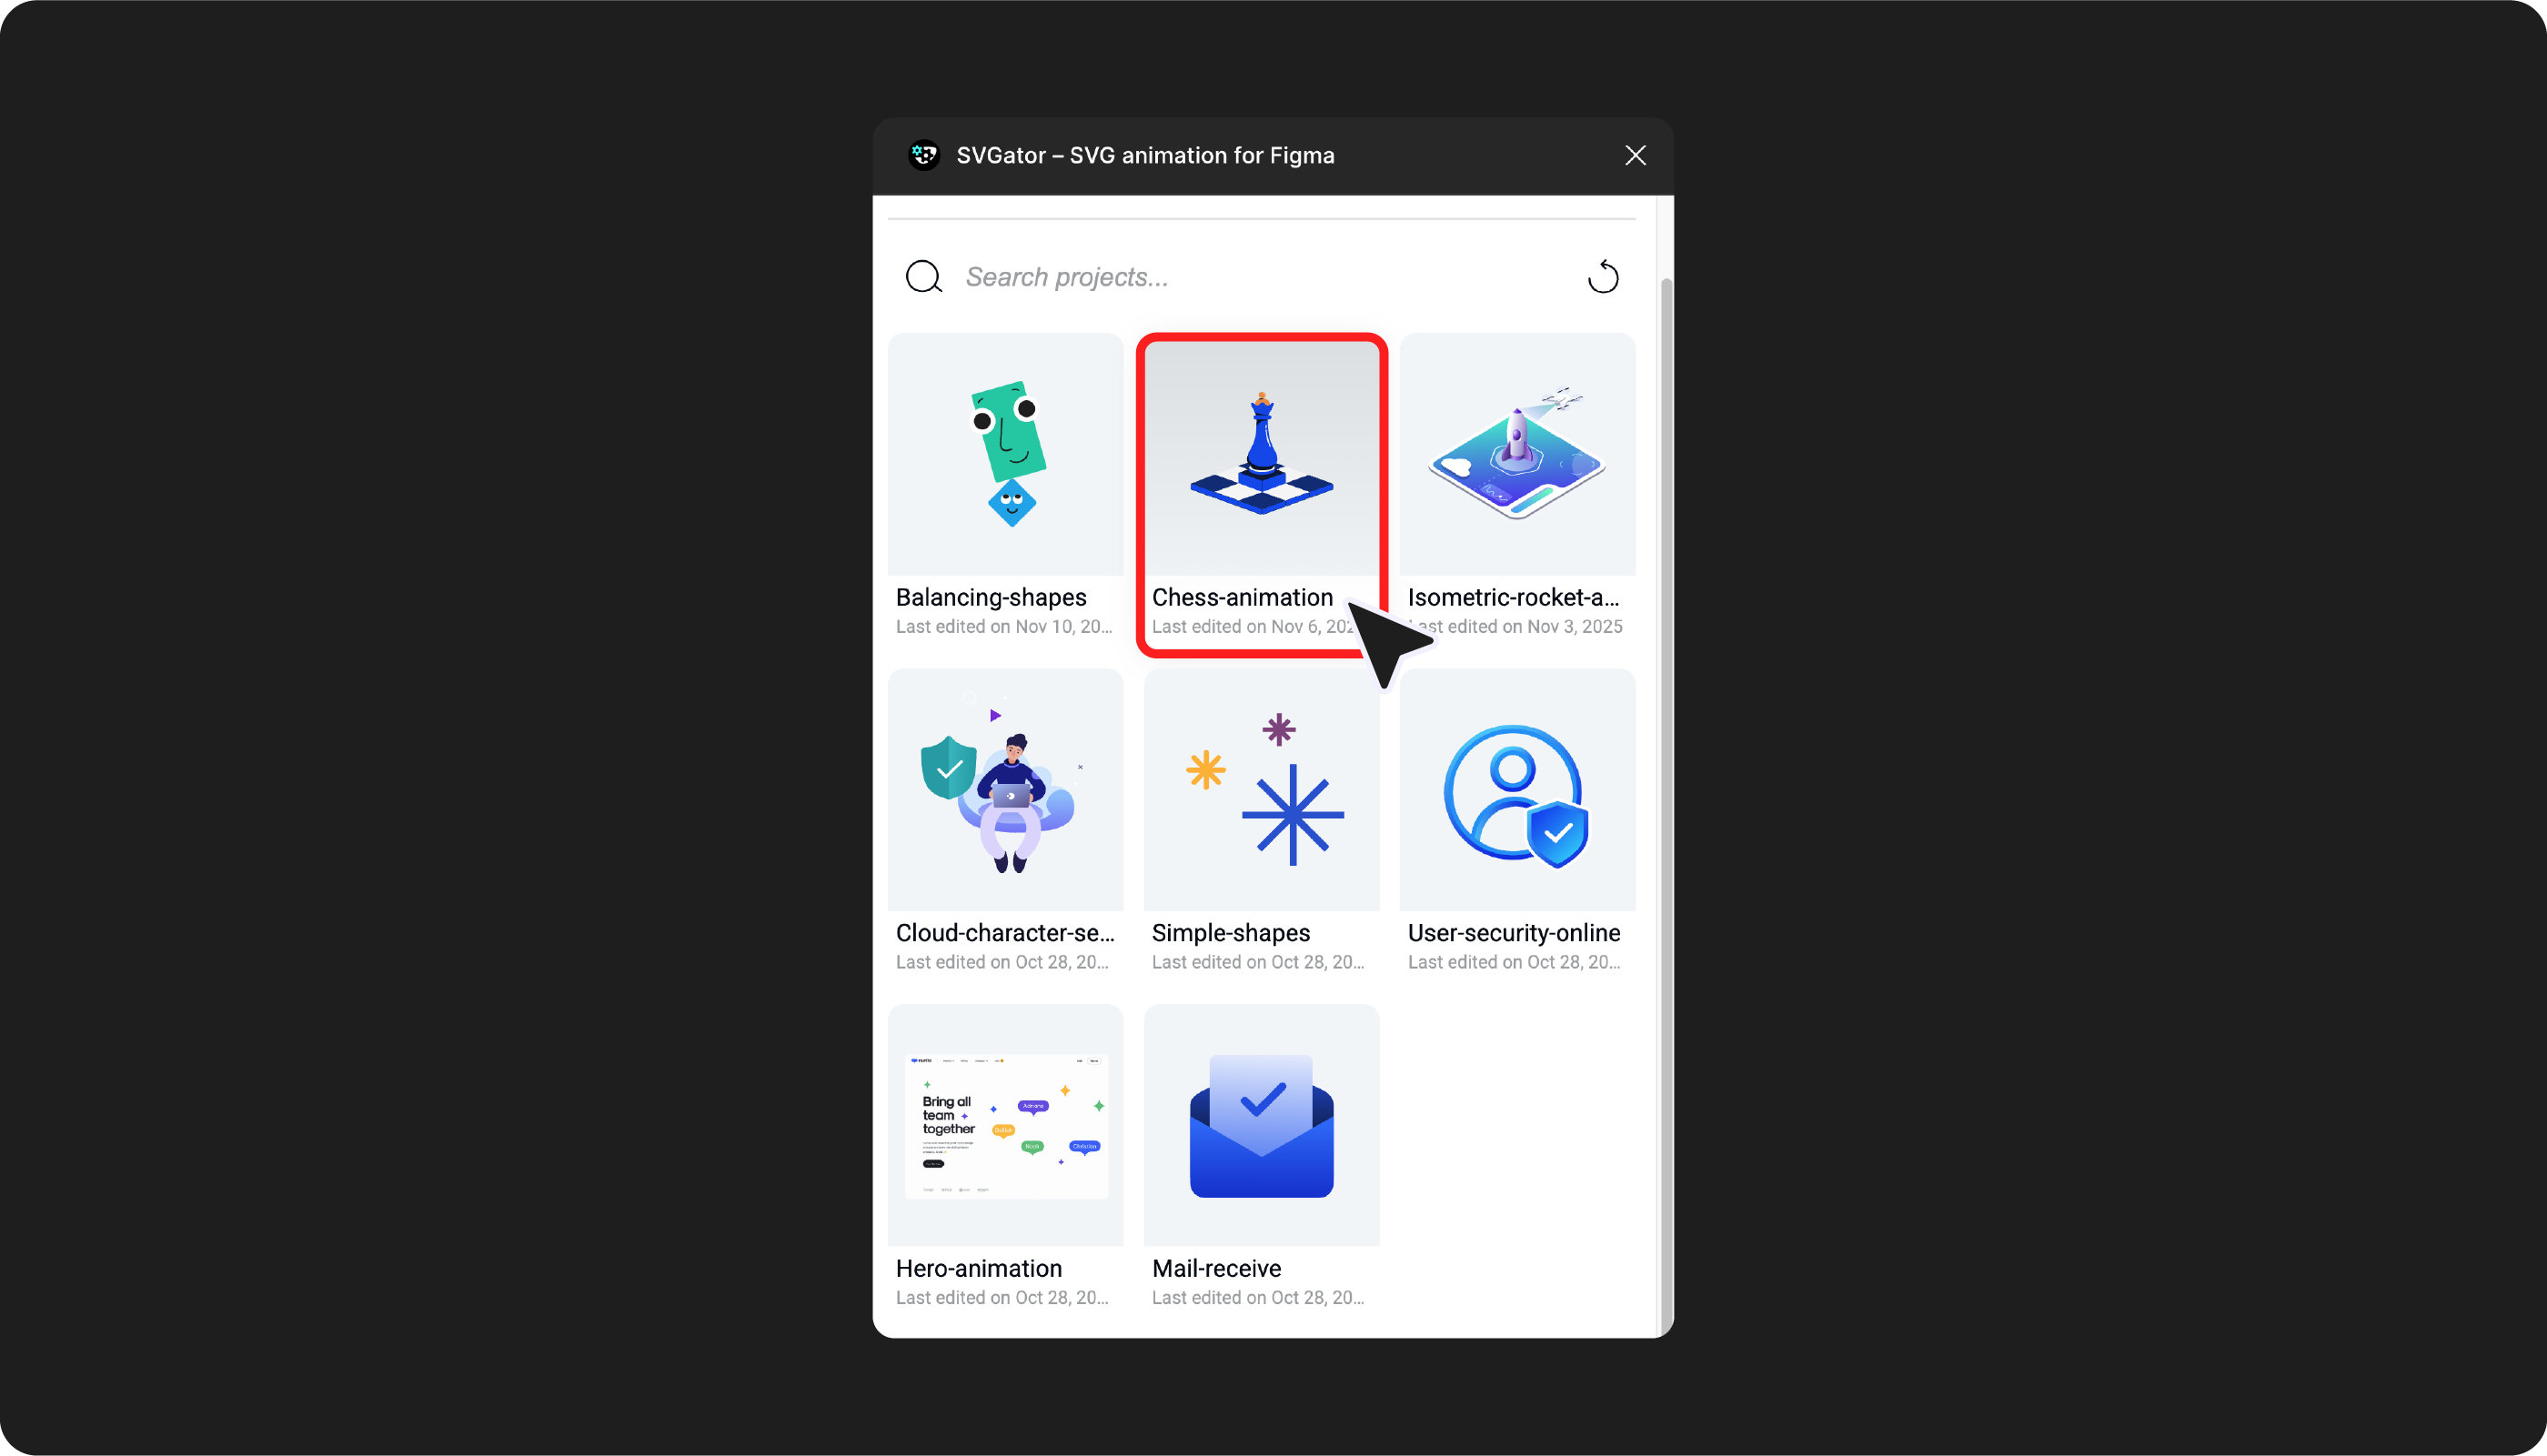
You will then have two main options:
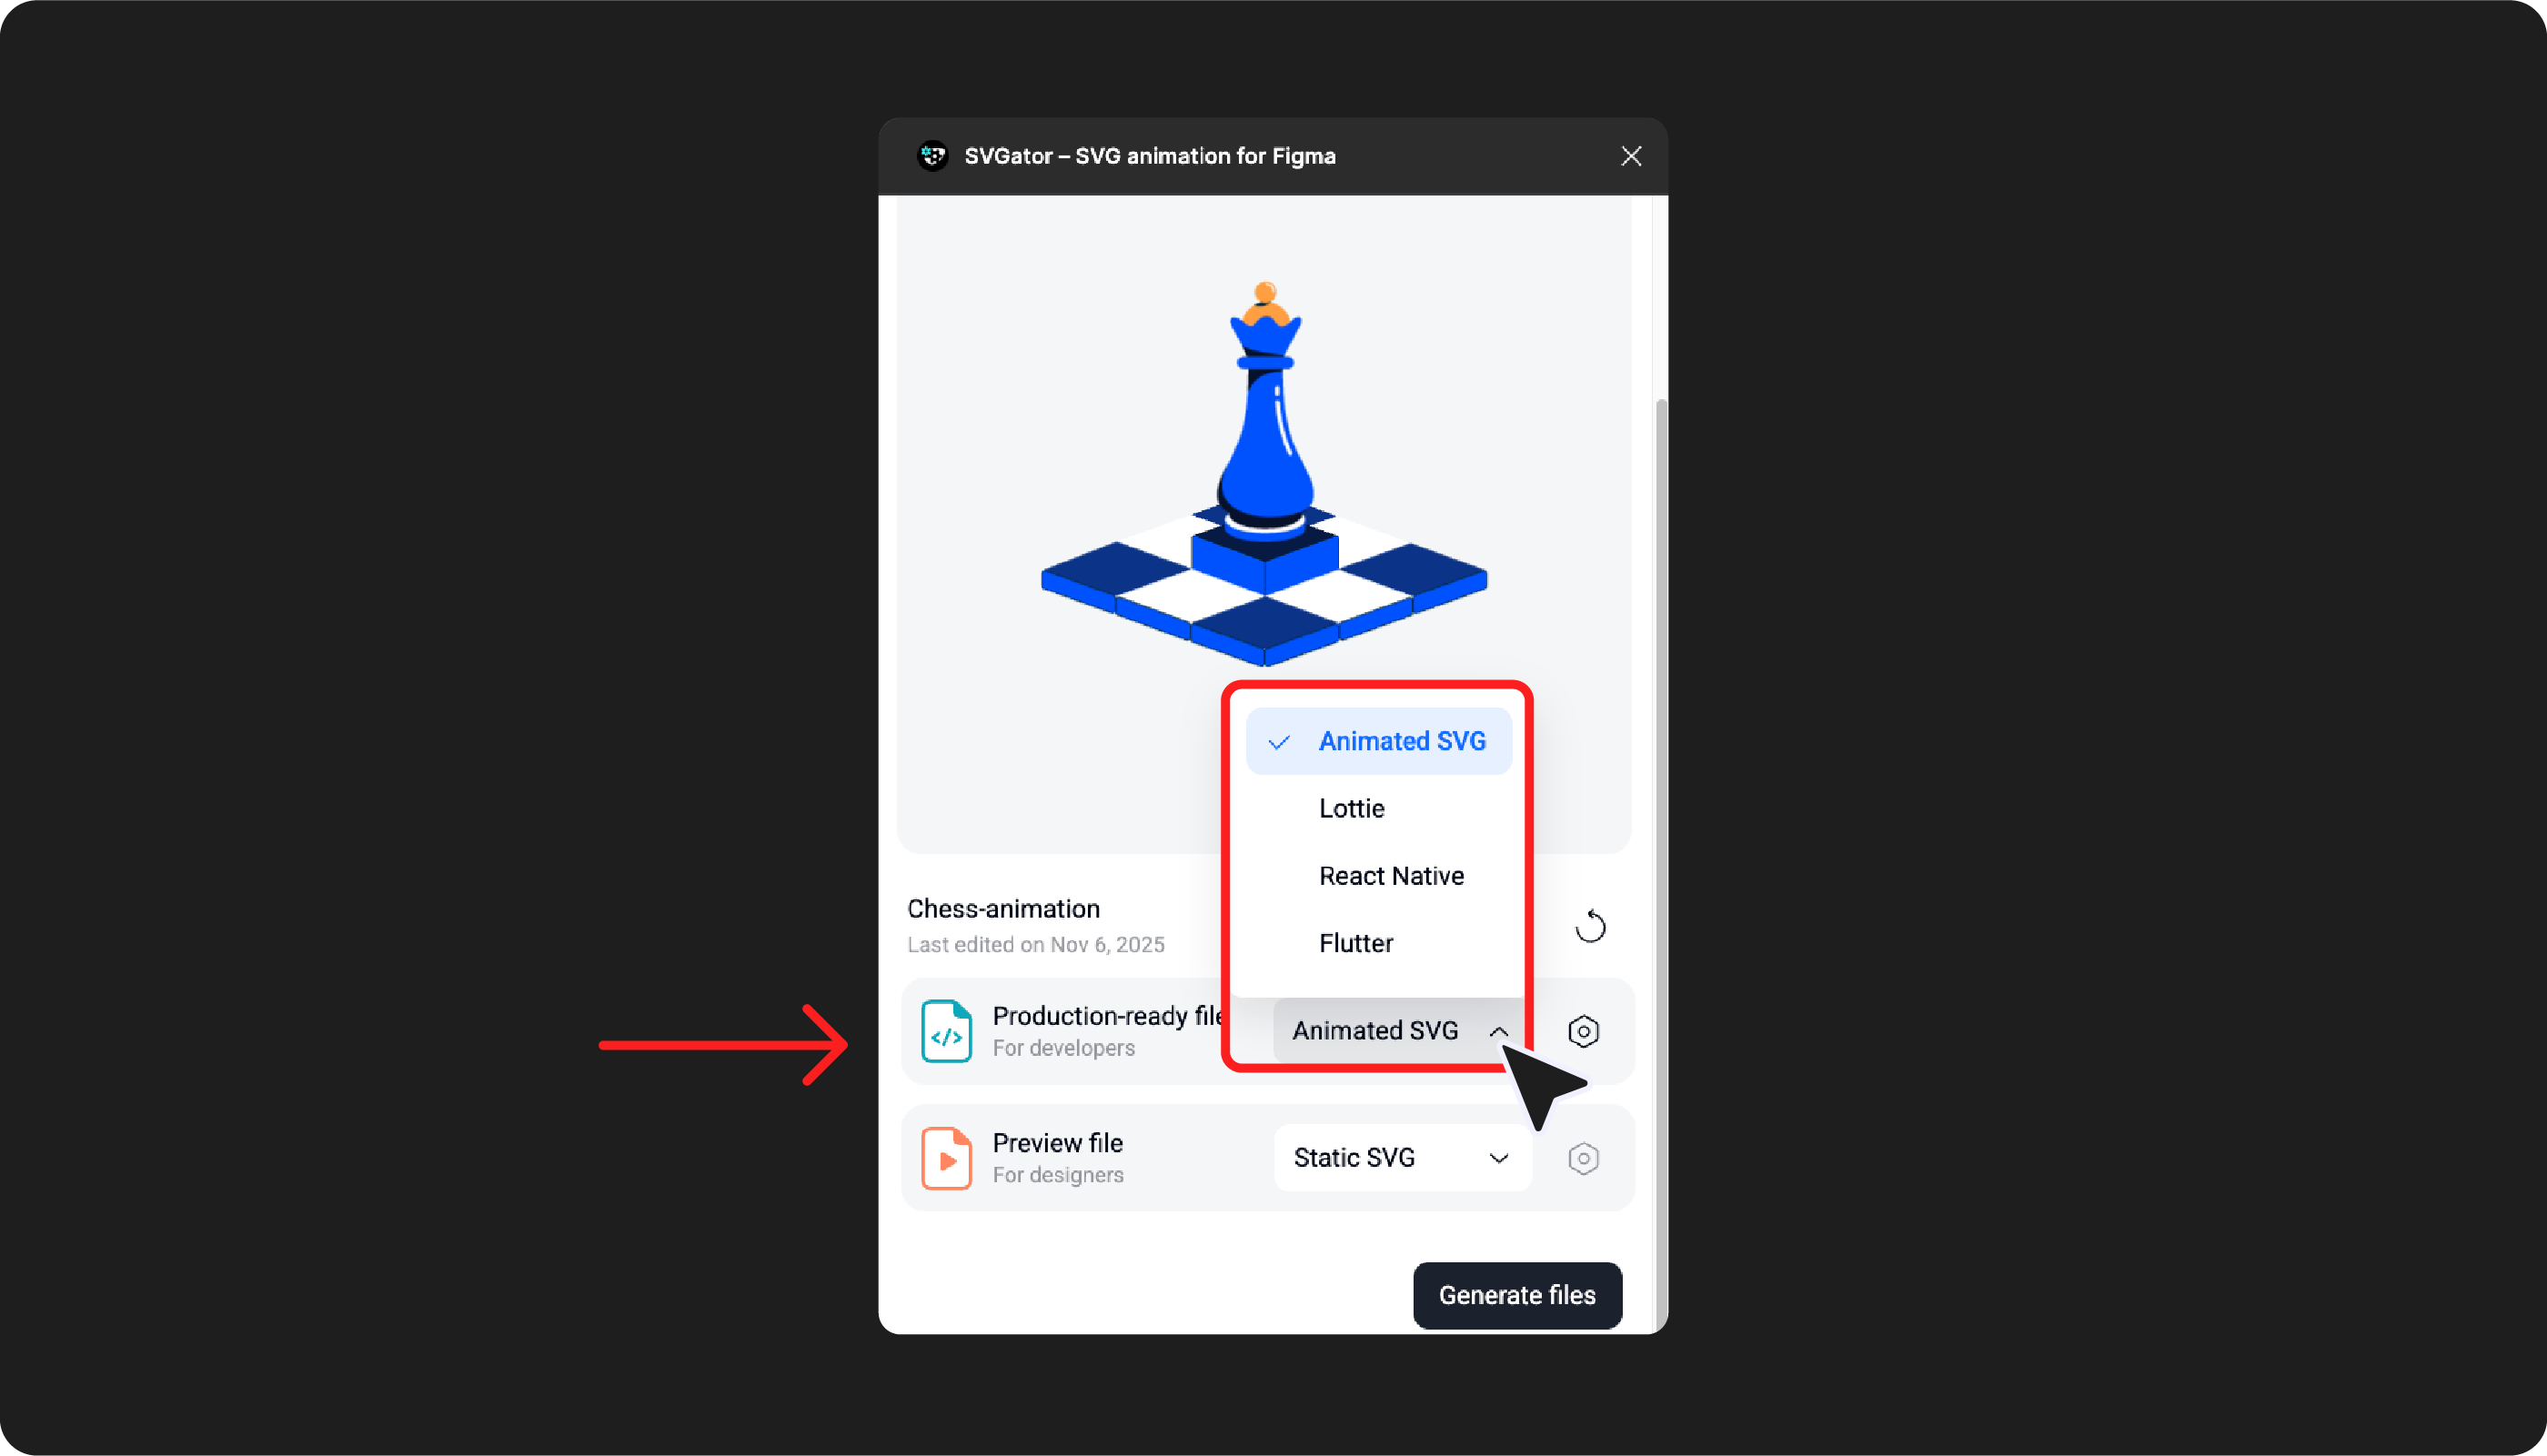
- Production-ready file: You can insert the SVGator project directly into your Figma project, or copy or download the project as an animated SVG, Lottie, React Native, or Flutter file, ready for implementation. Any Figma user who has Edit access will be able to access these files and work with them directly in Figma’s Dev Mode.
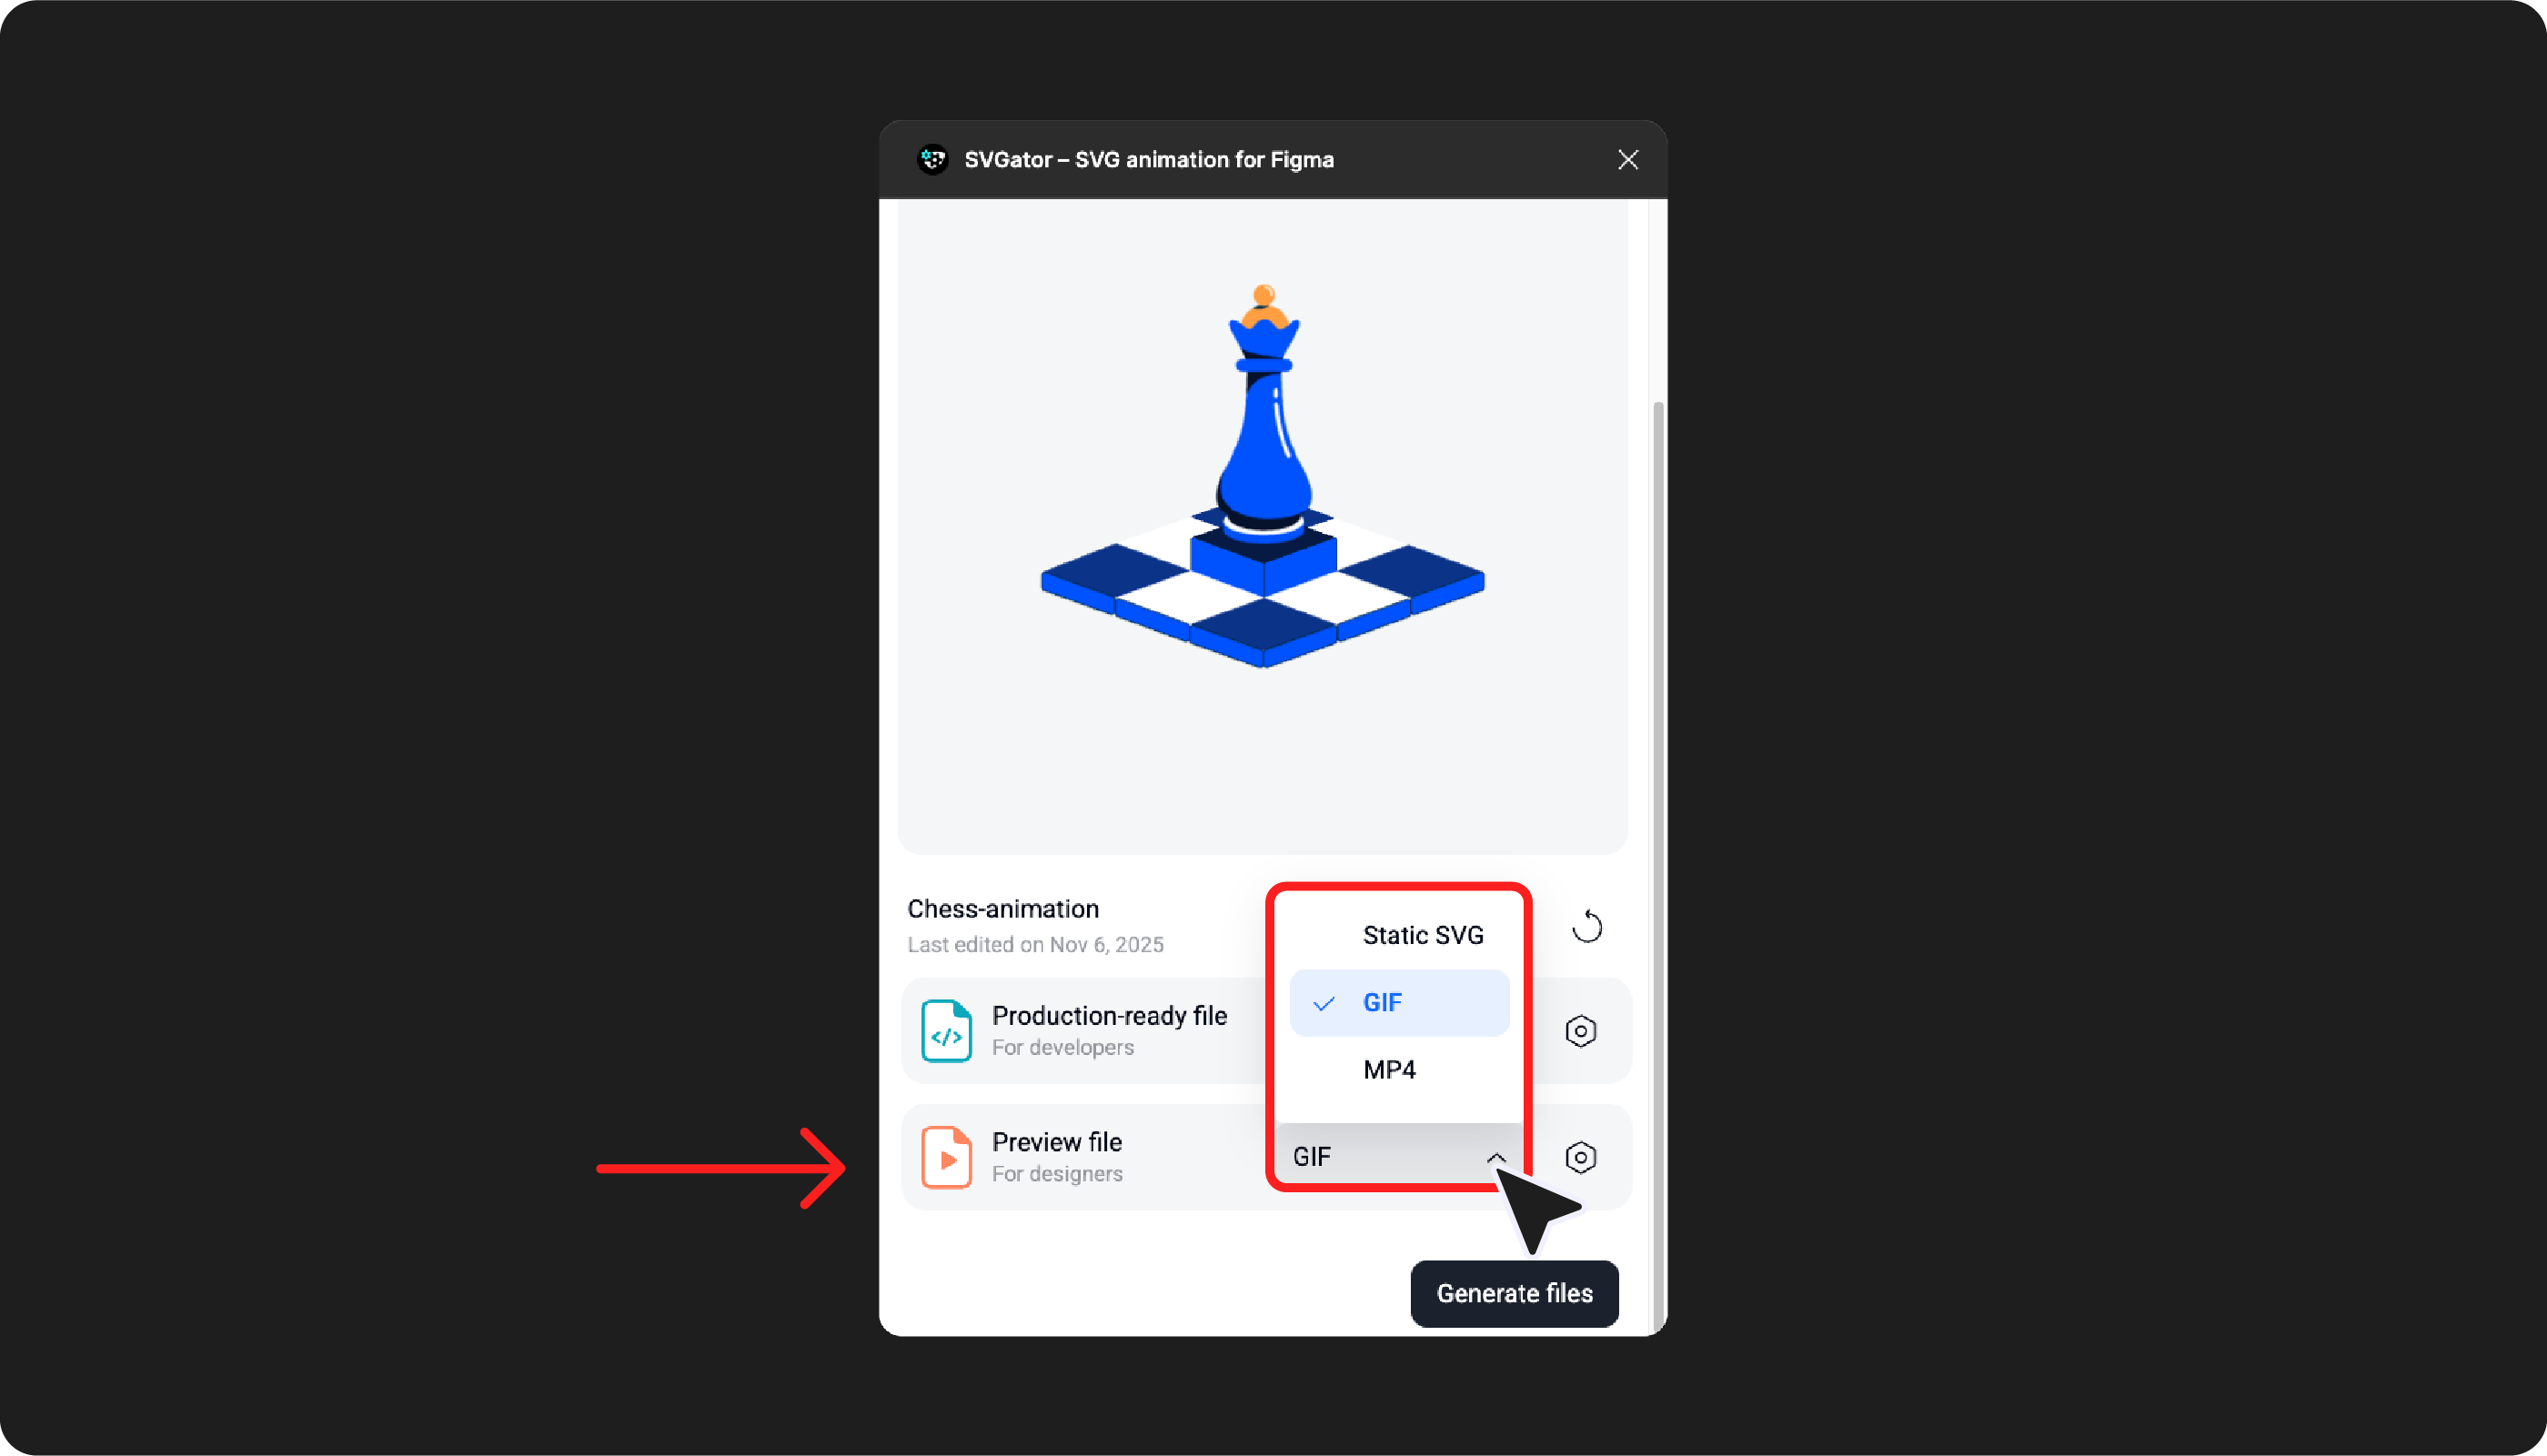
- Preview file: Because Figma supports only static SVGs, GIFs, and MP4s (and not animated SVGs), generating your animation as a GIF or MP4 allows you to preview it and enhance your project’s visuals in Present and Preview modes as well.
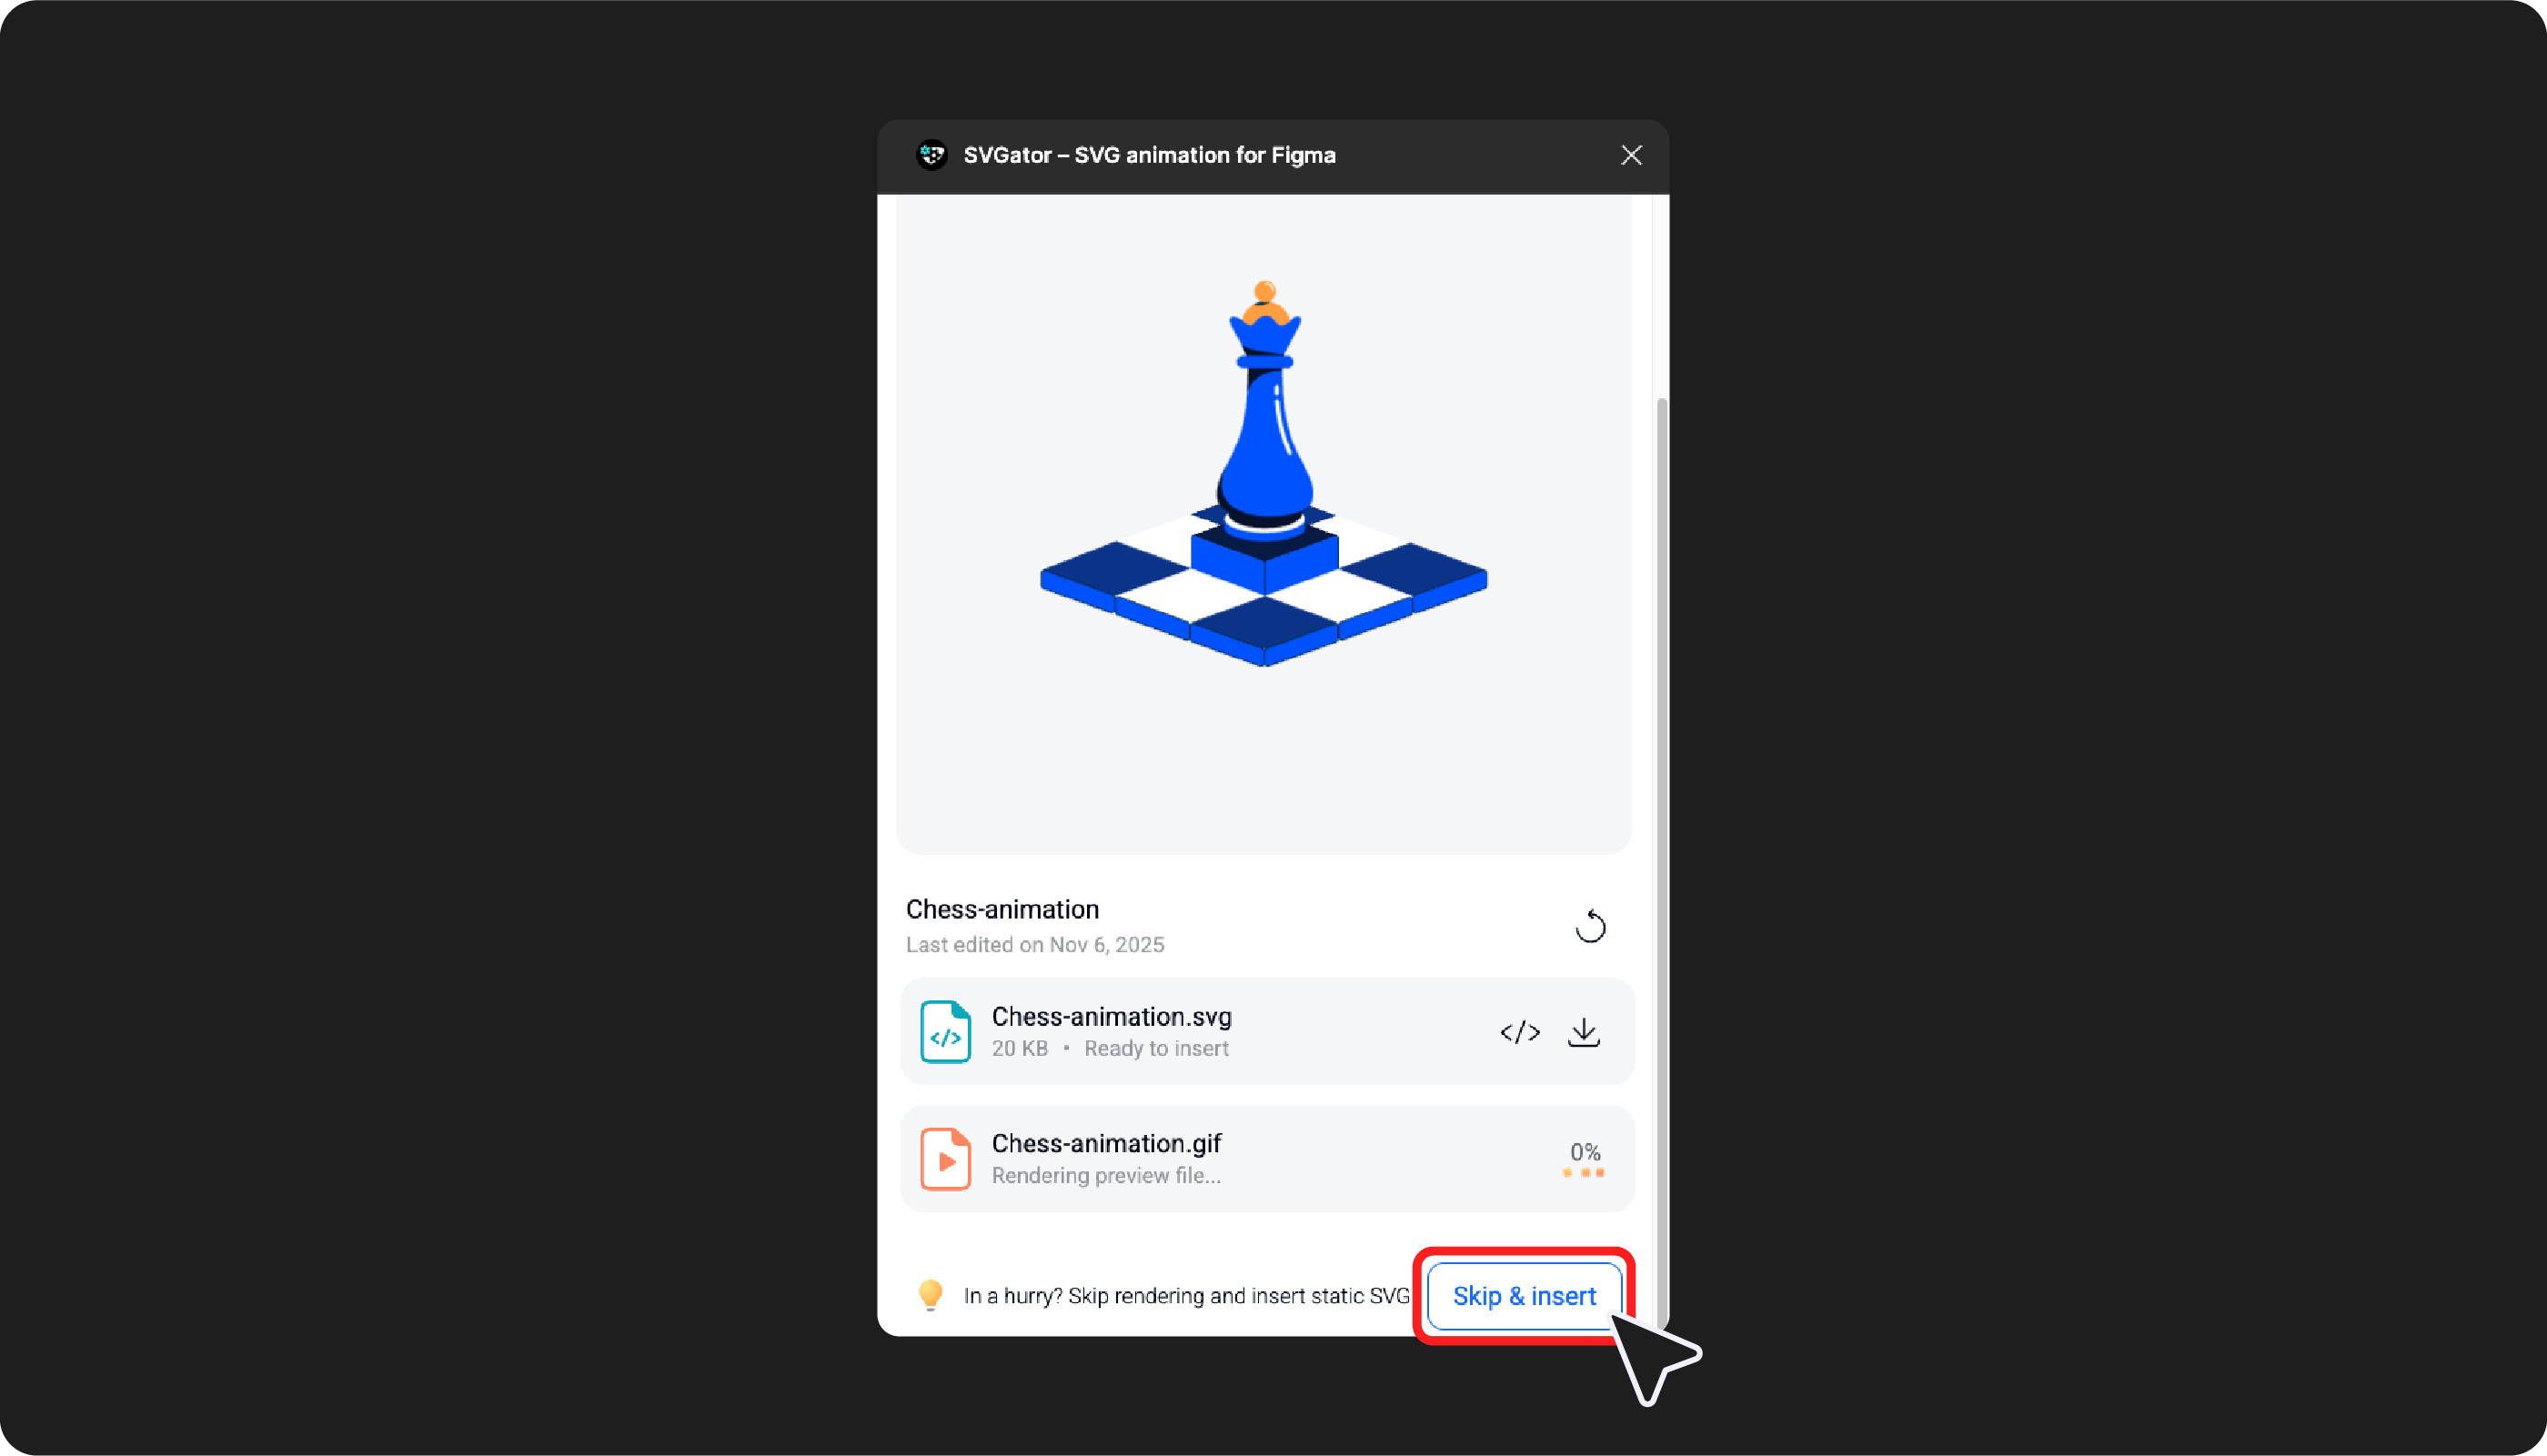
After selecting the export options you need, click Generate files. A static SVG preview file will be generated quickly. If you don’t want to wait for the GIF or MP4 files to render, you can click Skip & insert to instantly add the SVG to your Figma project instead.
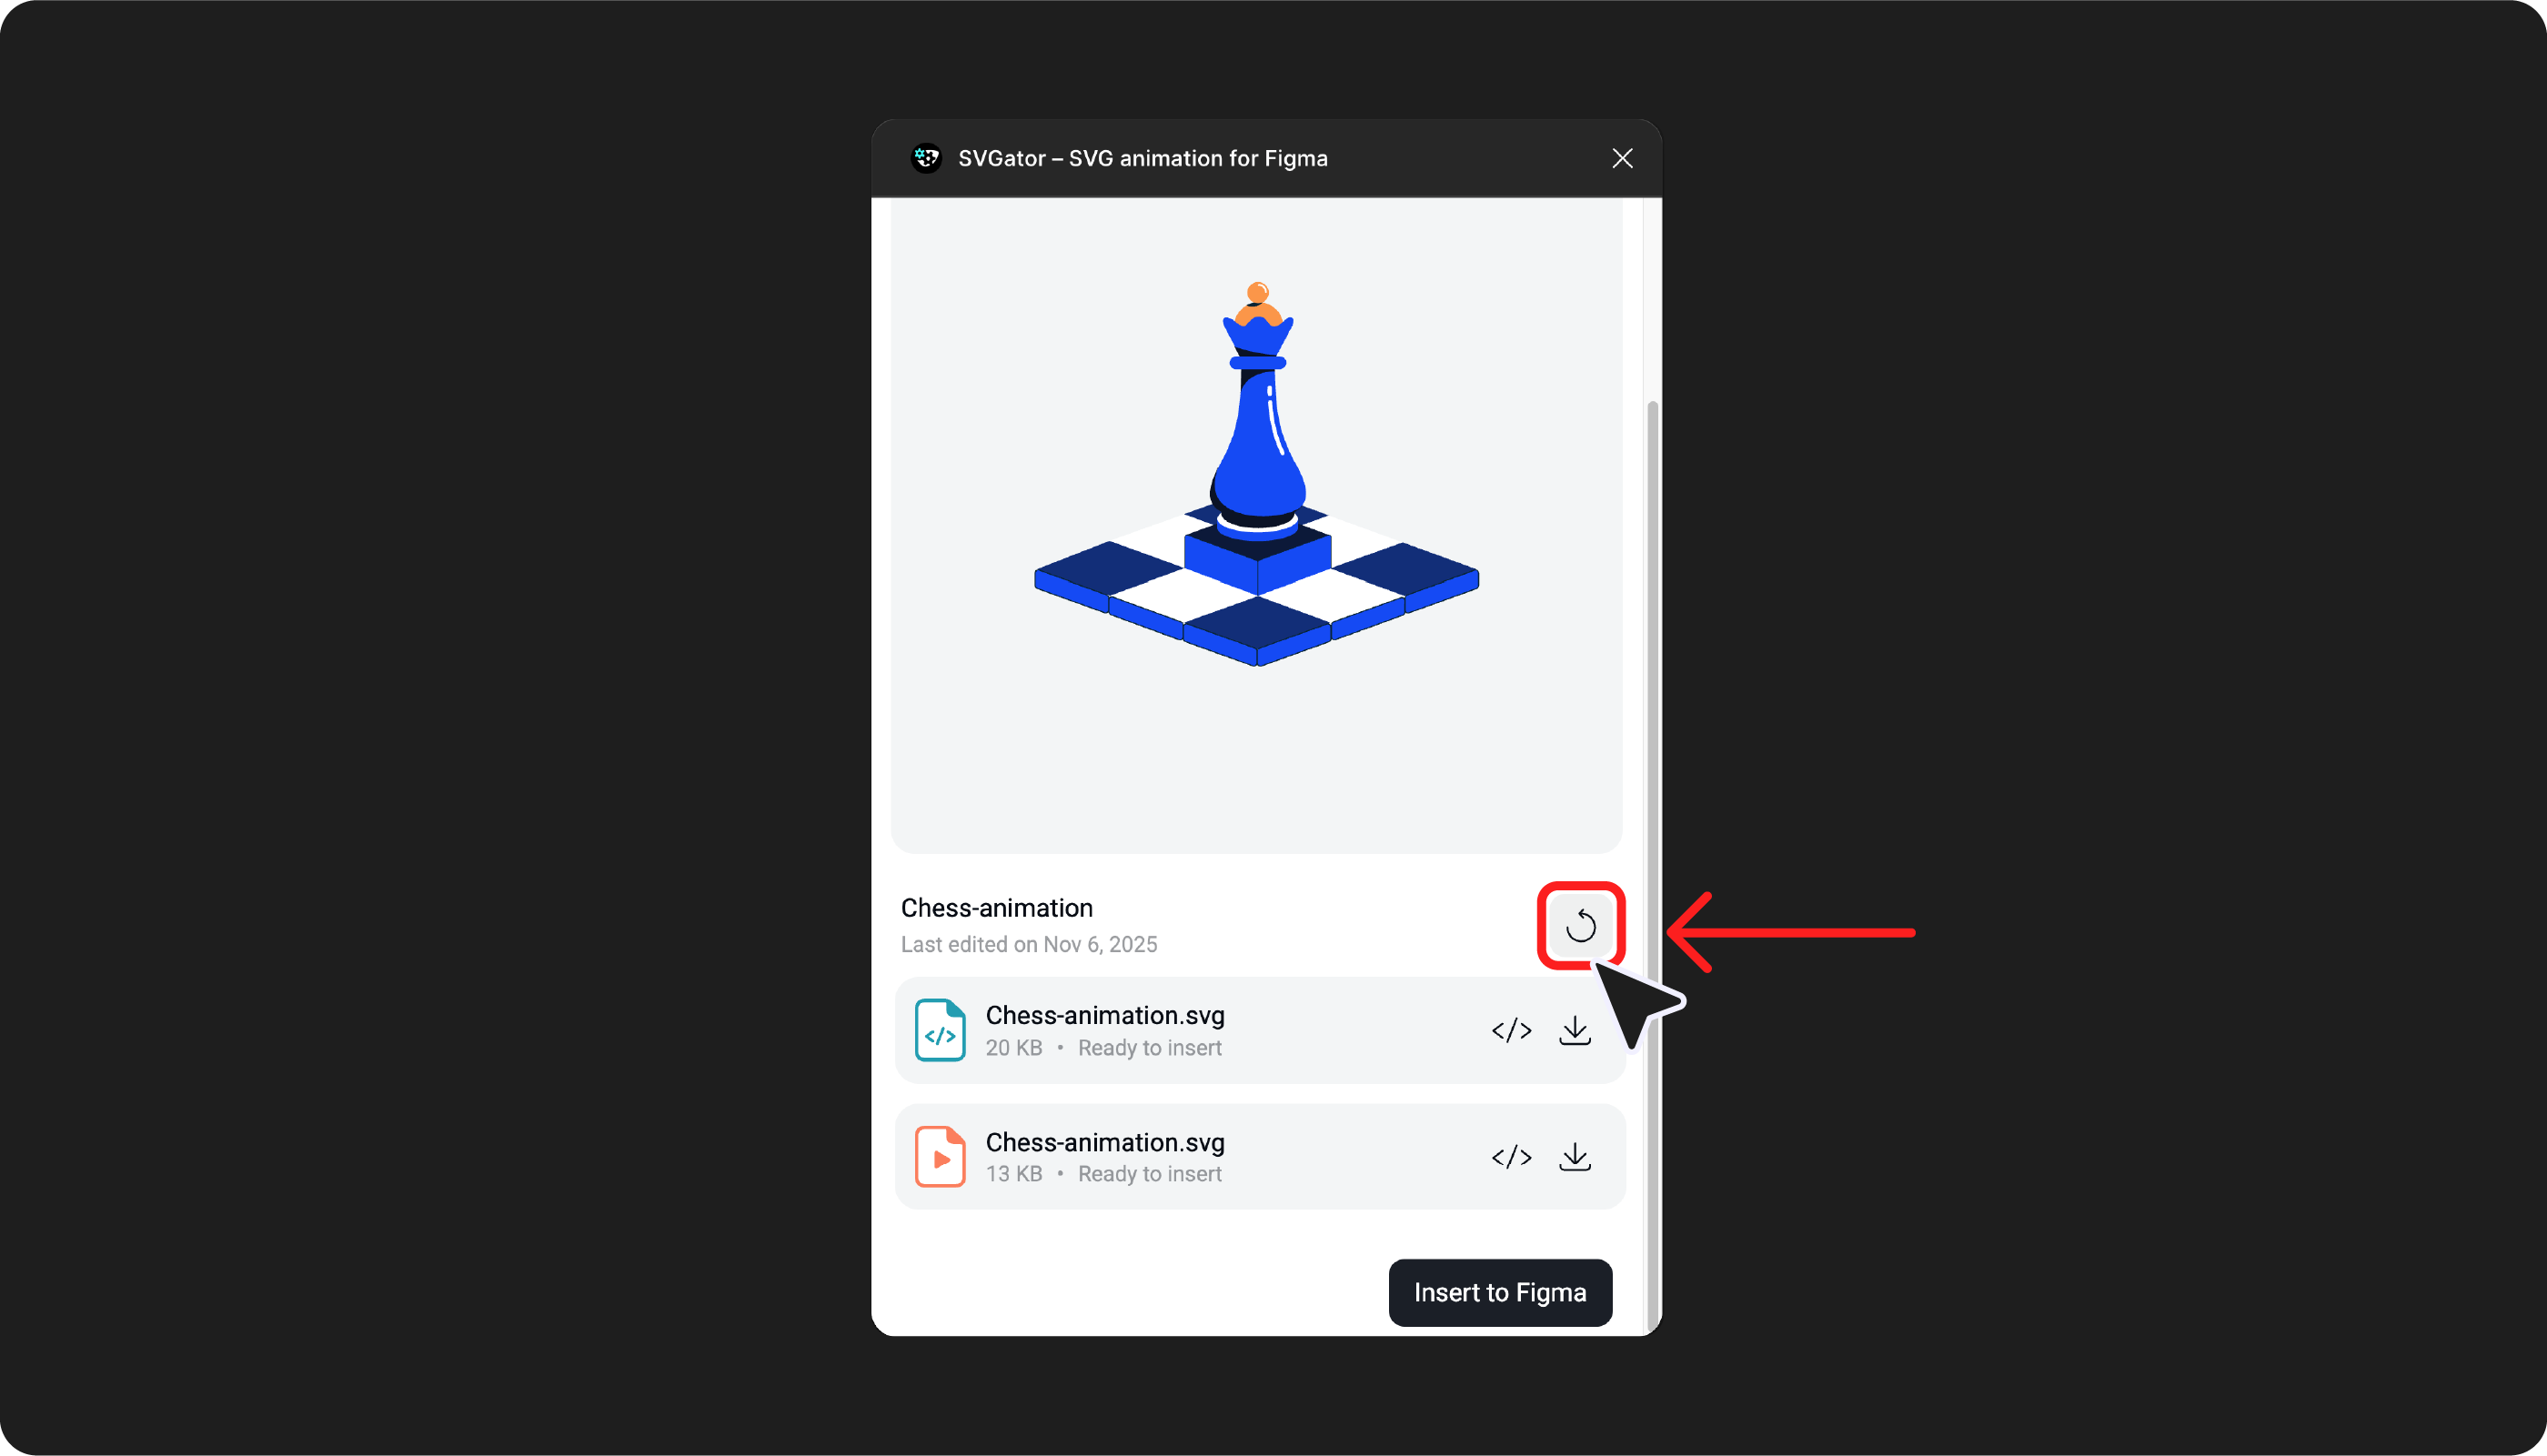
Note: Whenever you make changes to the project in SVGator’s editor or adjust the export settings, be sure to click the Refresh button.
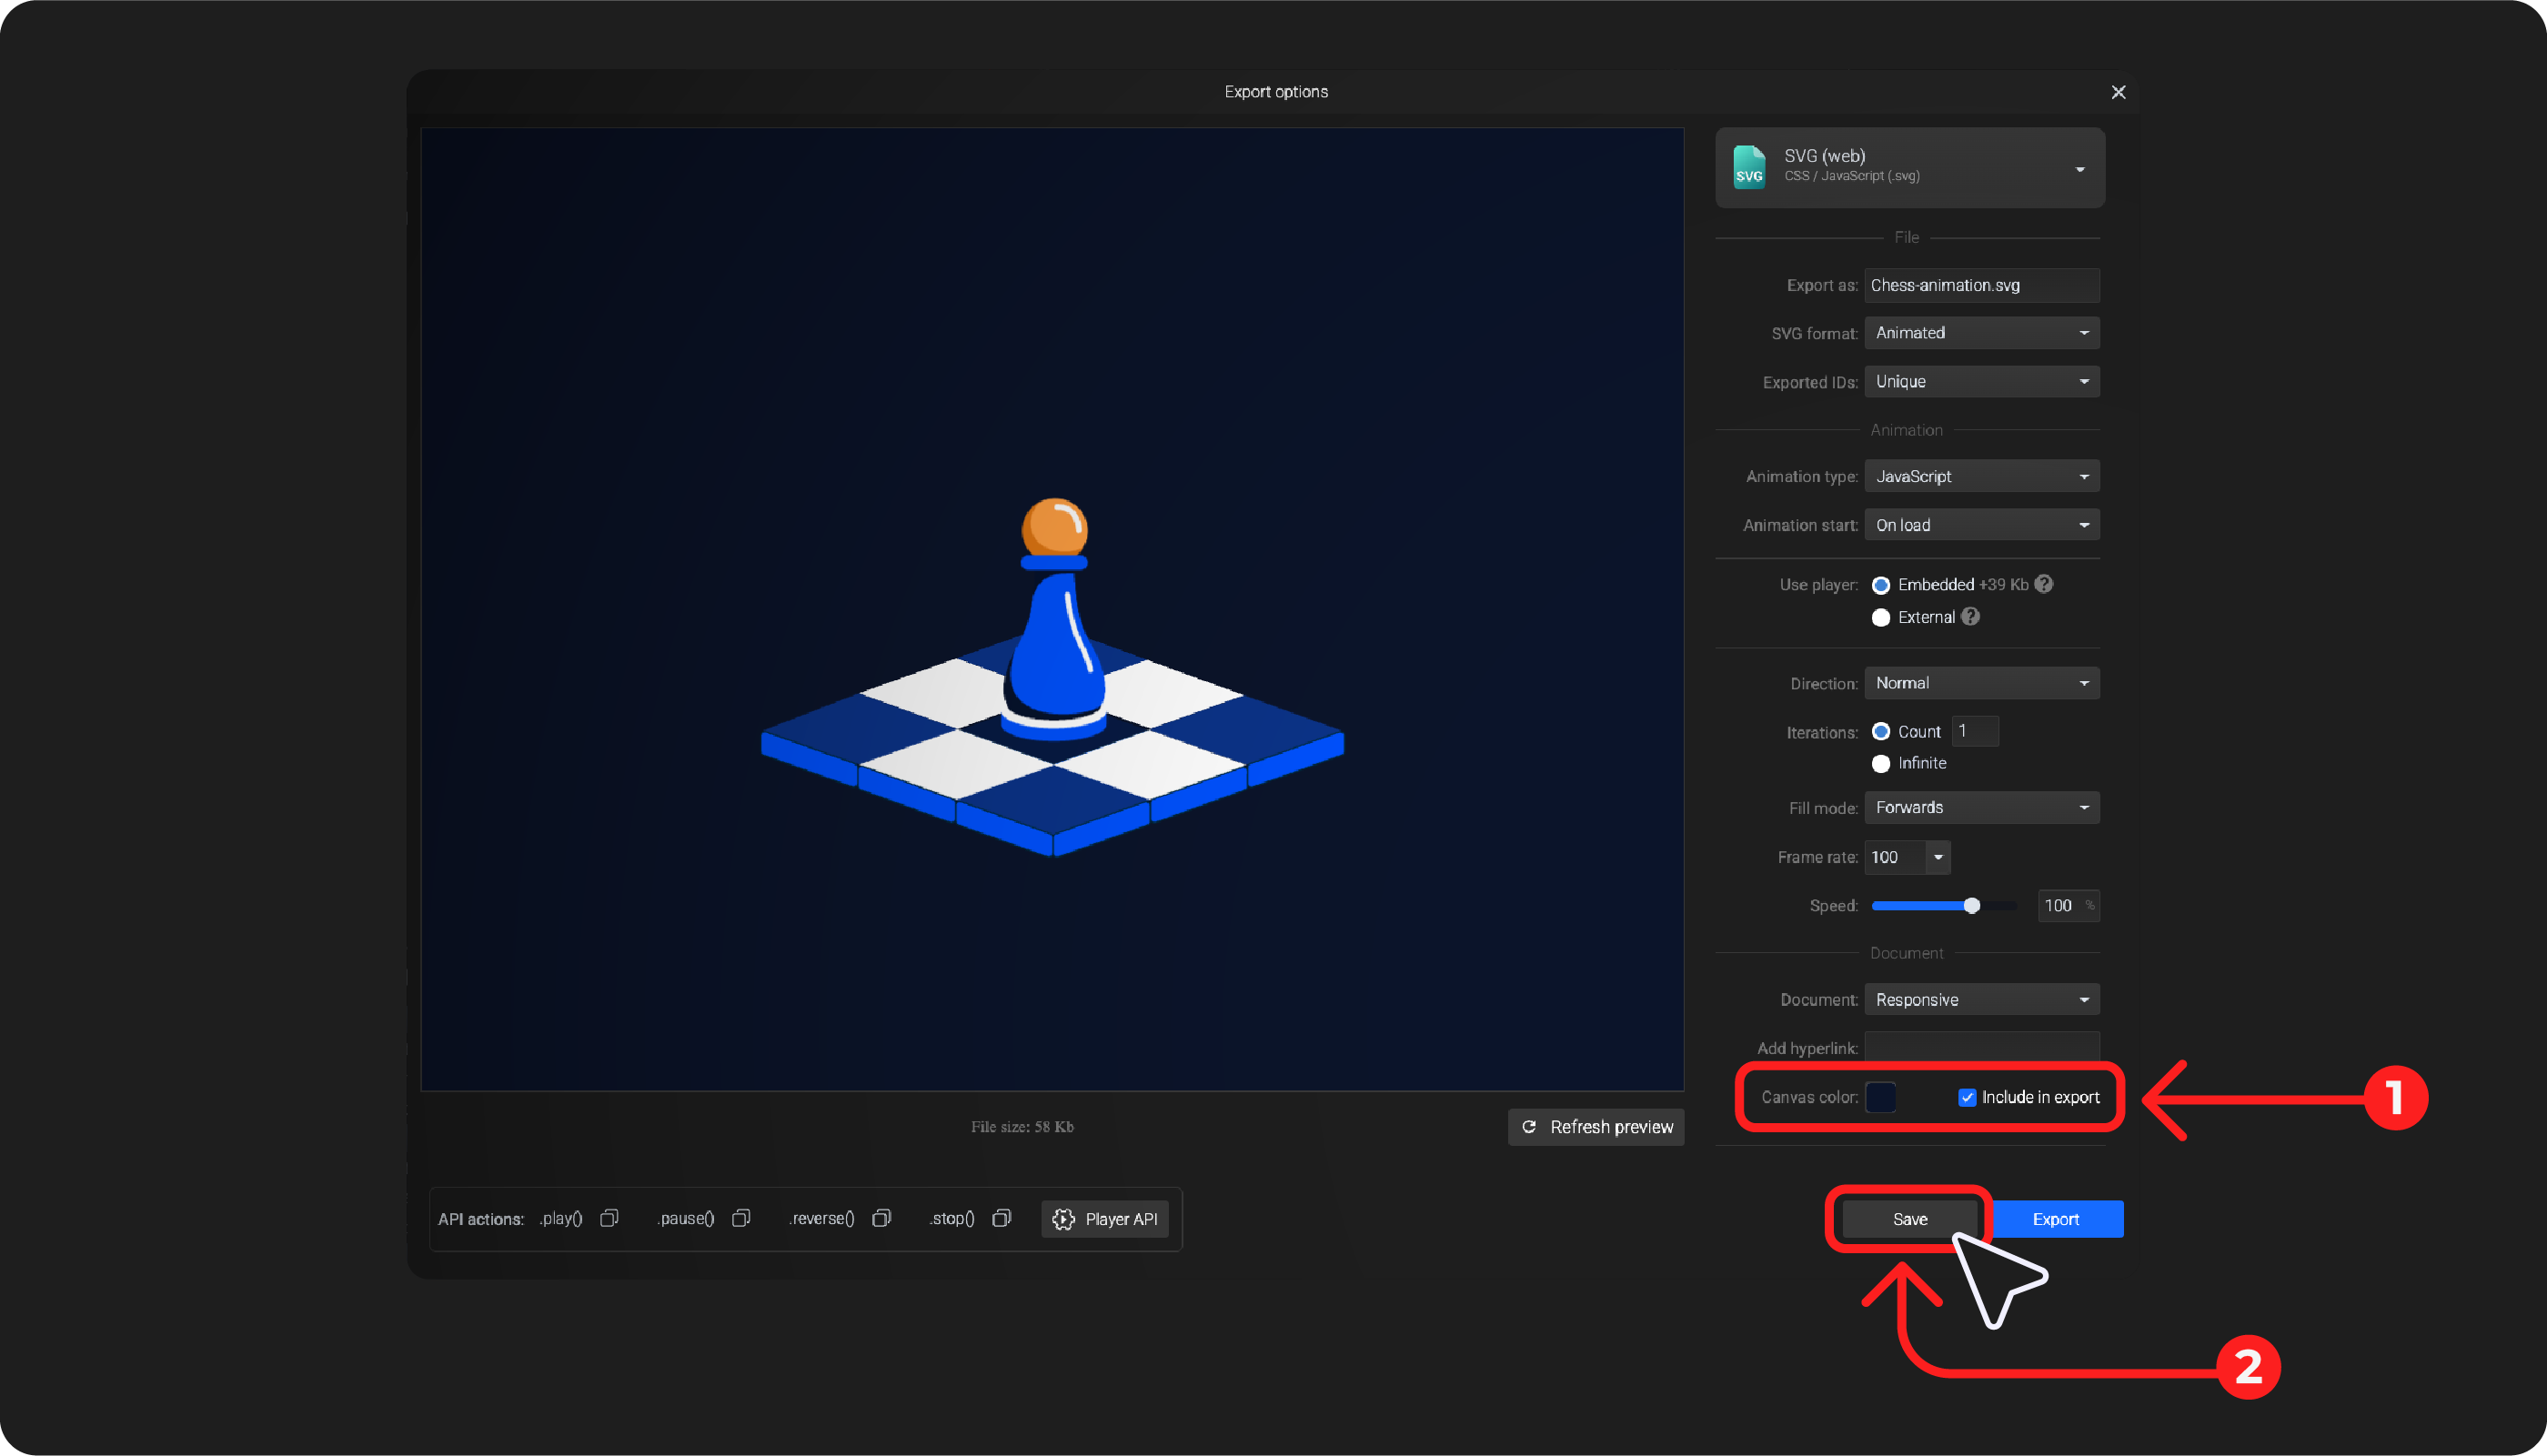
Note: If you update the canvas color and want it included in the export, remember to enable Include in export for the canvas color in the Export options.
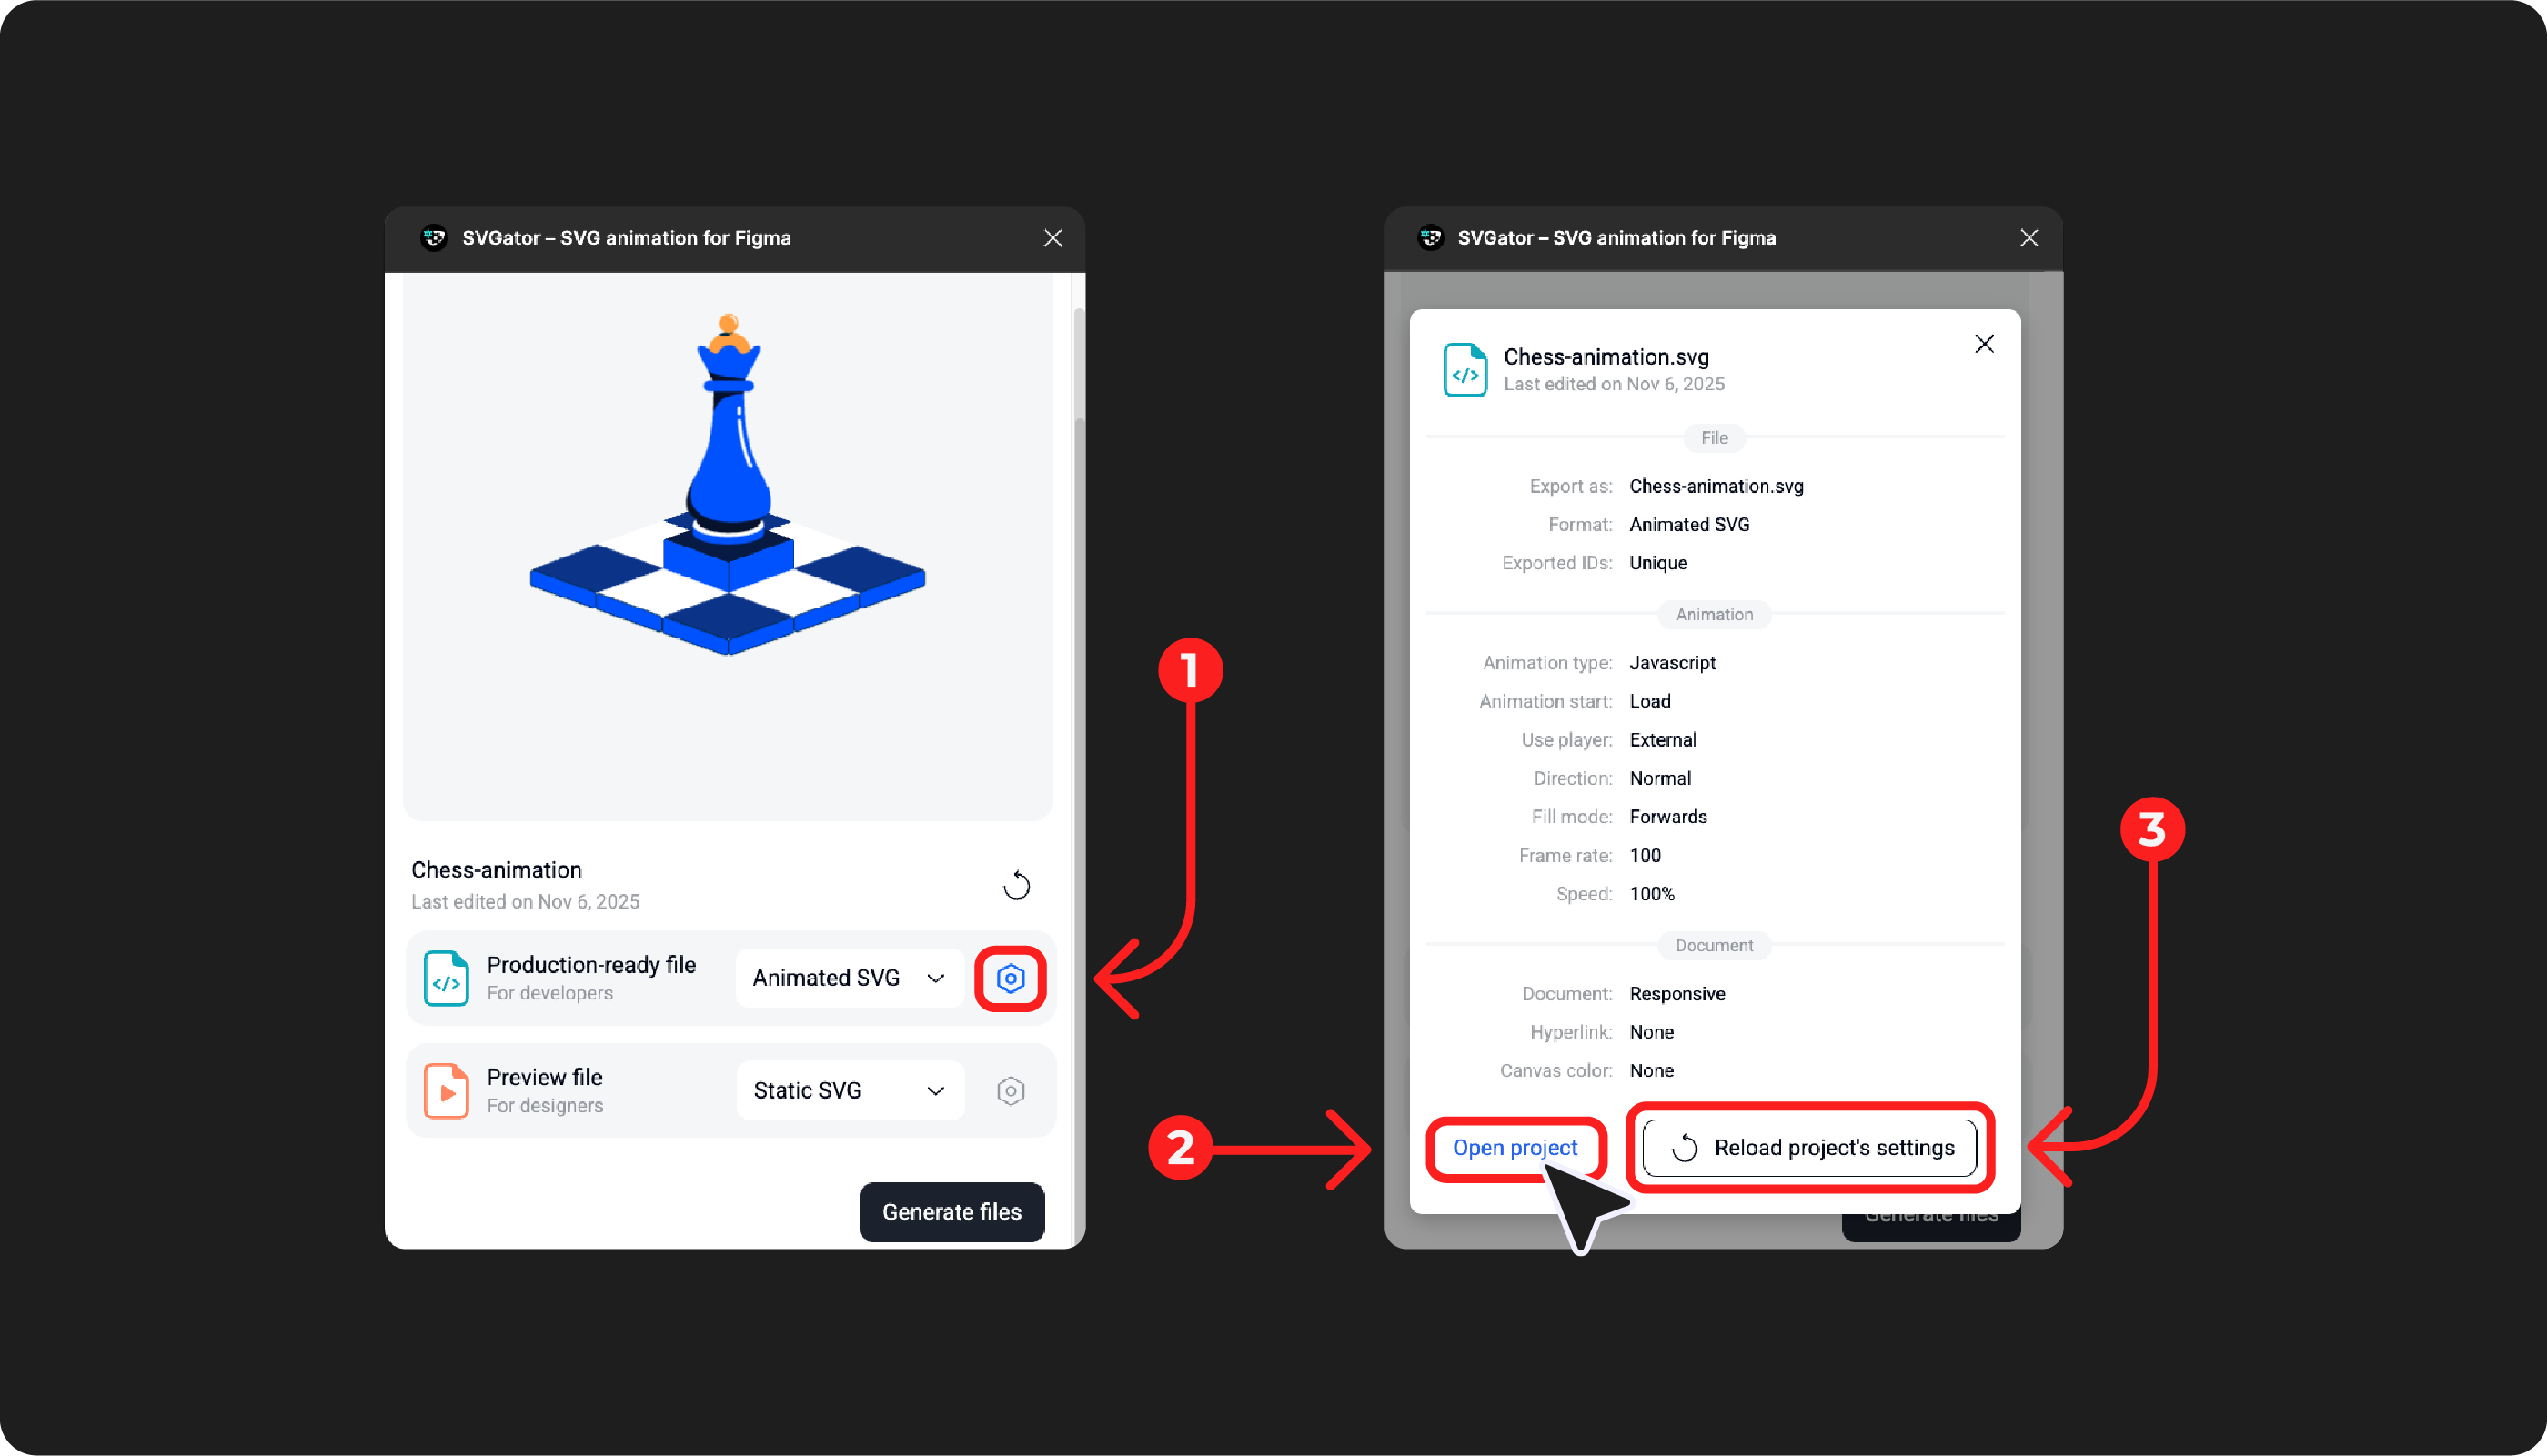
By using the gear icon for both the Production-ready file and the Preview file, you can view the current export settings of the selected project for each export format.
From there, you can access the Open project button to modify the animation in SVGator or adjust the Export settings. After making any changes, you can refresh the export options by clicking the Reload project’s settings button.
Note: Always make sure to click the Save button after editing the Export settings in SVGator so that the changes are detected by the plugin.
Note: The production-ready file is updated instantly. However, there may be a delay of about 10–15 seconds between making changes in SVGator’s editor and seeing those changes reflected in the thumbnail image in the plugin. This is normal system behavior.