
Let's take off today with an animated rocket that you can use as an illustration, logo, icon, loader, or at any other project. It can also be used if you offer the fastest WordPress hosting or cloud hosting, for example, which will show the speed.
In this article, we will show you how to create the perfect animated rocket ship in SVGator.
Table of Contents:
Many students use web animation and add interactive elements when making presentations or other projects. Animation software makes the study process much more effective.
What you will learn:
- How to set up keyframes on the timeline in SVGator
- How to create a morphing effect
- How to use the easing settings for smooth animation effects
- How to export your animated rocket ship for the web and for mobile apps
- How to make your animation load on mouse over
Taking off... 🚀
All you have to do is download the rocket SVG file provided and follow the steps below. If you’d prefer to create your own rocket launch animation, you can also draw your own visuals from scratch in SVGator.
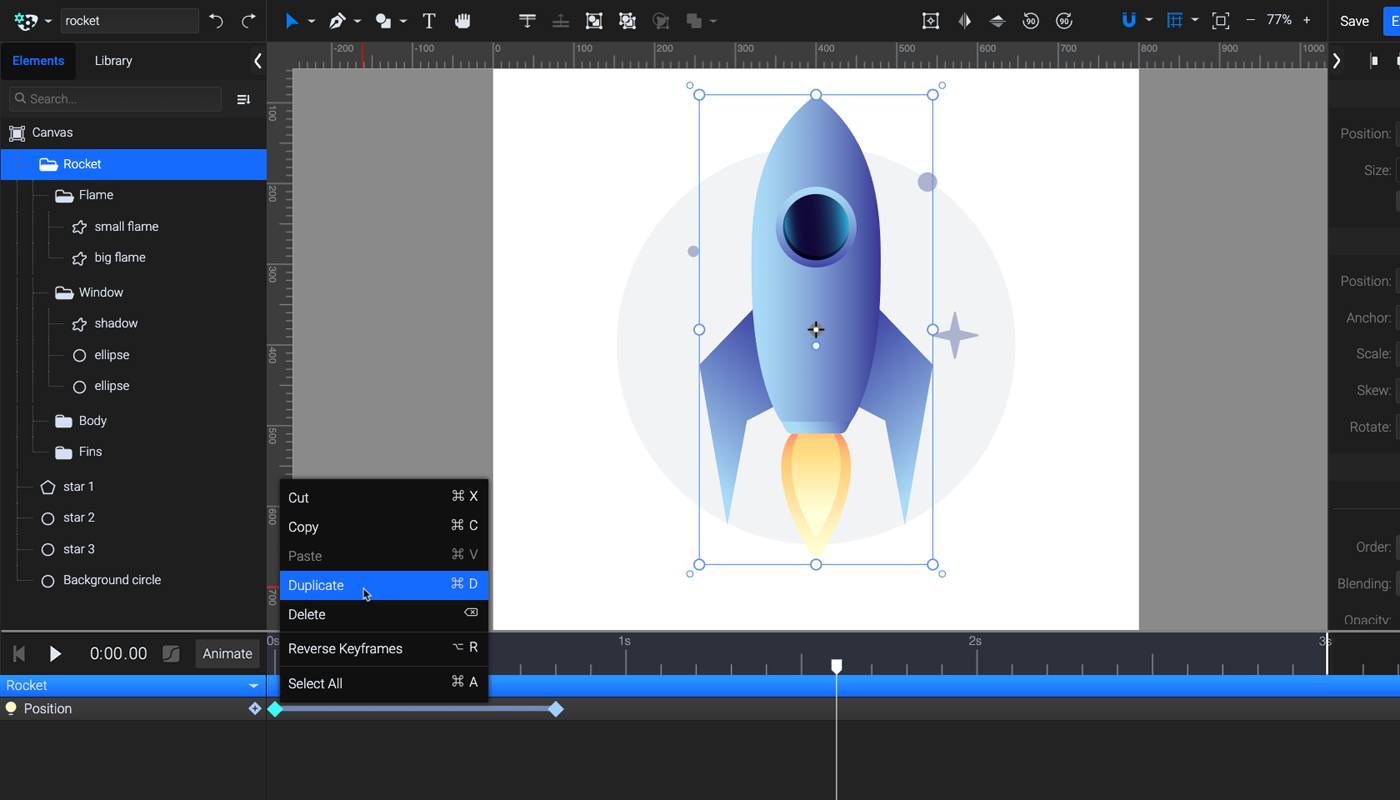
Step 1. Moving the rocket SVG
Import the rocket ship SVG to SVGator. Select the Rocket group, click on the Animate button, and choose Position. This will add a position keyframe to the beginning of the timeline.

Move the playhead to 0.8 seconds, and move the rocket slightly upward. You can use the arrow keys: holding down Shift while pressing the arrow keys will move the rocket ten units instead of one.

Move the playhead to 1.6 seconds, right-click the first keyframe, and choose duplicate (Ctrl+D).
Change the duration from the default 3 seconds to 1.6 seconds by dragging the white duration mark or writing the new duration in the tooltip that appears on hover.

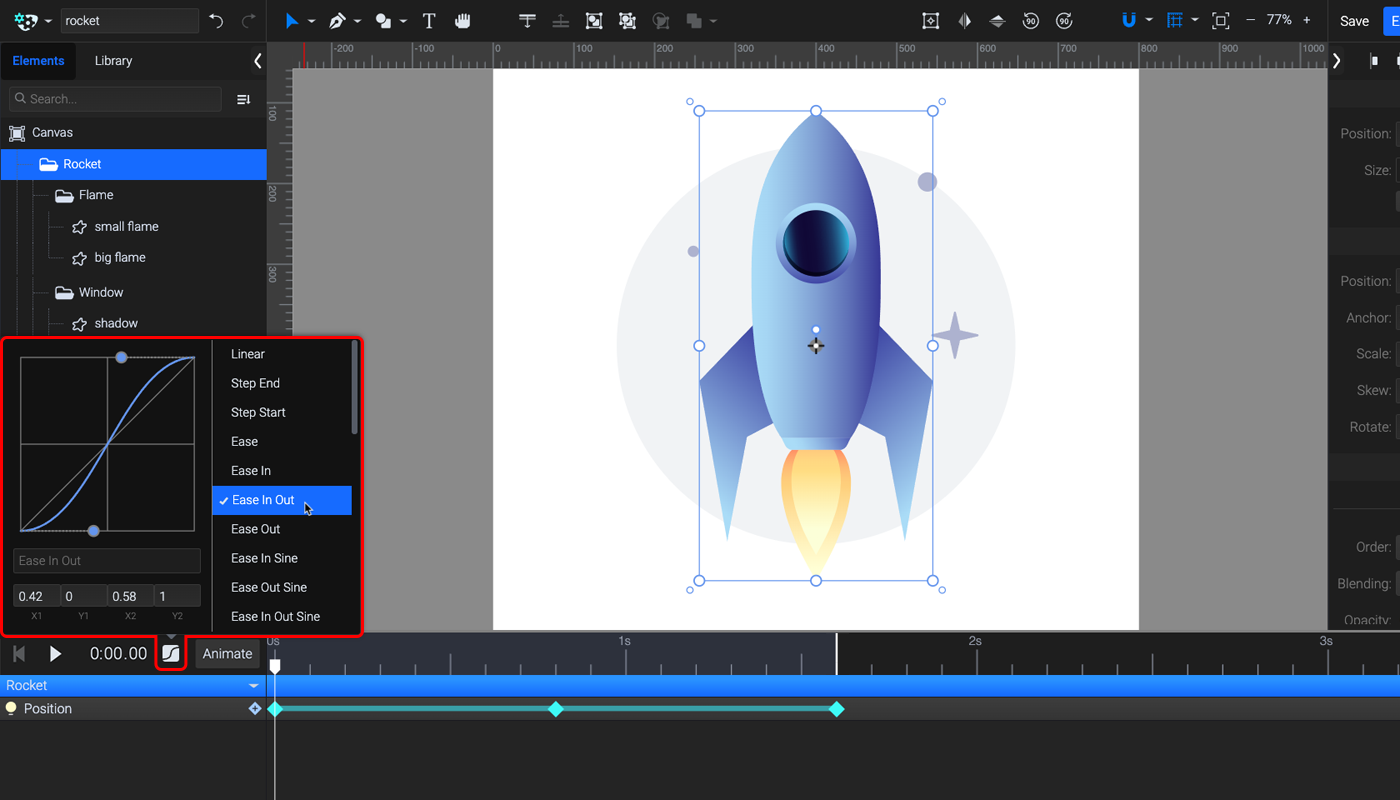
Preview your rocket animation by pressing Space on the keyboard or the Play button next to the time indicator. To make the animation look more natural and smooth, let’s add easing.
Select all the keyframes, open the Easing panel, and choose Ease In Out.
Step 2. Animating the flame
We will use the Morph animator to animate the flames. The good thing is that we can animate both at the same time. We’ll also enable the grid to keep things symmetrical.
First, enable the Front Grid and Snap to Grid.

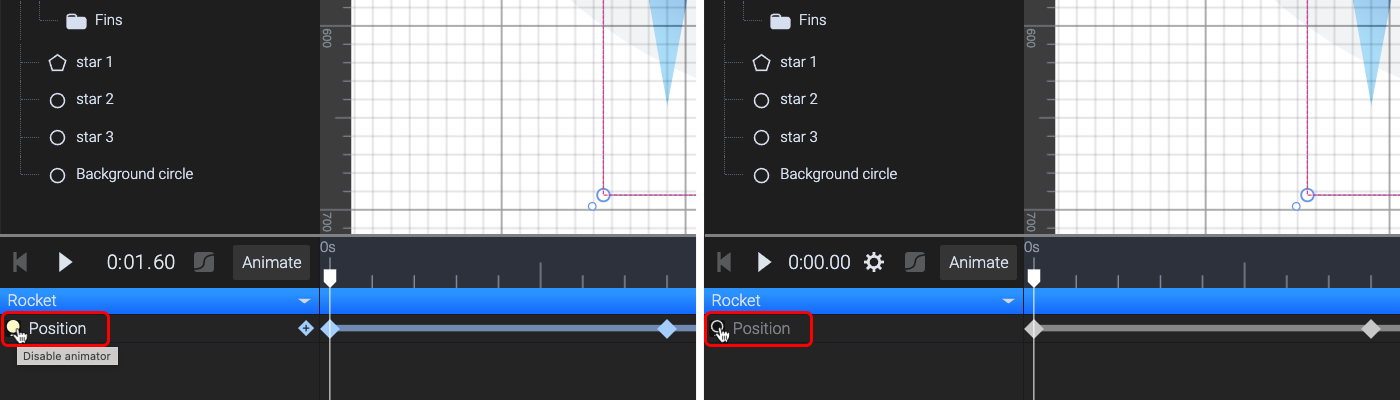
Next, make sure the playhead is at the beginning of the timeline, and disable the Position animator temporarily by clicking on the lightbulb icon. This will make animation easier.
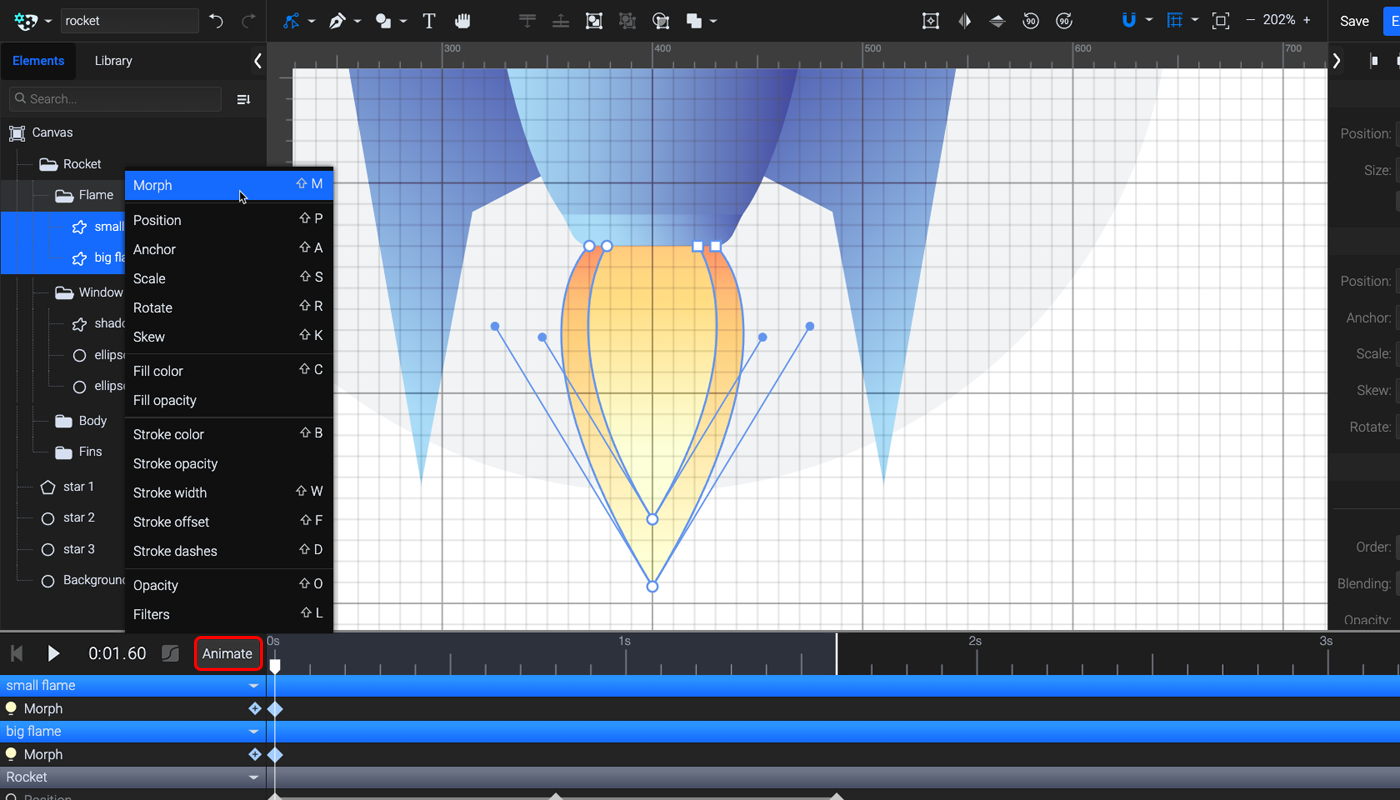
With the Node tool (A) active, select the two flame paths in the stage, press animate, and choose Morph.
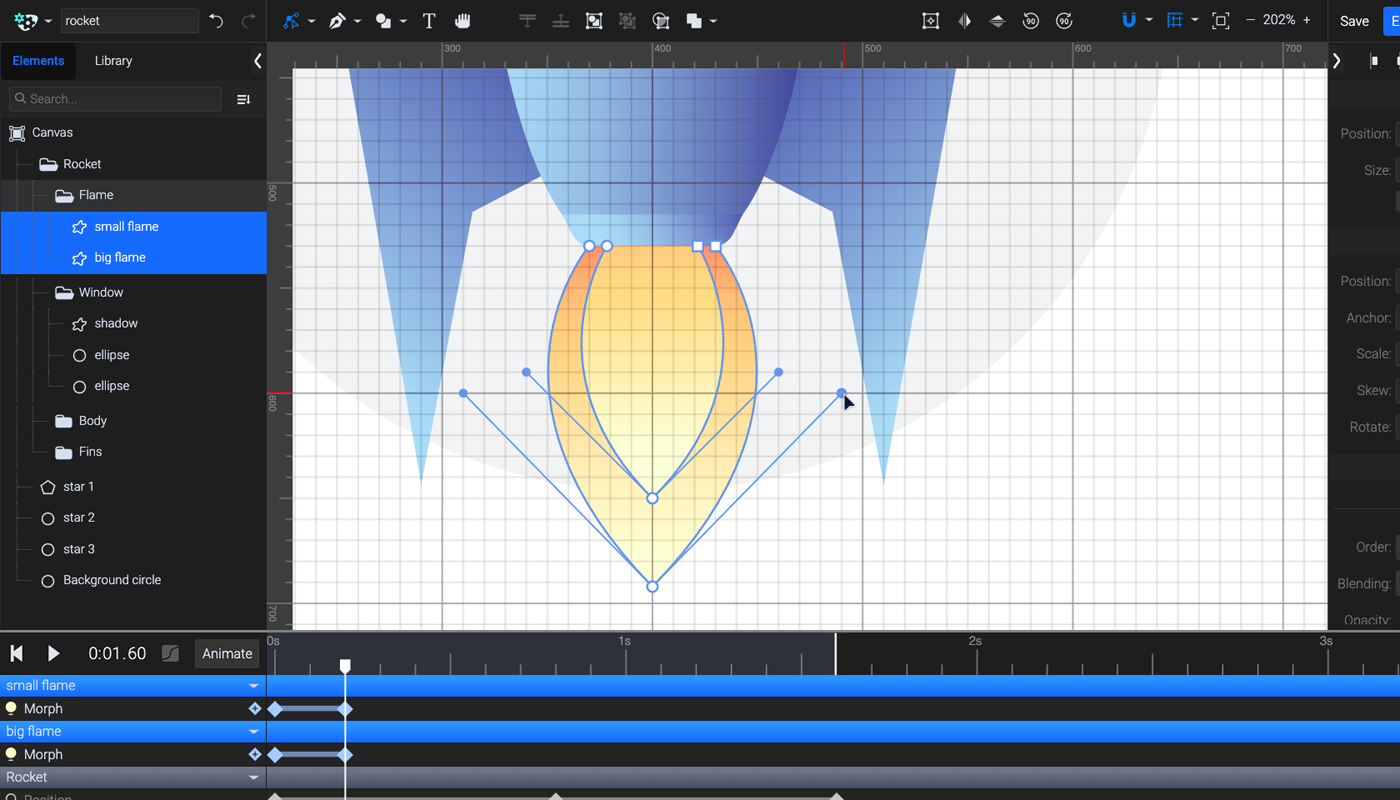
Move the playhead forward two units, and change the shape of the flame by moving the nodes and handles. The grid will help to match the two sides.
Move the playhead forward again, select the first keyframes from both paths, and duplicate them by pressing Ctrl/Cmd+D.

Select all three Morph keyframes on both paths, and duplicate them three more times to fill the timeline.
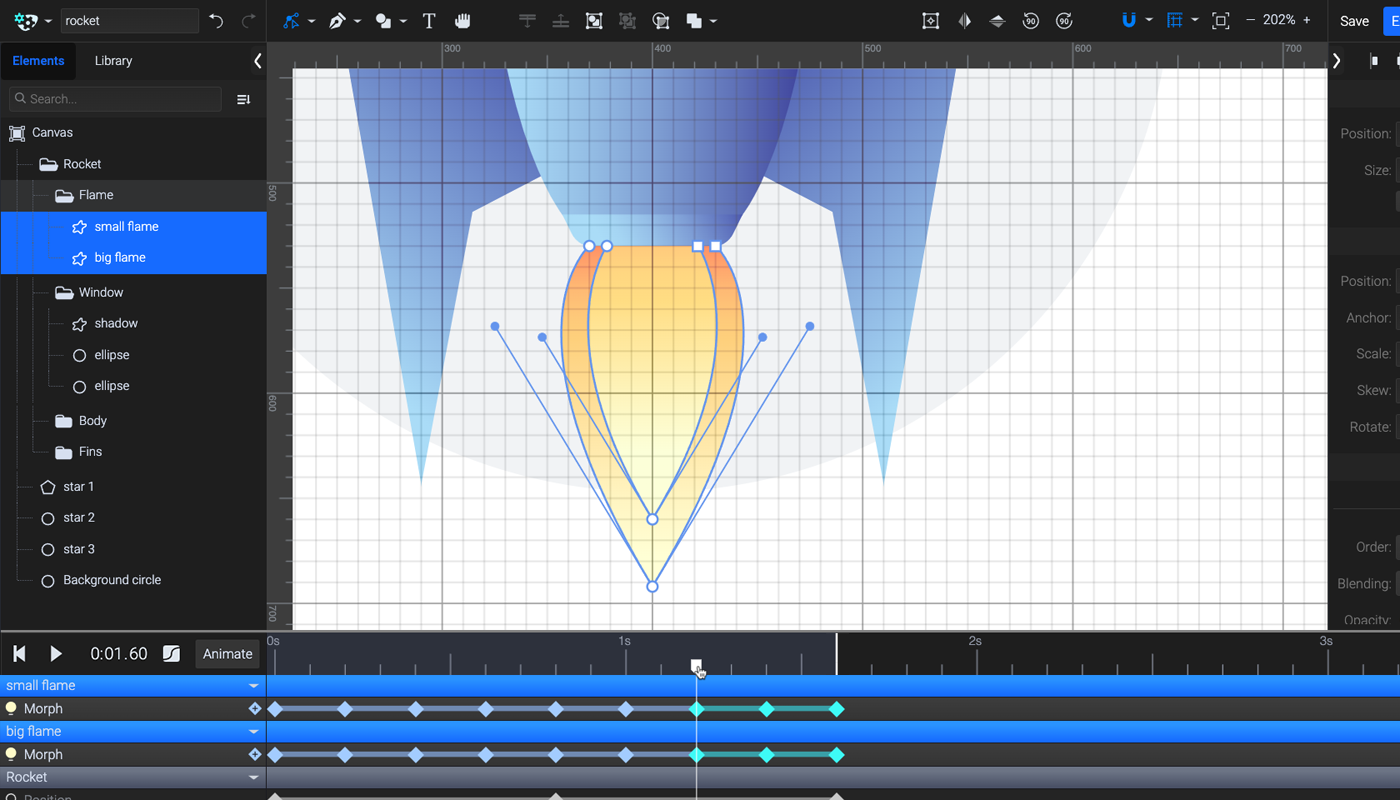
If you want, you can change the flame paths in the middle keyframes to add more variety to the flame animation, but make sure the first and last frames are exactly the same so that the final animation can loop seamlessly.
Re-enable the position animator we added in the previous step, and preview your animation.
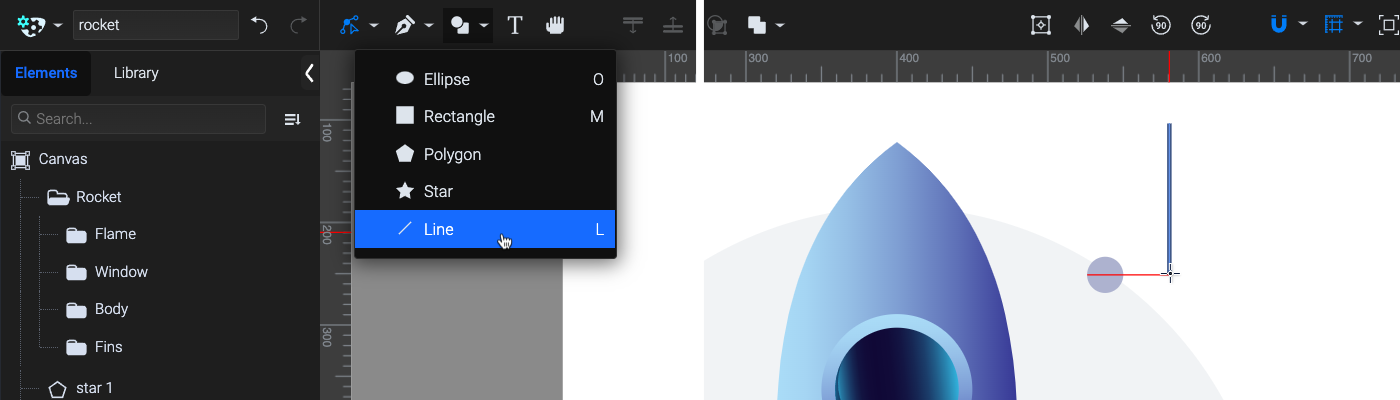
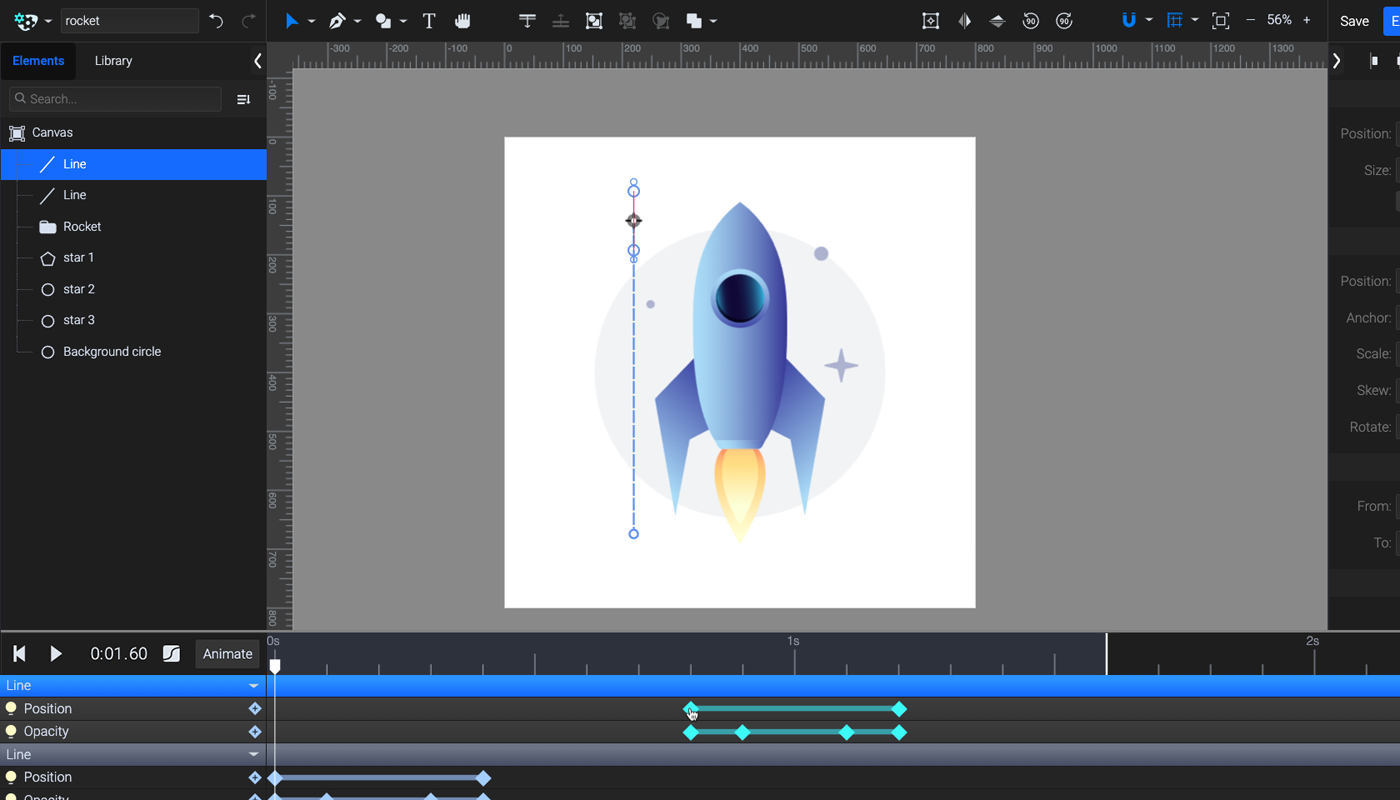
Step 3. Animating speedlines
We’ll start with adding some speed-lines. You can disable Snap to Grid and Front Grid for this part. All of the stars and speedlines will use the same animation with slight variations.
Choose the Line tool (L) from the Shapes panel, and draw a vertical line on the top part of the stage next to the rocket.
In the Appearance section of the right panel, change the line thickness to 6 px and the Line ends to Round.
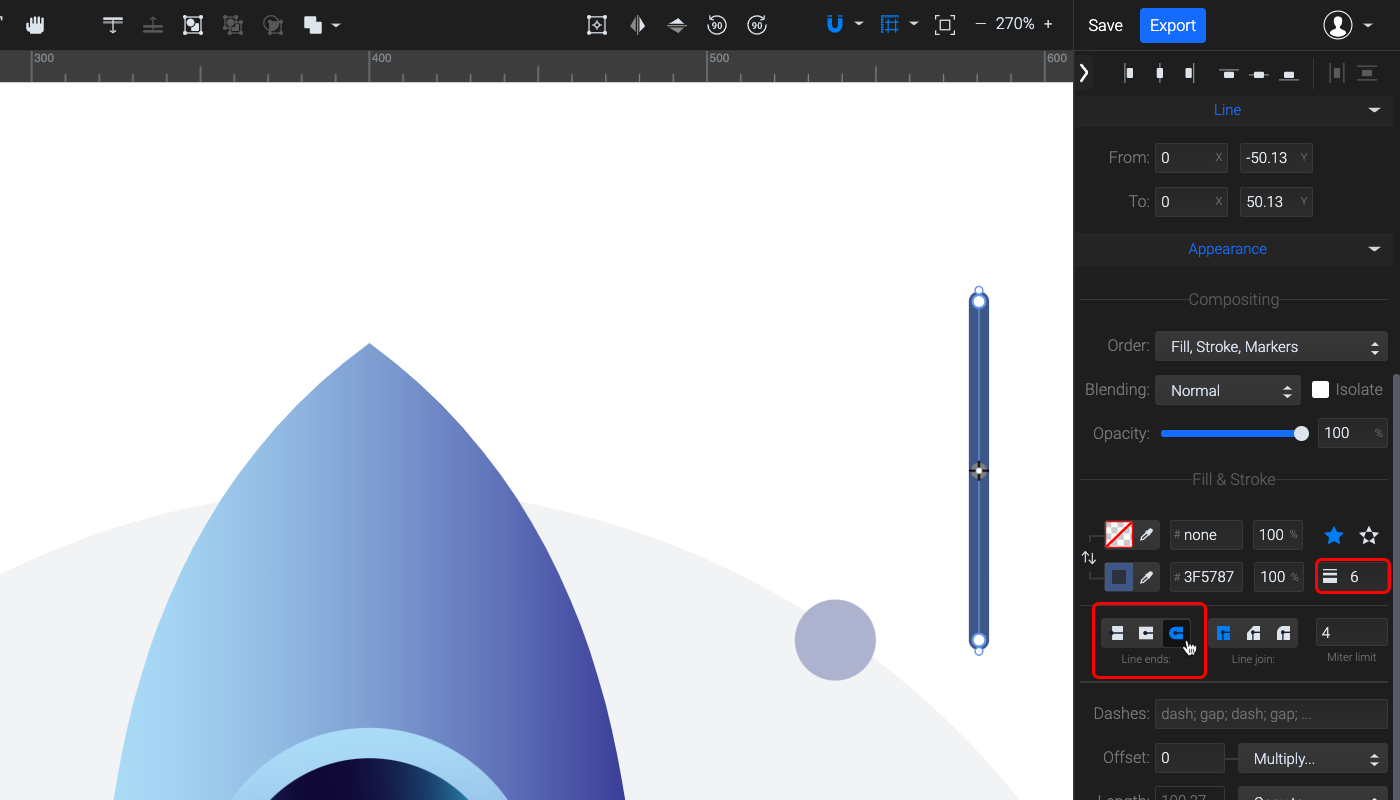
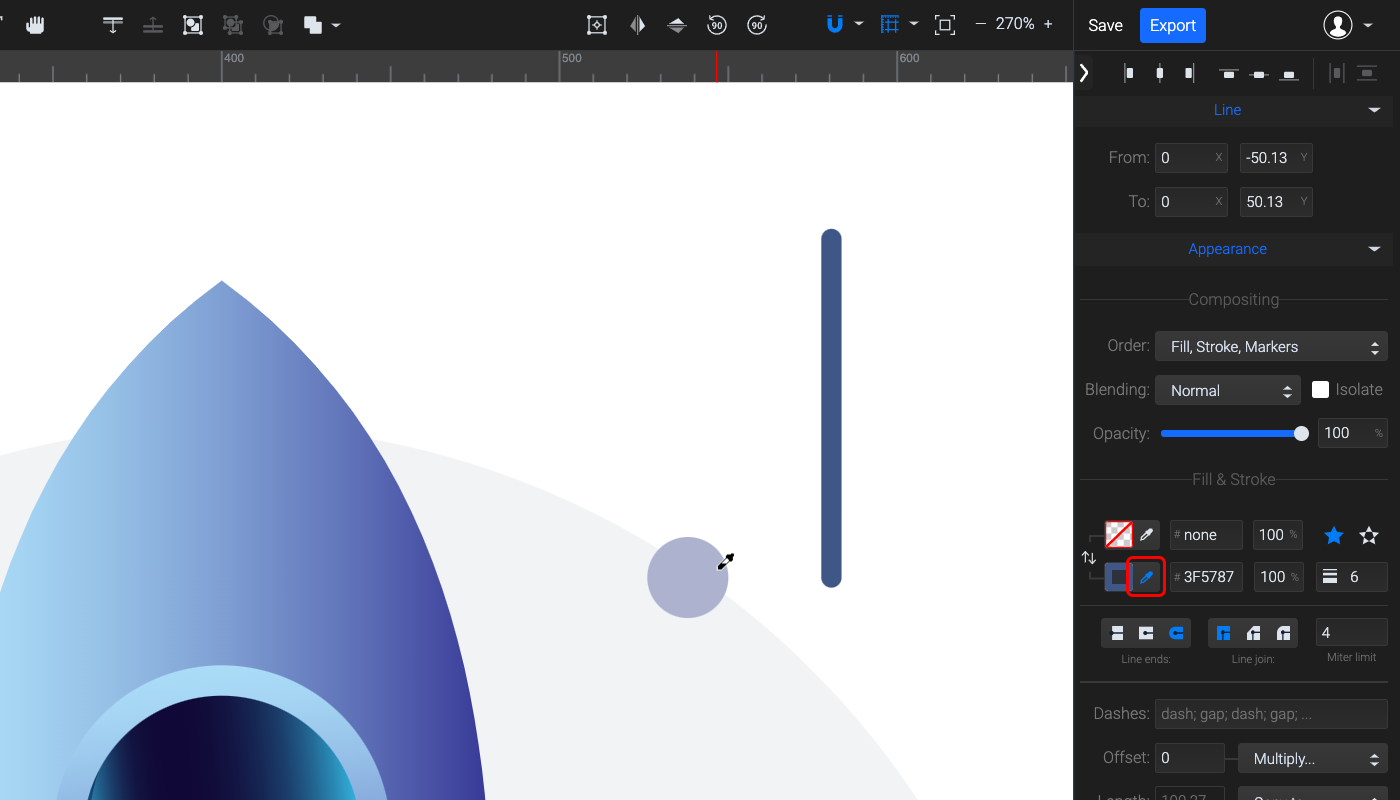
Make the stroke the same color as the stars. Click on the Color picker tool next to the stroke color, and sample one of the stars.
Add a position animator, move the playhead four units forward, and then move the line to the bottom of the stage. Hold down Shift while dragging, to constrain it to a straight vertical line.
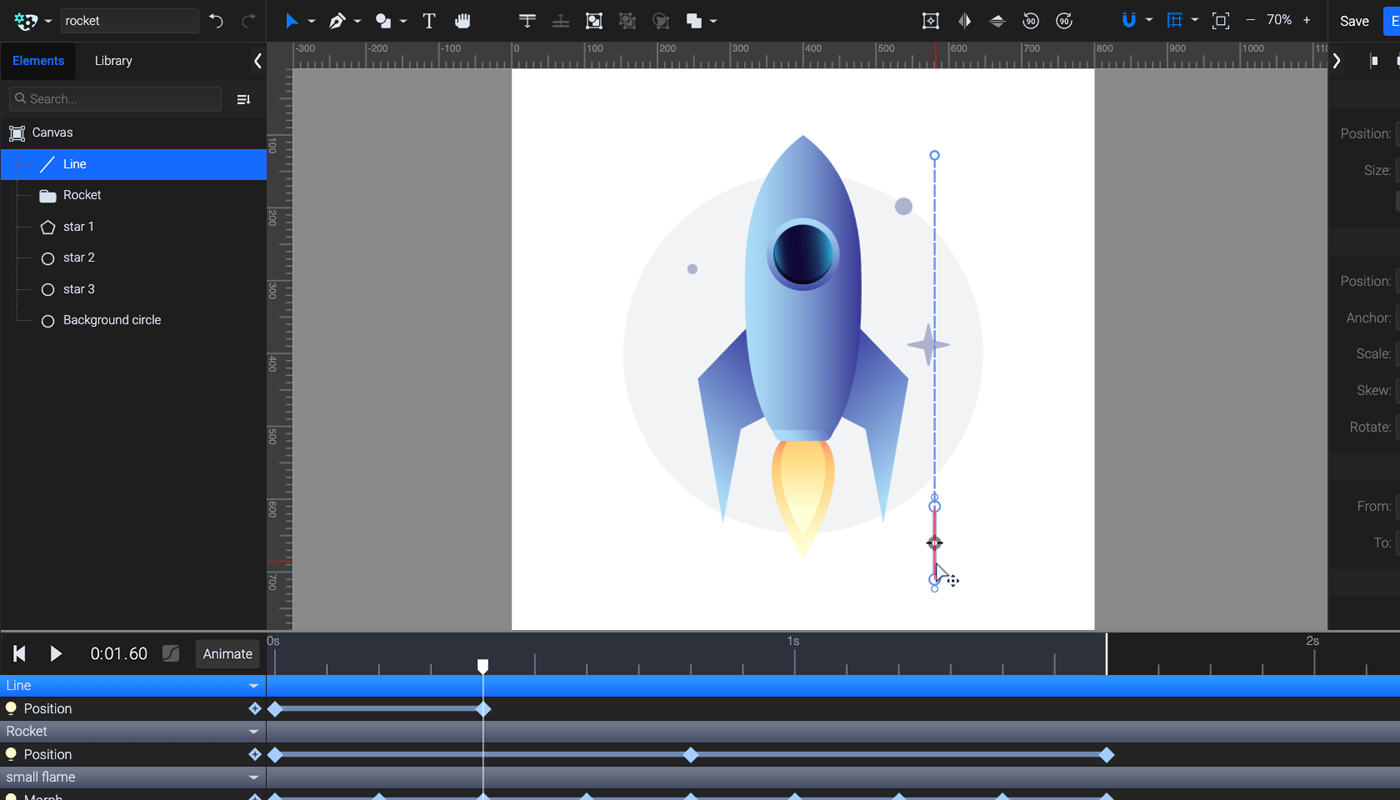
Move the playhead to 0.1 seconds, and add an opacity animator.
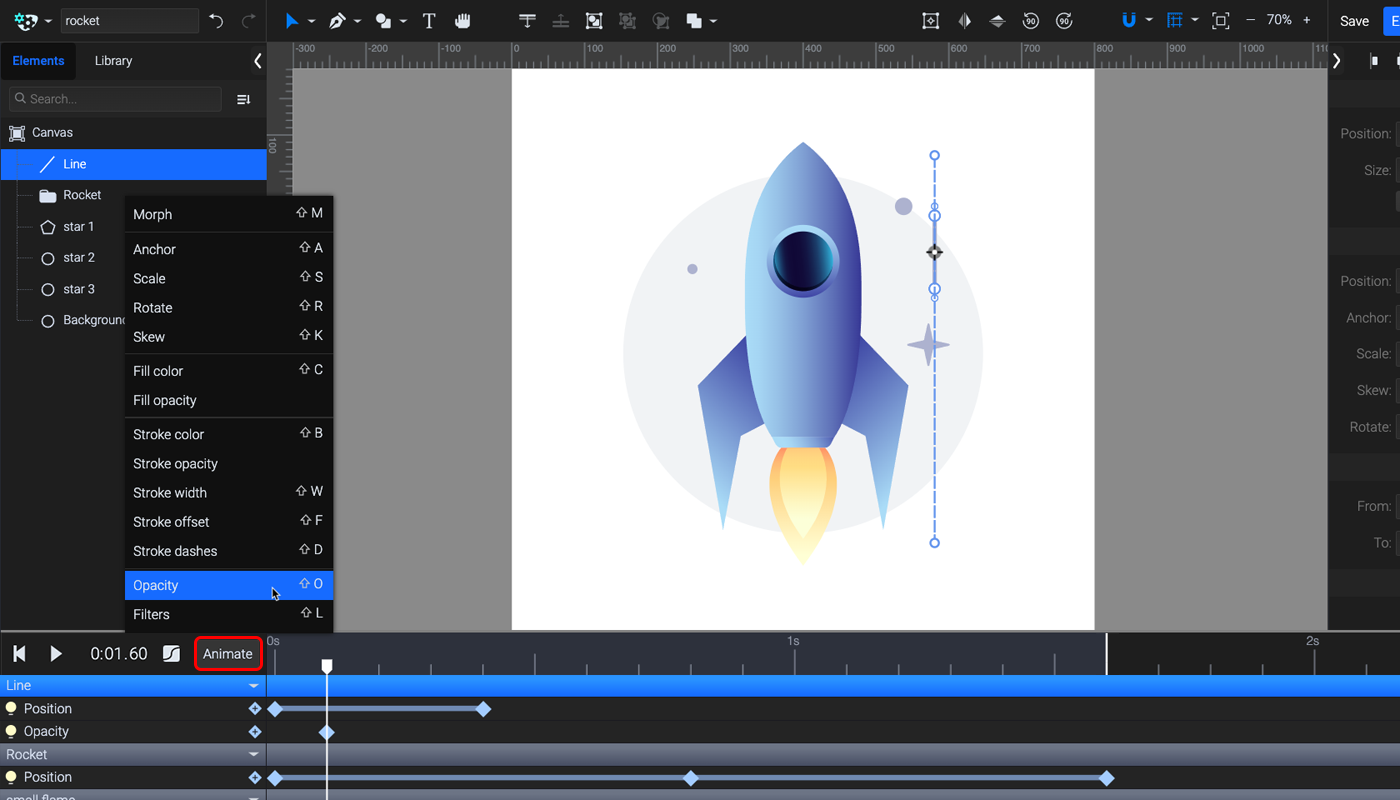
After moving the playhead two units forward, press the Add keyframe button next to the Opacity animator. This will be the part where the speedline will be visible.
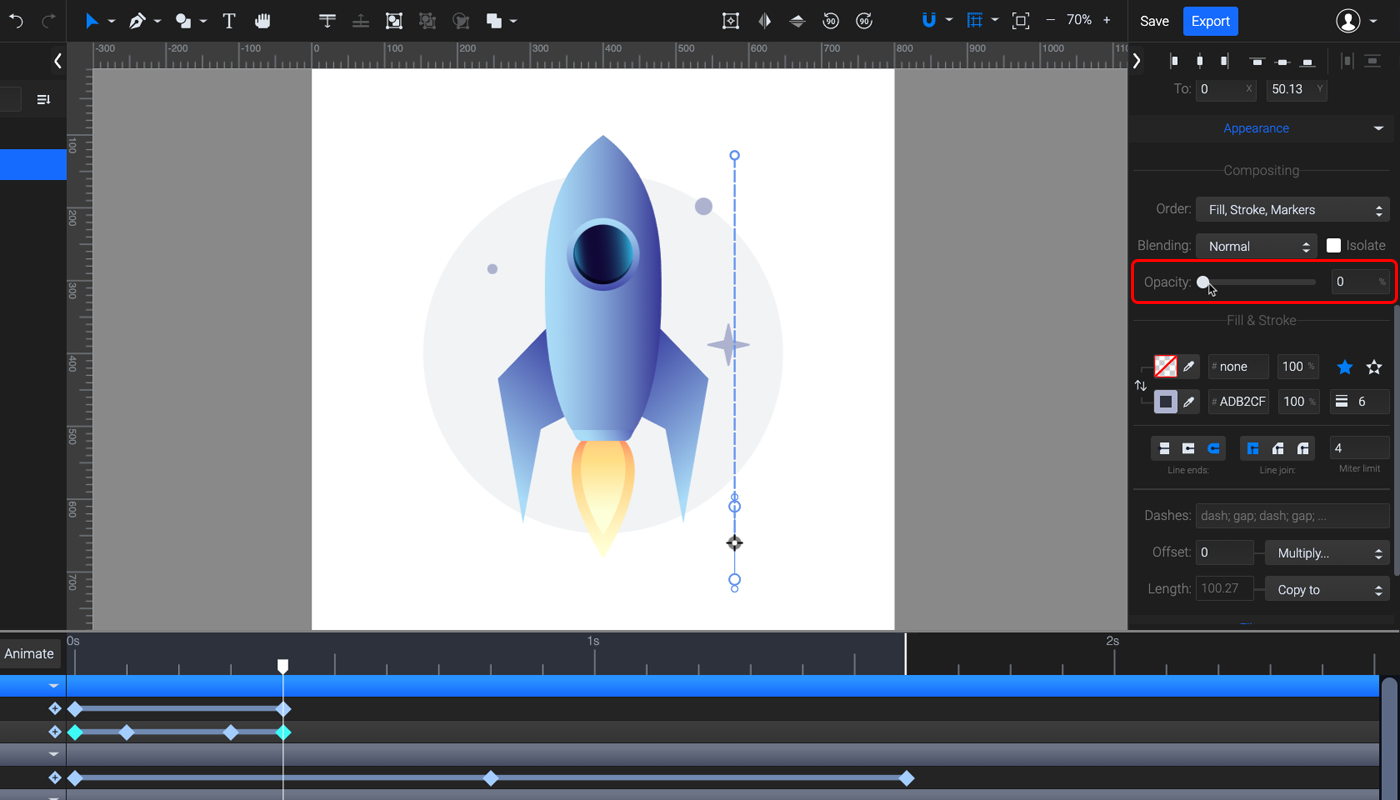
At the starting position and end position, change the Opacity to 0% in the right panel.
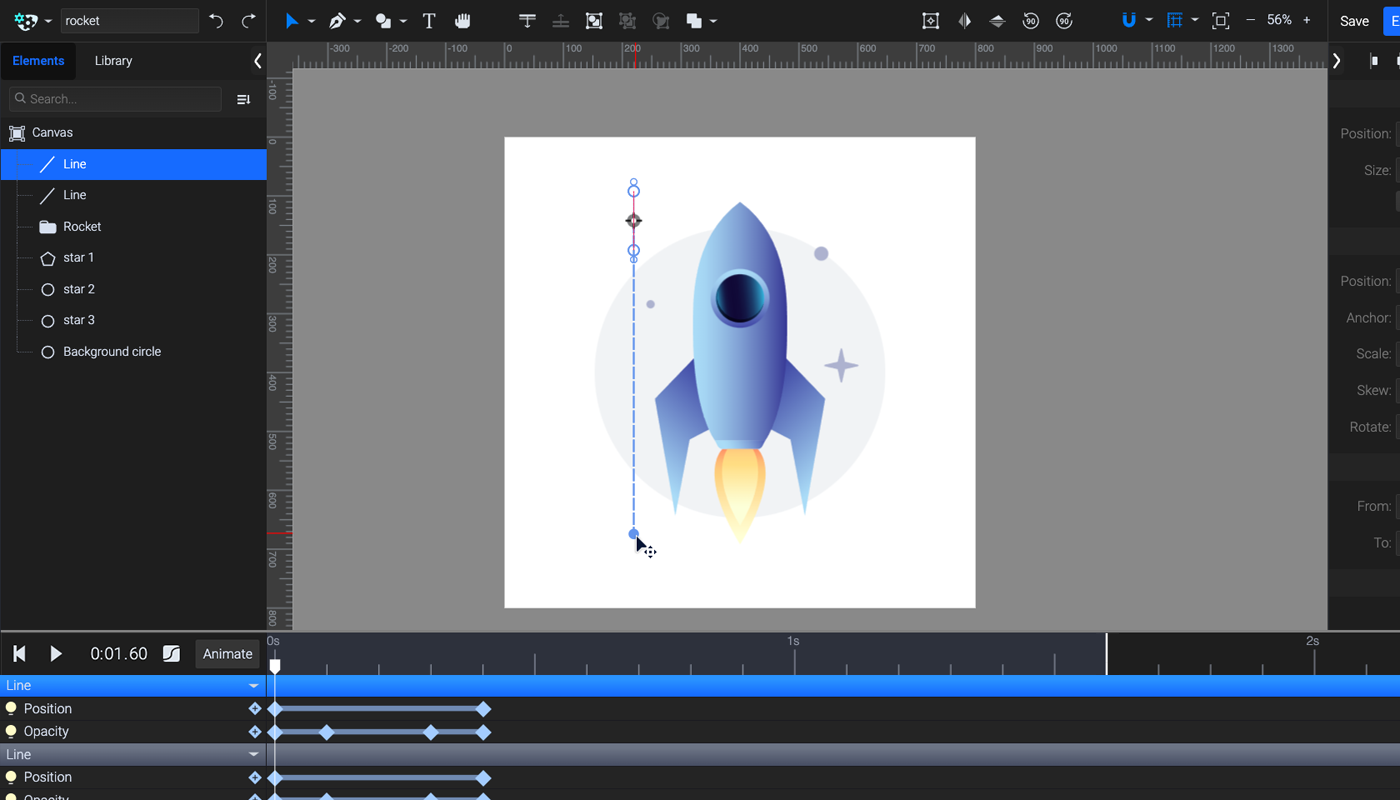
To make another speed line on the other side, copy and paste the line in the elements panel. The animation will also be copied along with the element.
The line needs to be moved to the other side of the rocket, but if you drag it directly, notice that your position animator is affected.
To move the line without affecting the Position animation on it, shift+drag one of the points of the motion path, and this will move the motion path along with the element.
Select all keyframes and drag them forwardtep to offset the animation in time.
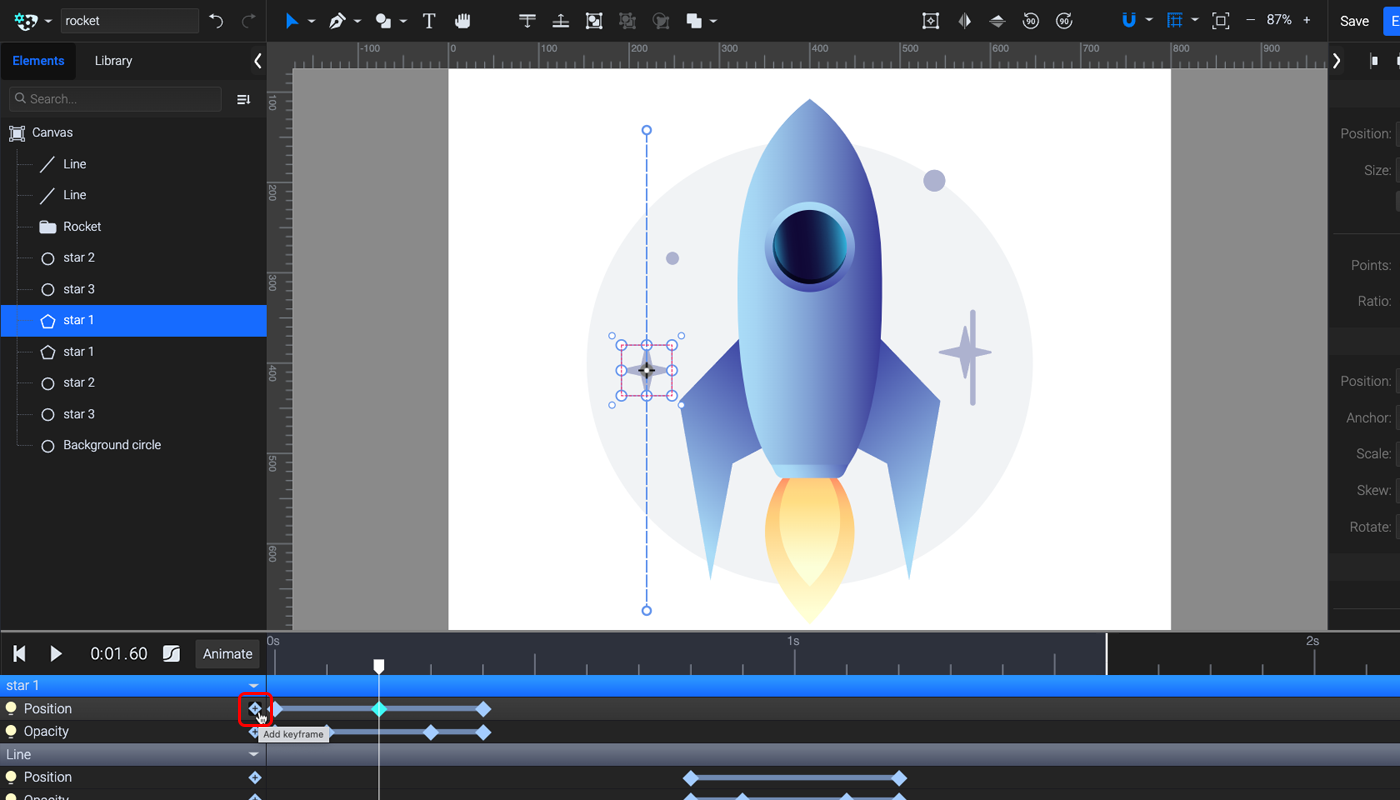
Step 4. Looping the stars
The stars will use the exact same animation as the speedlines, but the animation will have to be split to make them loop seamlessly.
If you paste the animation directly to the stars, their position will change, so let’s start with copying all the stars to keep the originals as guides.
Copy the keyframes of one of the speedlines, then add a position animator to the four-pointed star and press Ctrl+V to paste.
Add a new position keyframe right in the middle, as shown below. This is where the animation will actually start.
Select and copy the first couple of keyframes, and paste them to the end of the timeline. Delete the first keyframes and move the rest to the start. Your timeline should look like this:

Shift+drag a point on the motion path to reposition it based on the original star.

Do the same for the round stars, but instead of splitting the position animation in the middle, add a new position keyframe exactly above or a little after the opacity keyframe, as they are higher up in the starting position.
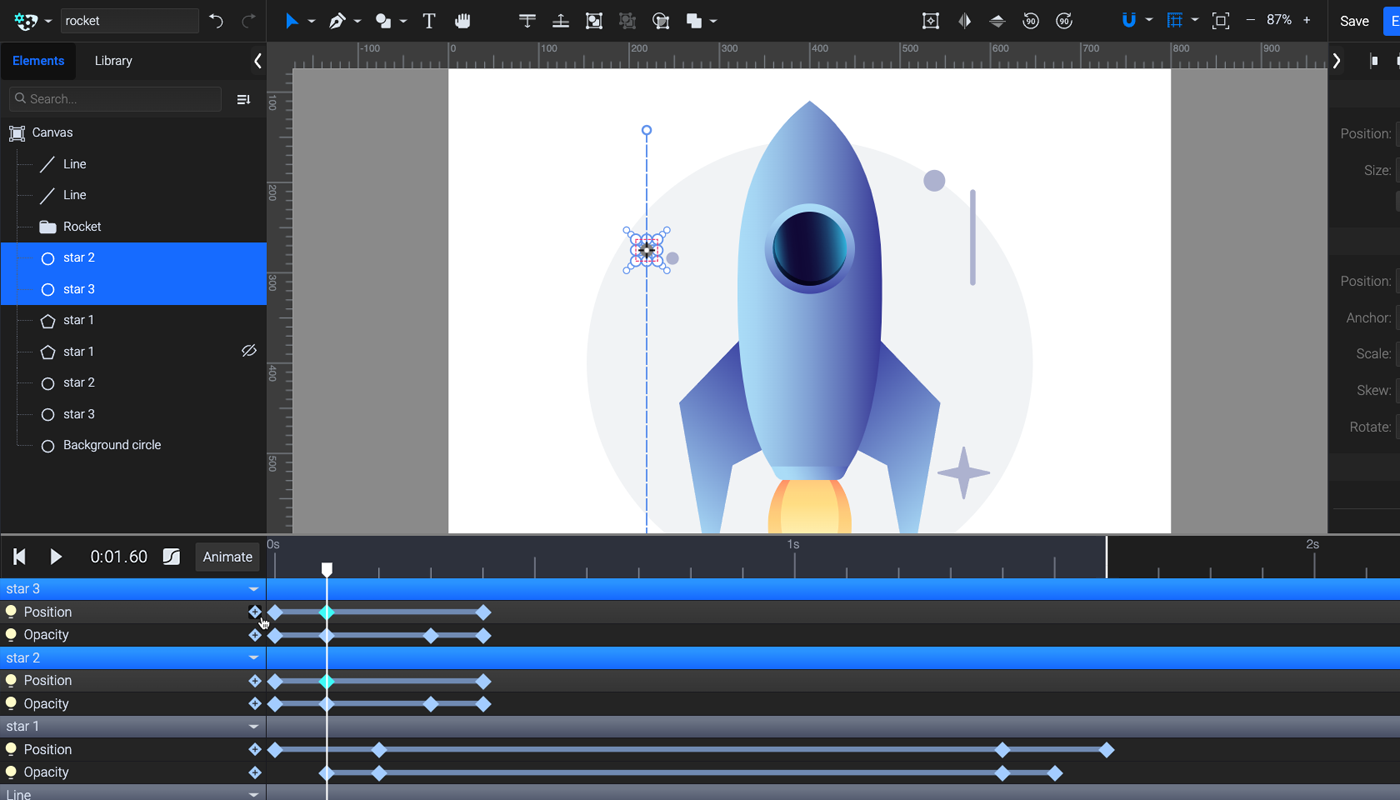
Move them exactly where you need them with shift+drag, then you can delete the stars you used as a reference.
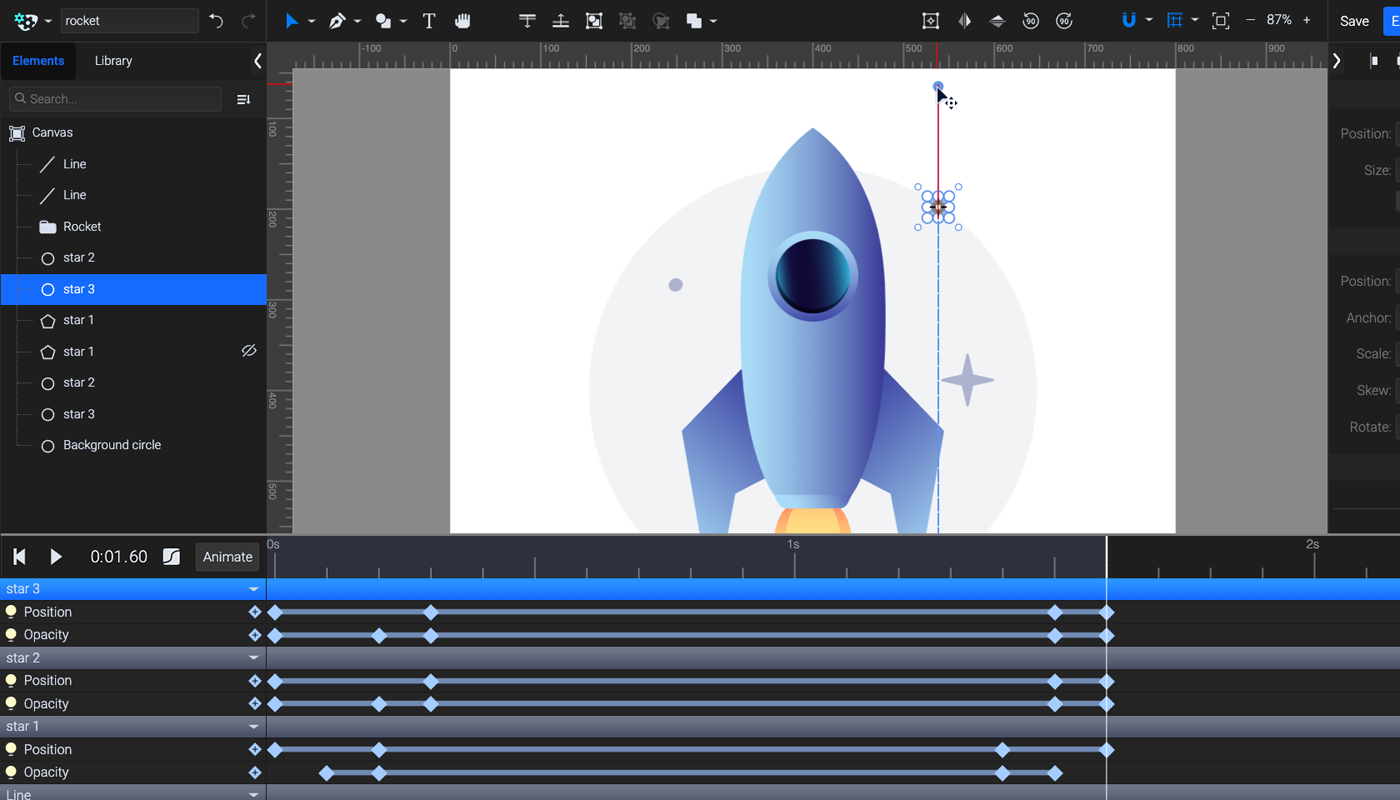
Preview the animation in the Export window to make sure everything is looping properly.
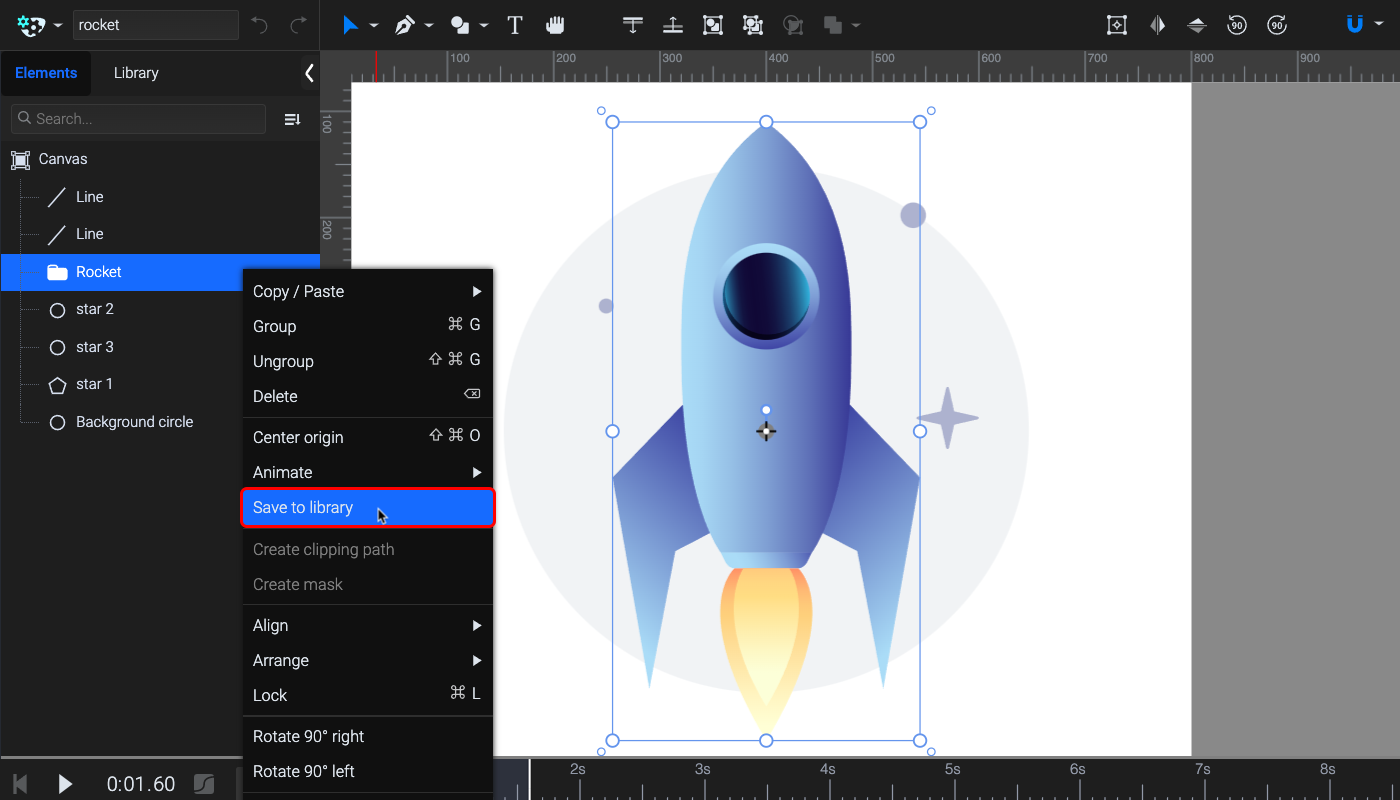
When the animated rocket is ready, you can select the rocket group and save it to the library to use in later projects.
Step 5. Export
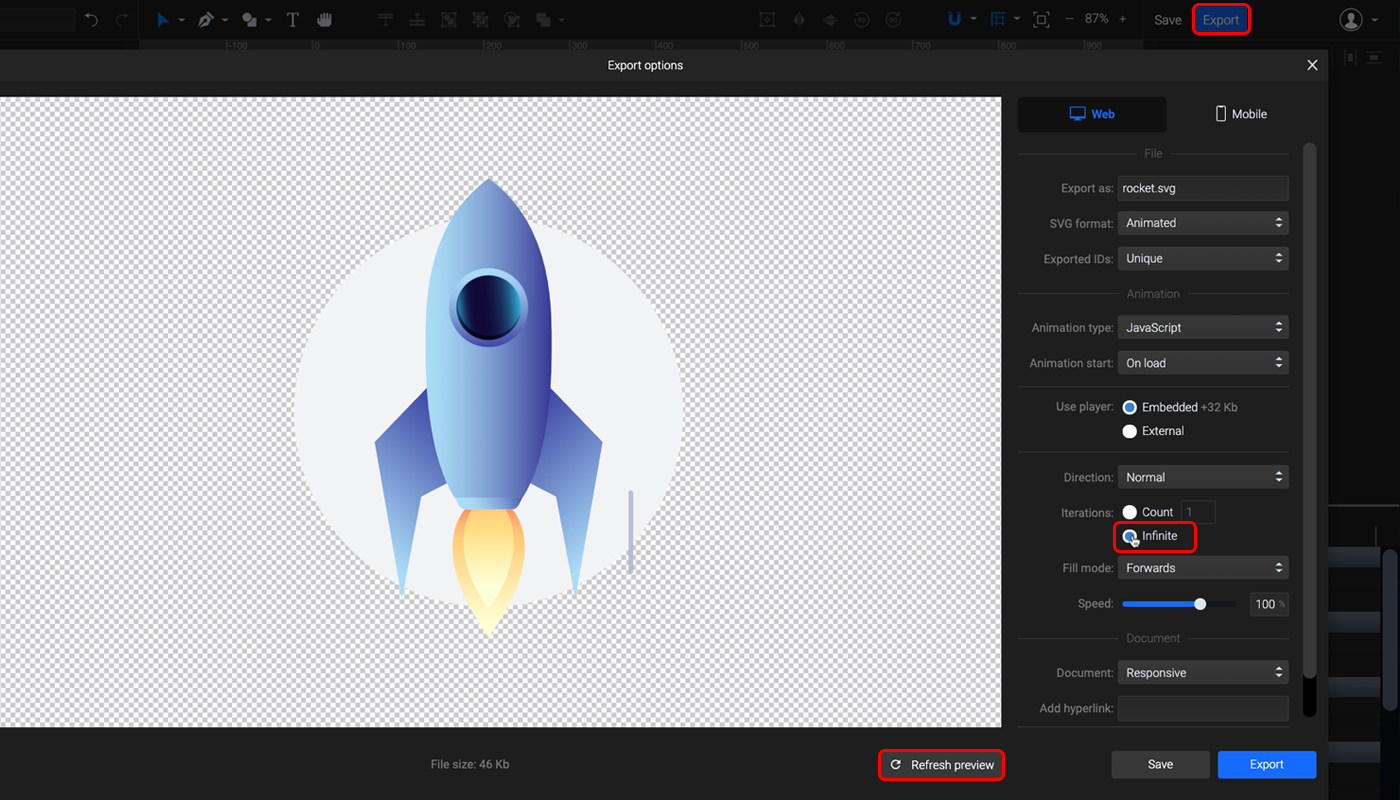
Congrats, your animated rocket is ready to launch! All that you have to do now is to export your work. Click on the blue Export button on the top right corner, and the Export options window will pop up.
The rocket SVG animation can be exported for web and mobile. Below you can find a short guide that helps you with export settings, depending on your project.
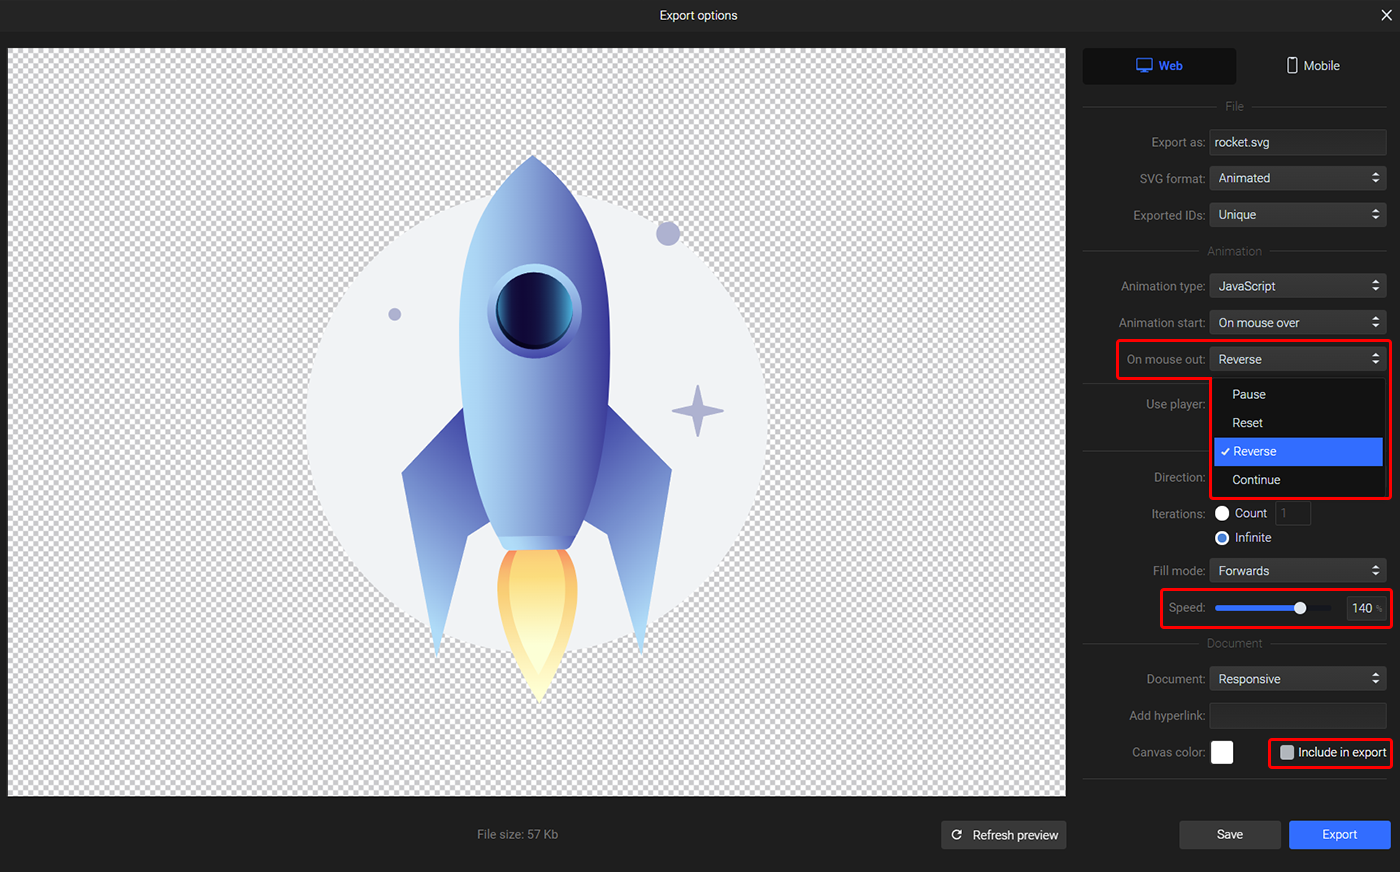
Export to web
Under the File section, you can rename your SVG and choose to export a static version. By default, the exported ID-s of the elements are random unique letter sequences. You can choose to export ID-s based on element names if you are working with developers to make finding everything in the code a lot easier. The ID-s will still remain unique.
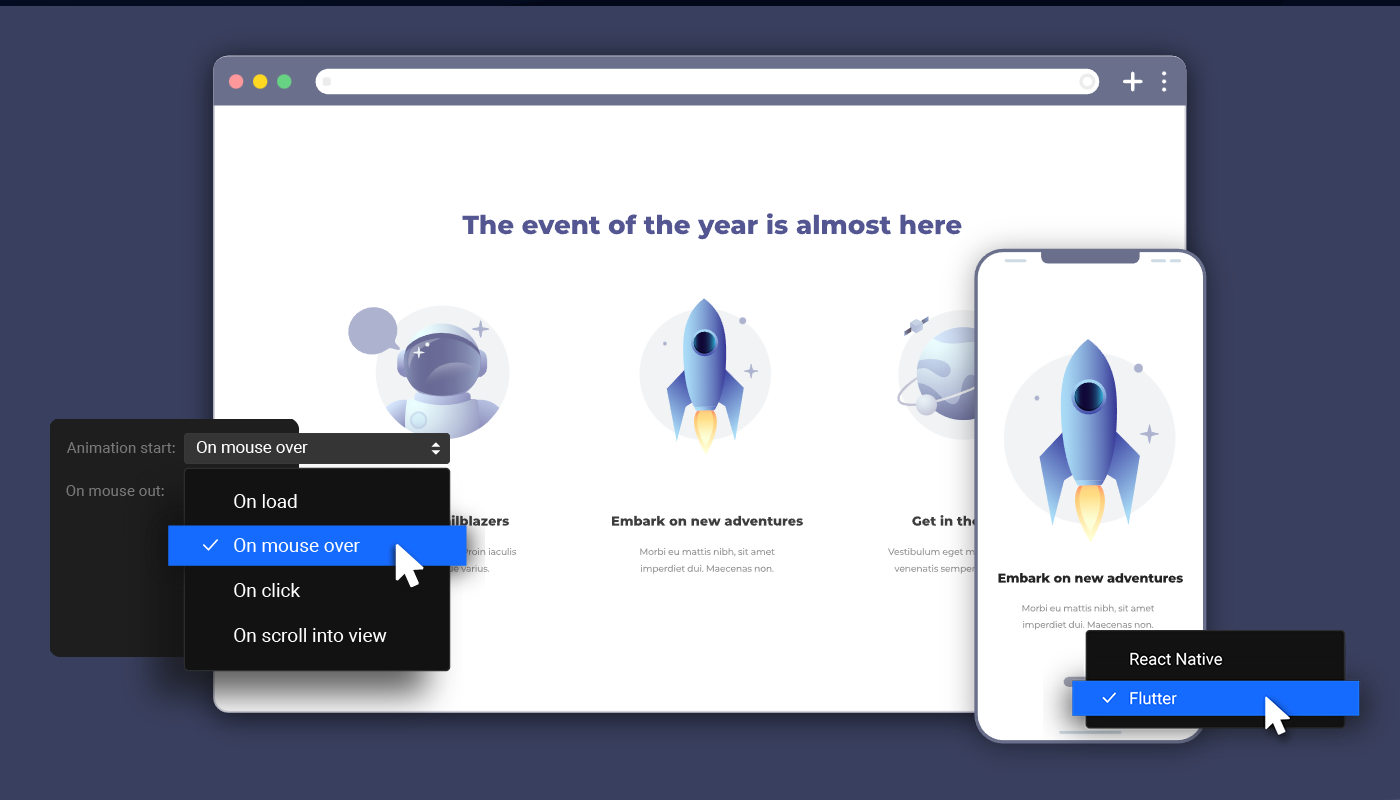
Let’s also add some interactivity. Leave the animation type on Javascript. From the Animation start dropdown, choose On mouse over. From the On mouse out dropdown, choose reset.
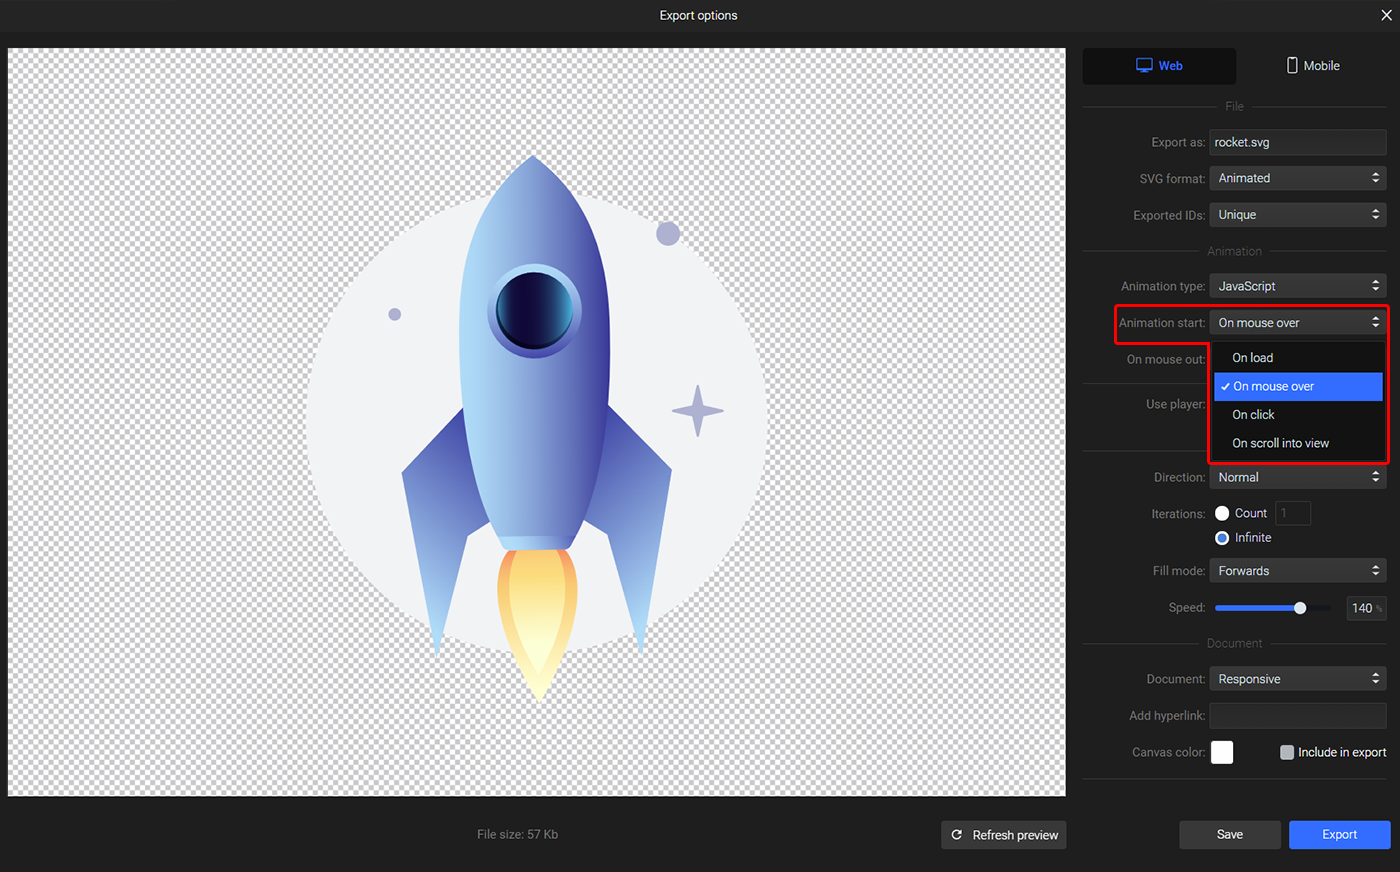
Set iterations to infinite, and adjust the speed if needed. We set the speed to 140% in this example. Before exporting, if you have a canvas color set, make sure to leave the Include in Export option unchecked.
Export to mobile
The main difference in the mobile export tab is that in the File section you can choose to export your rocket SVG animation to two of the most popular frameworks: React Native and Flutter.
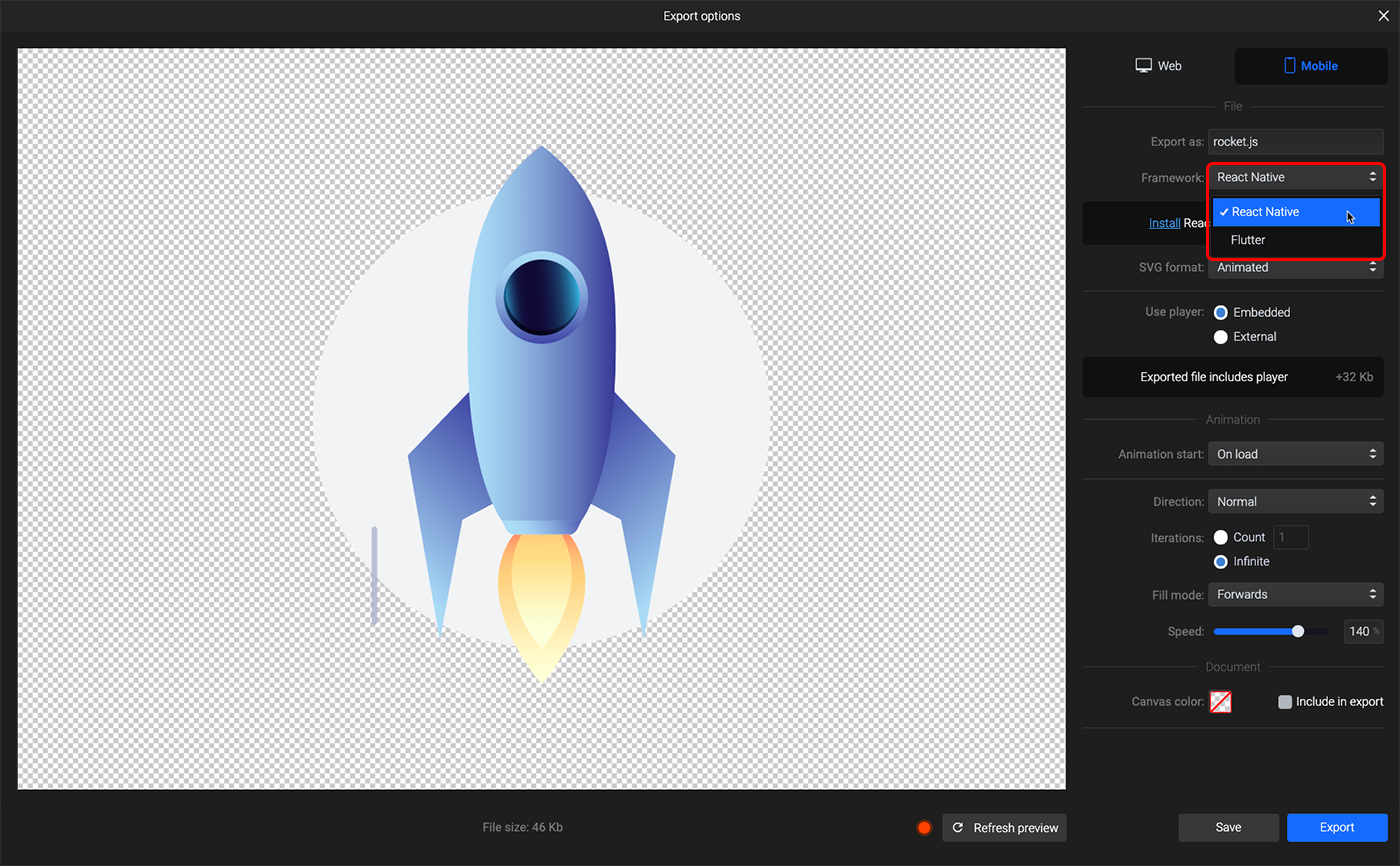
Visit our help center to learn more about mobile export. Here you will also find some handy information on how to install webview for your project on these frameworks.
👉 Export React Native animations
👉 Export Flutter animations
When you’re done, don’t forget to show off your work and tag us on social media. We can’t wait to see your rocket blast off!