How To Add SVGator Animations To Figma
Install And Log In
To access your SVGator projects and insert them in Figma, first install and run the SVGator plugin. You can do this either by:
- Navigating to Community → Plugins in Figma and searching for "SVGator"

- Or clicking Actions in your Figma project, searching for "SVGator", and selecting Run

Click Log in, and when the authorization page appears, click Authorize to allow the SVGator plugin to access your SVGator account and its content.
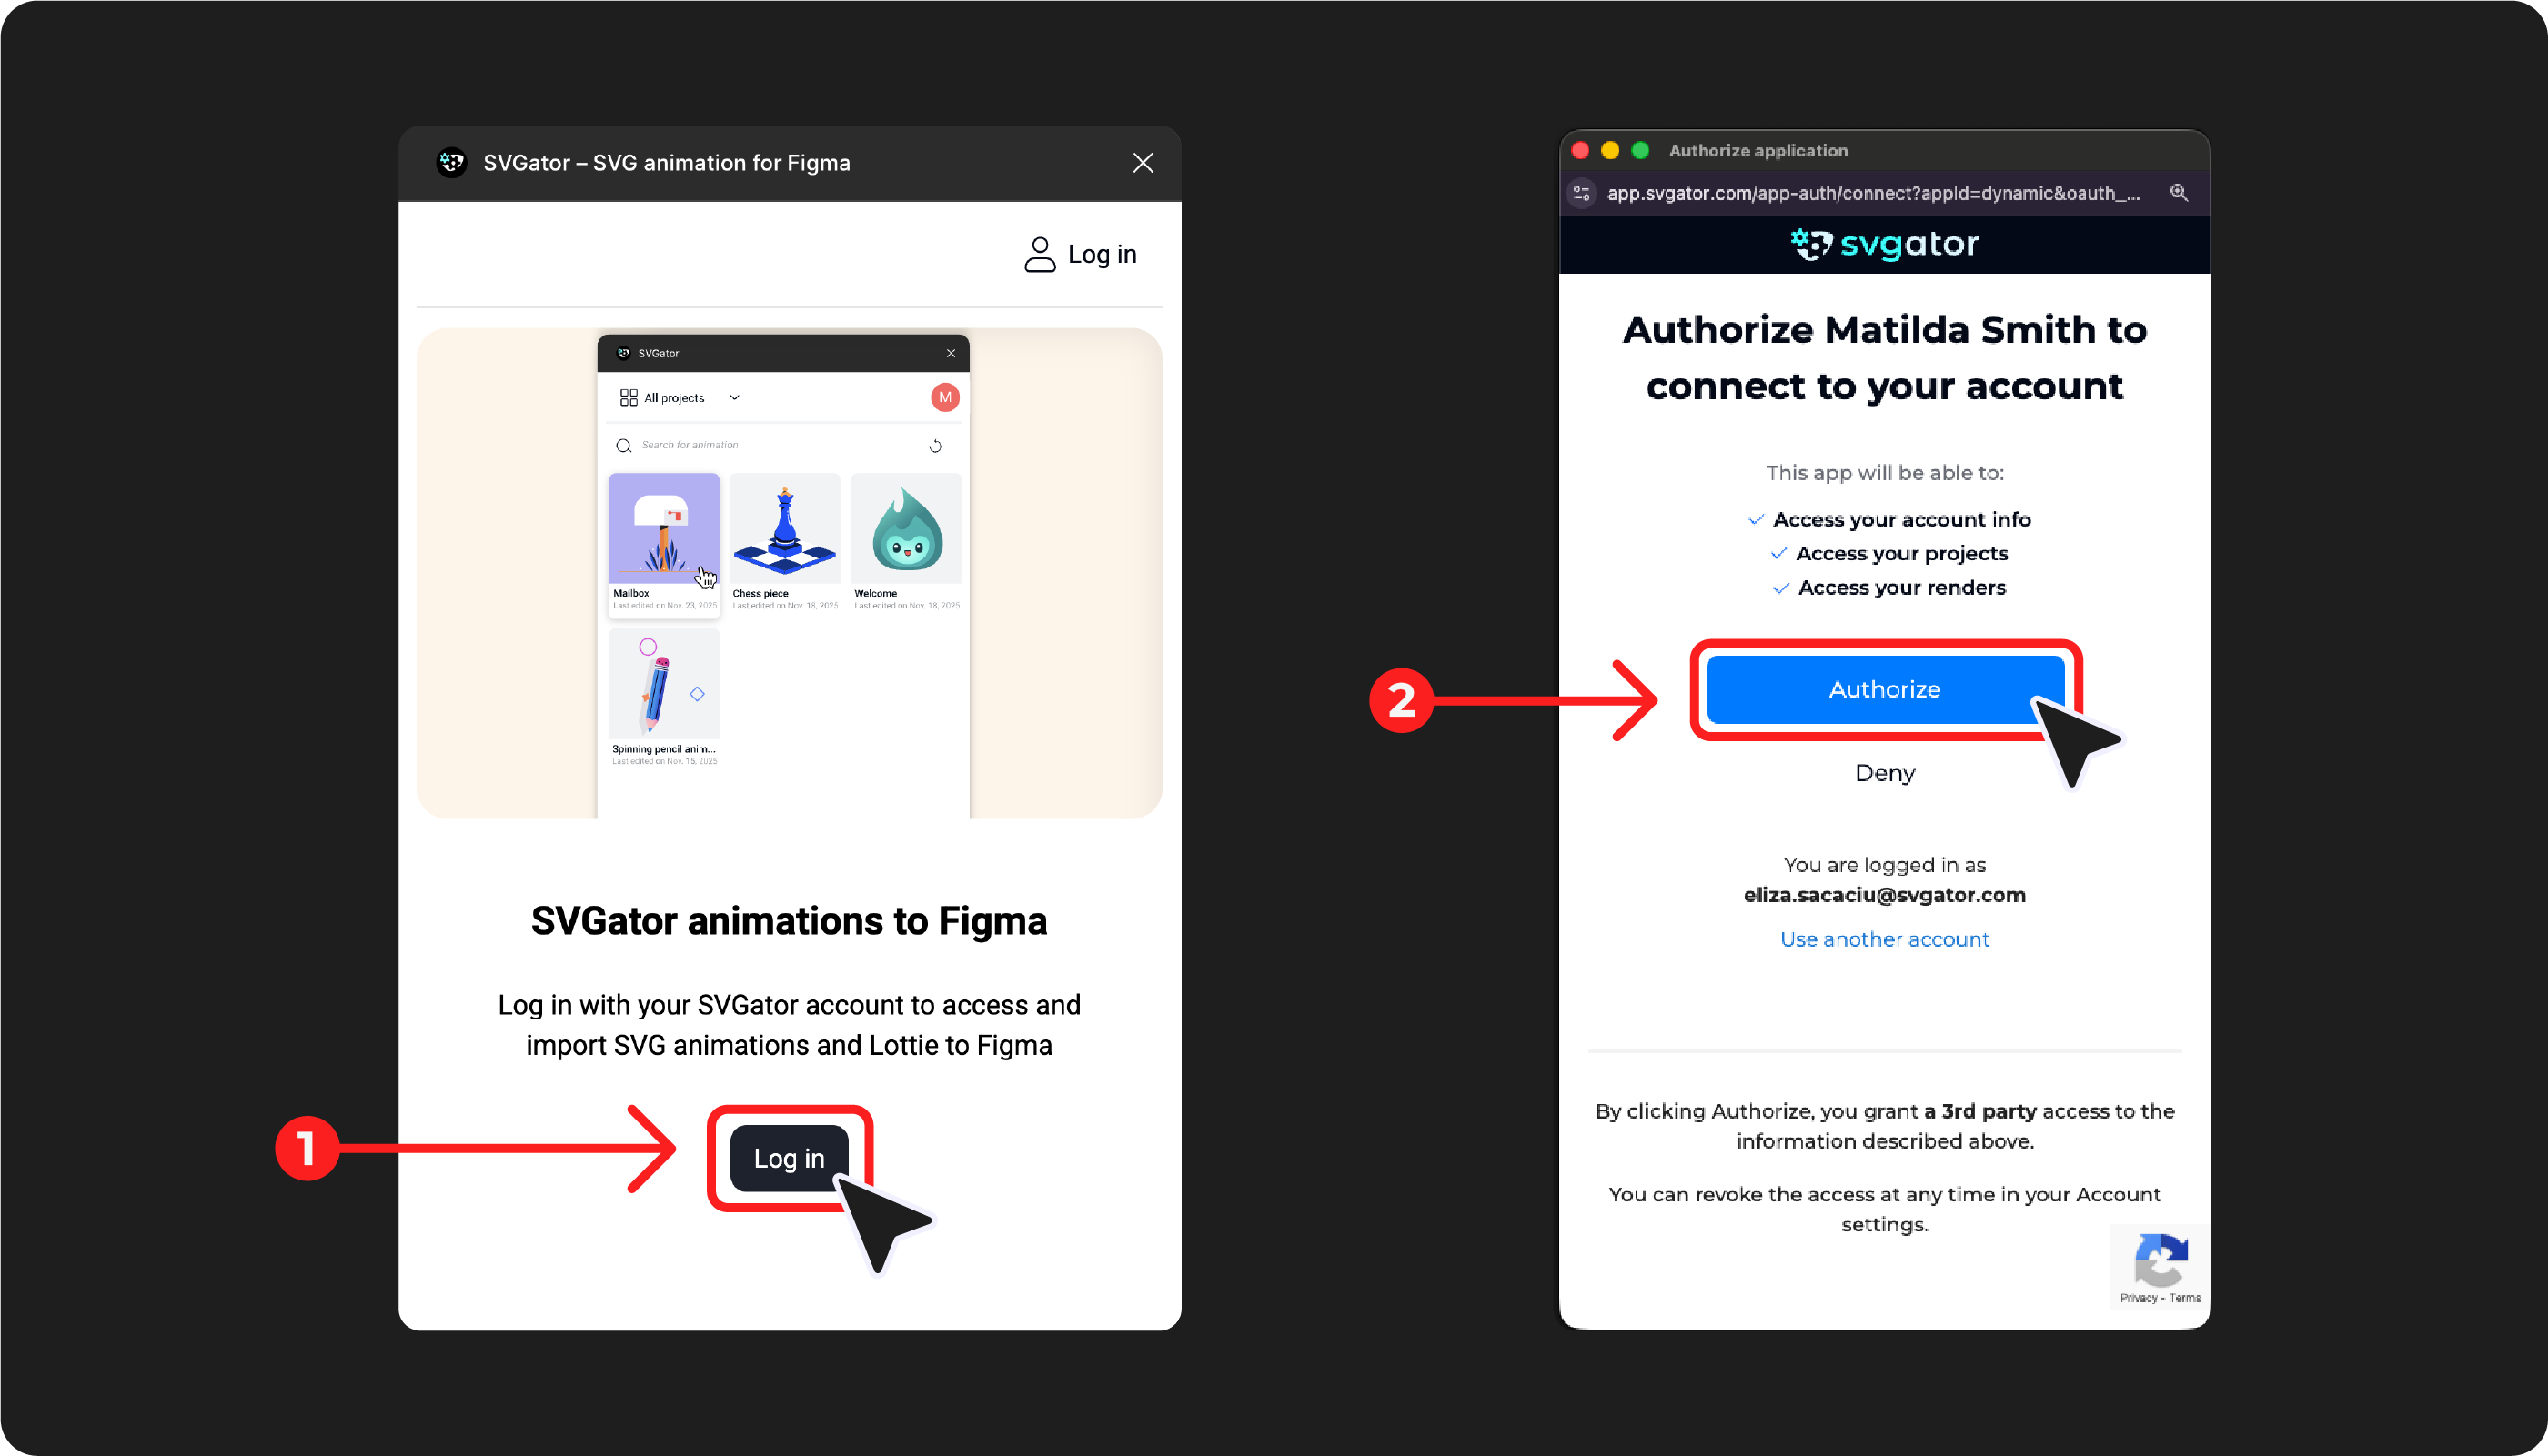
Note: If you only want to download production-ready files and don't have an SVGator account, the plugin will still work as long as you have Edit access to the Figma project.
How GIF/Mp4 Preview Works In Preview Mode
In addition to adding your SVGator animations from the plugin, you can use Preview mode to see what those animations look like in context.
Since Figma doesn't support animated SVGs (but does support GIFs and MP4s), the plugin offers a Preview file option. This generates a static SVG, GIF, or MP4 that you can view in Present or Preview mode to see your animation play.
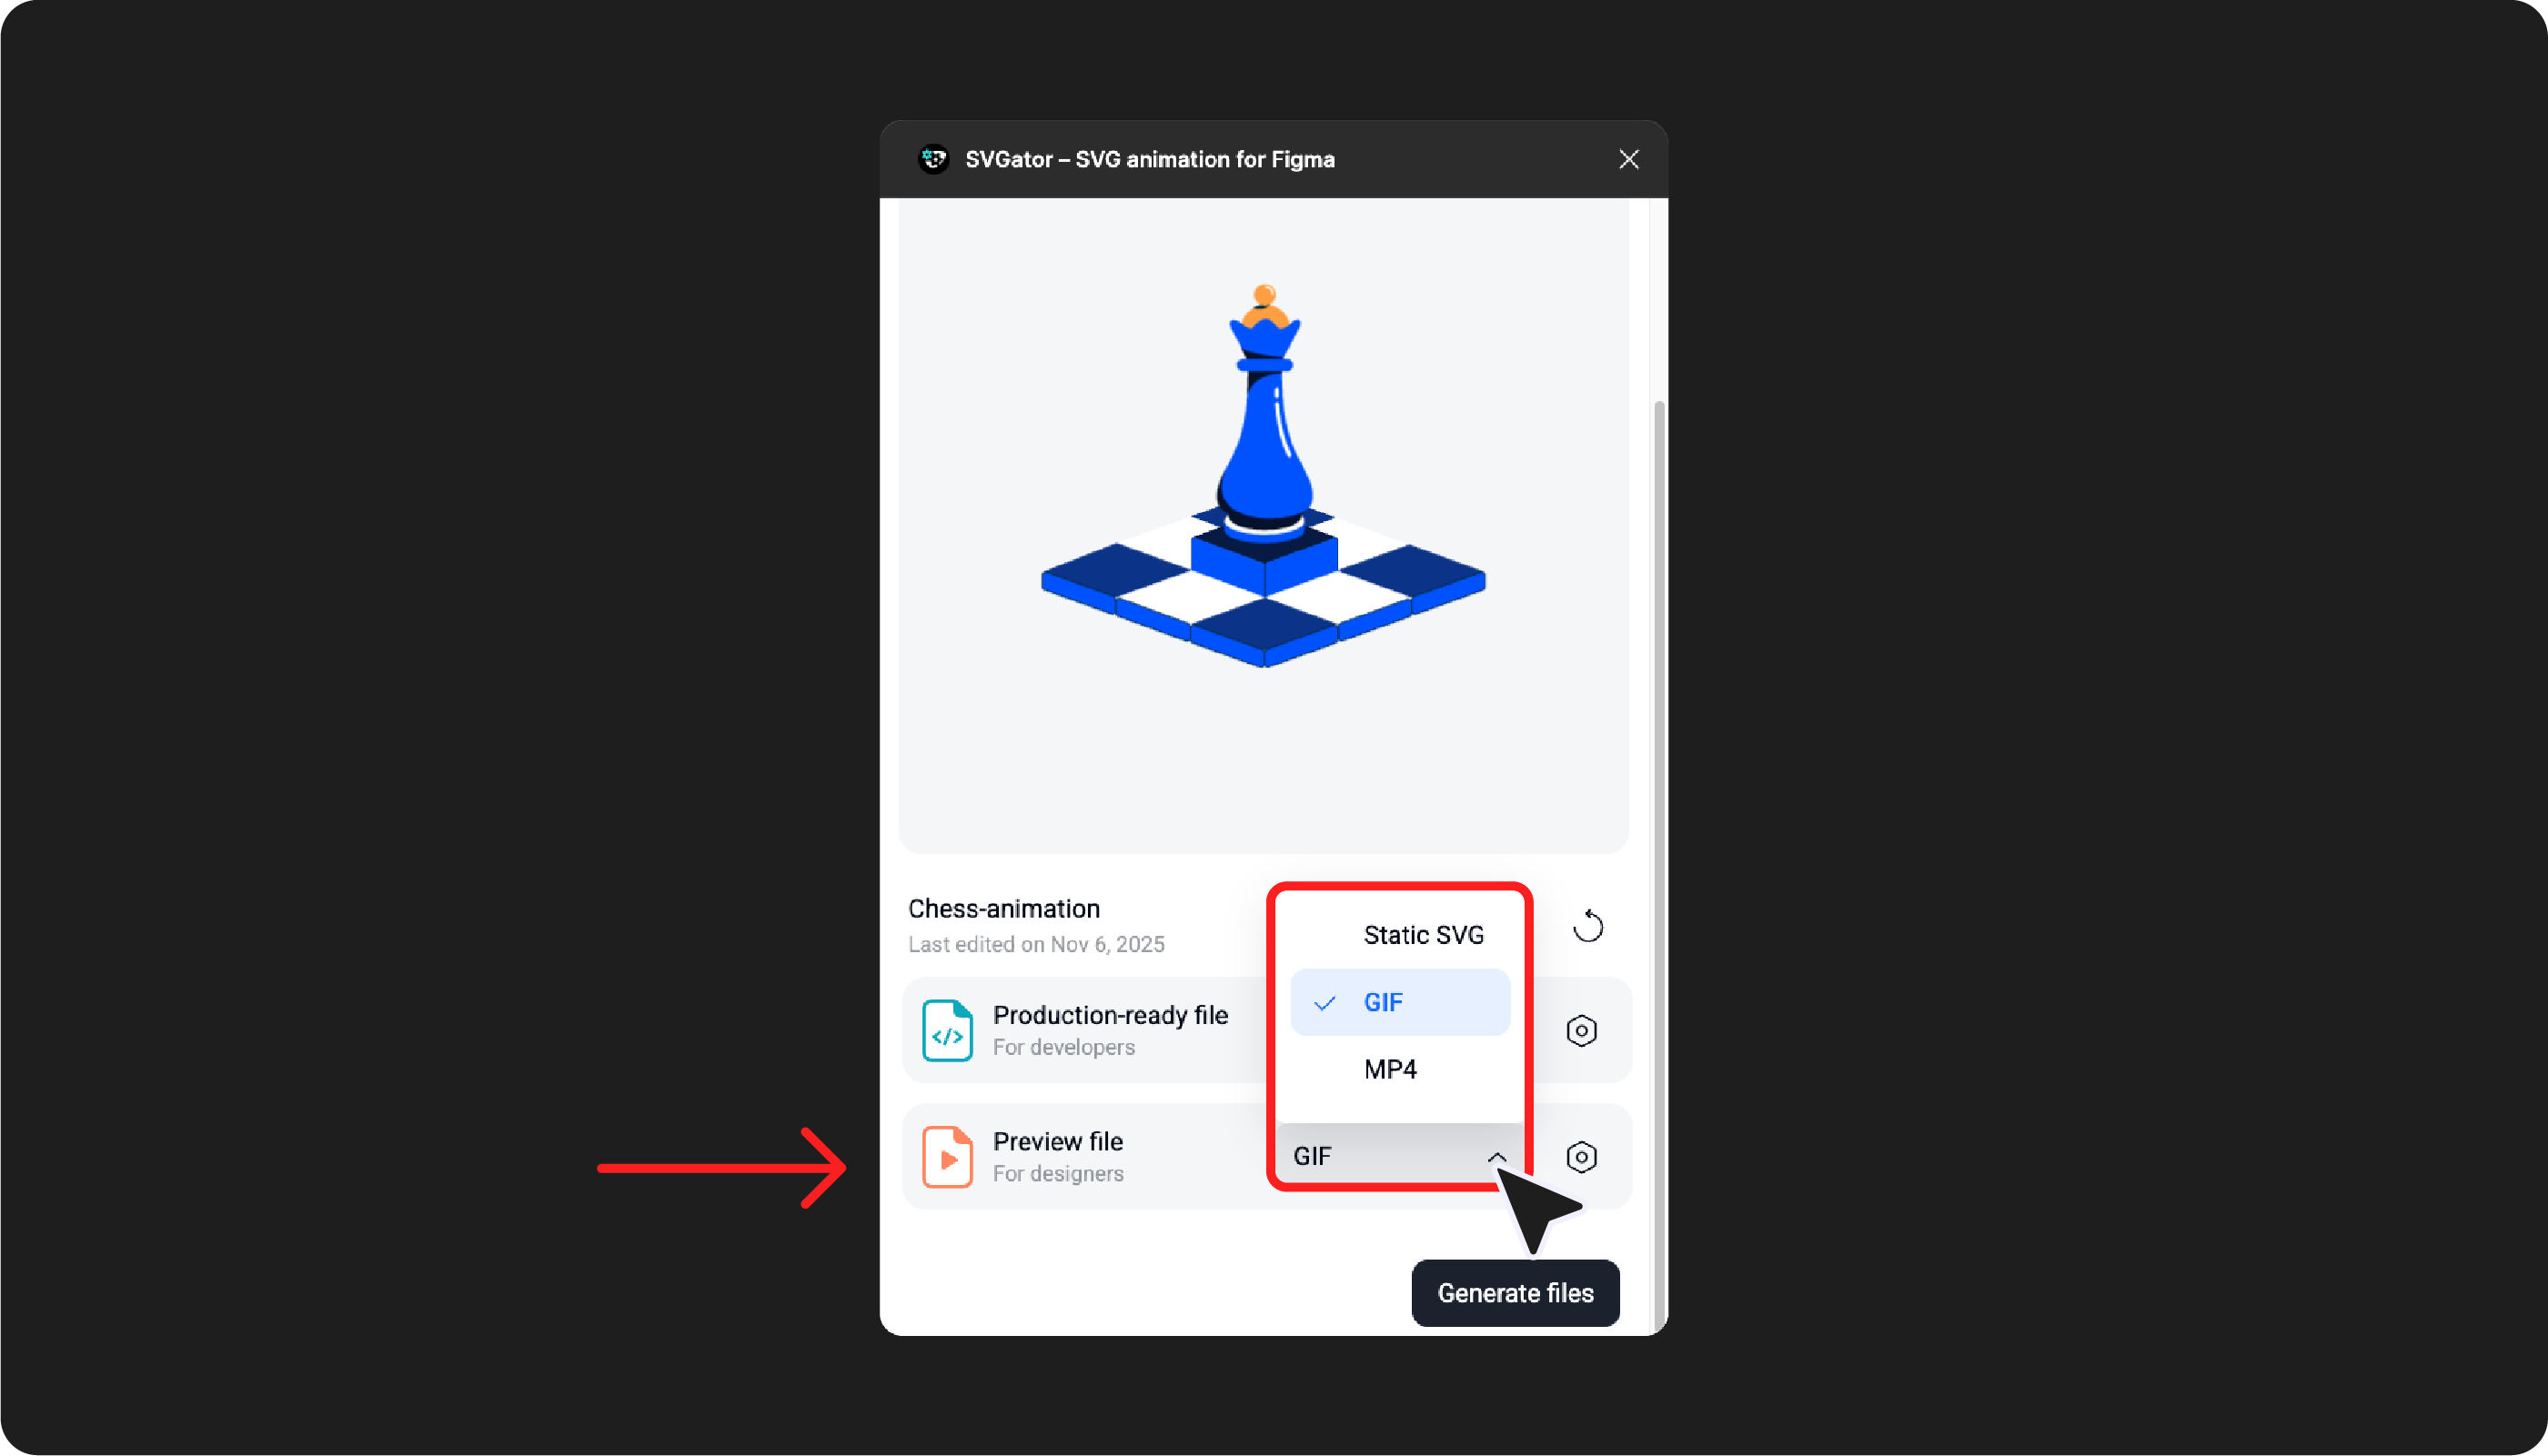
To modify the animation before exporting:
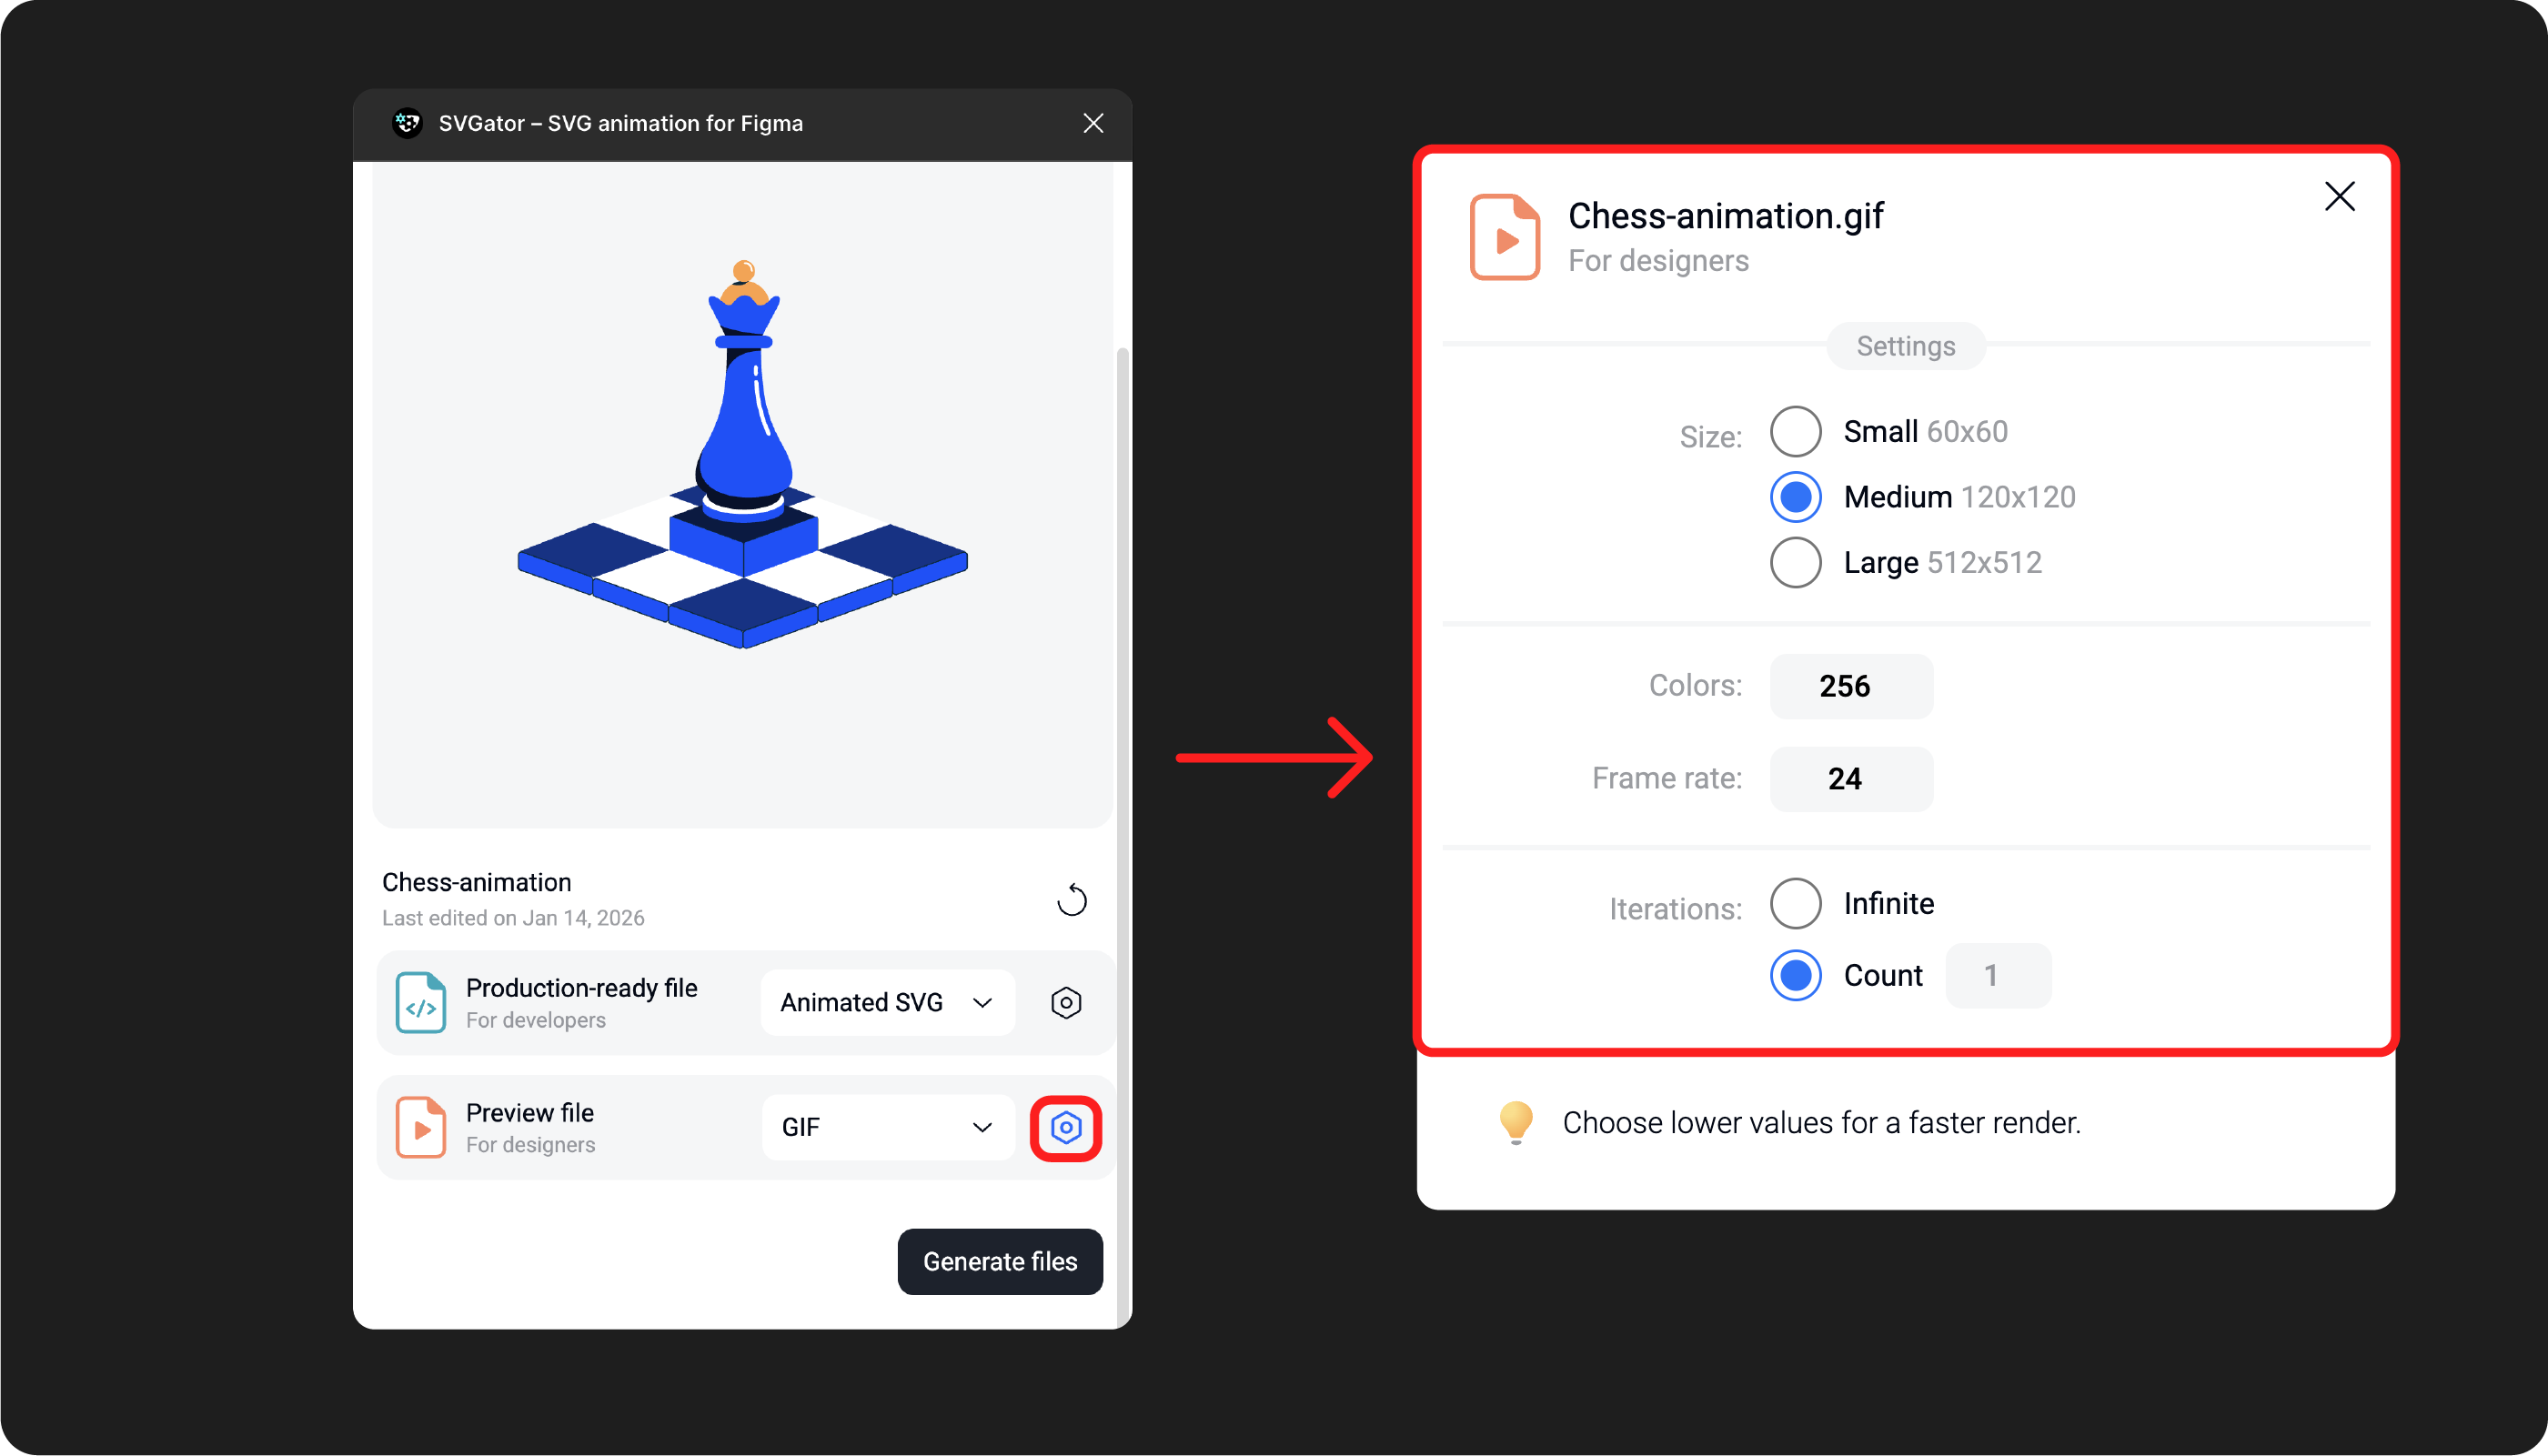
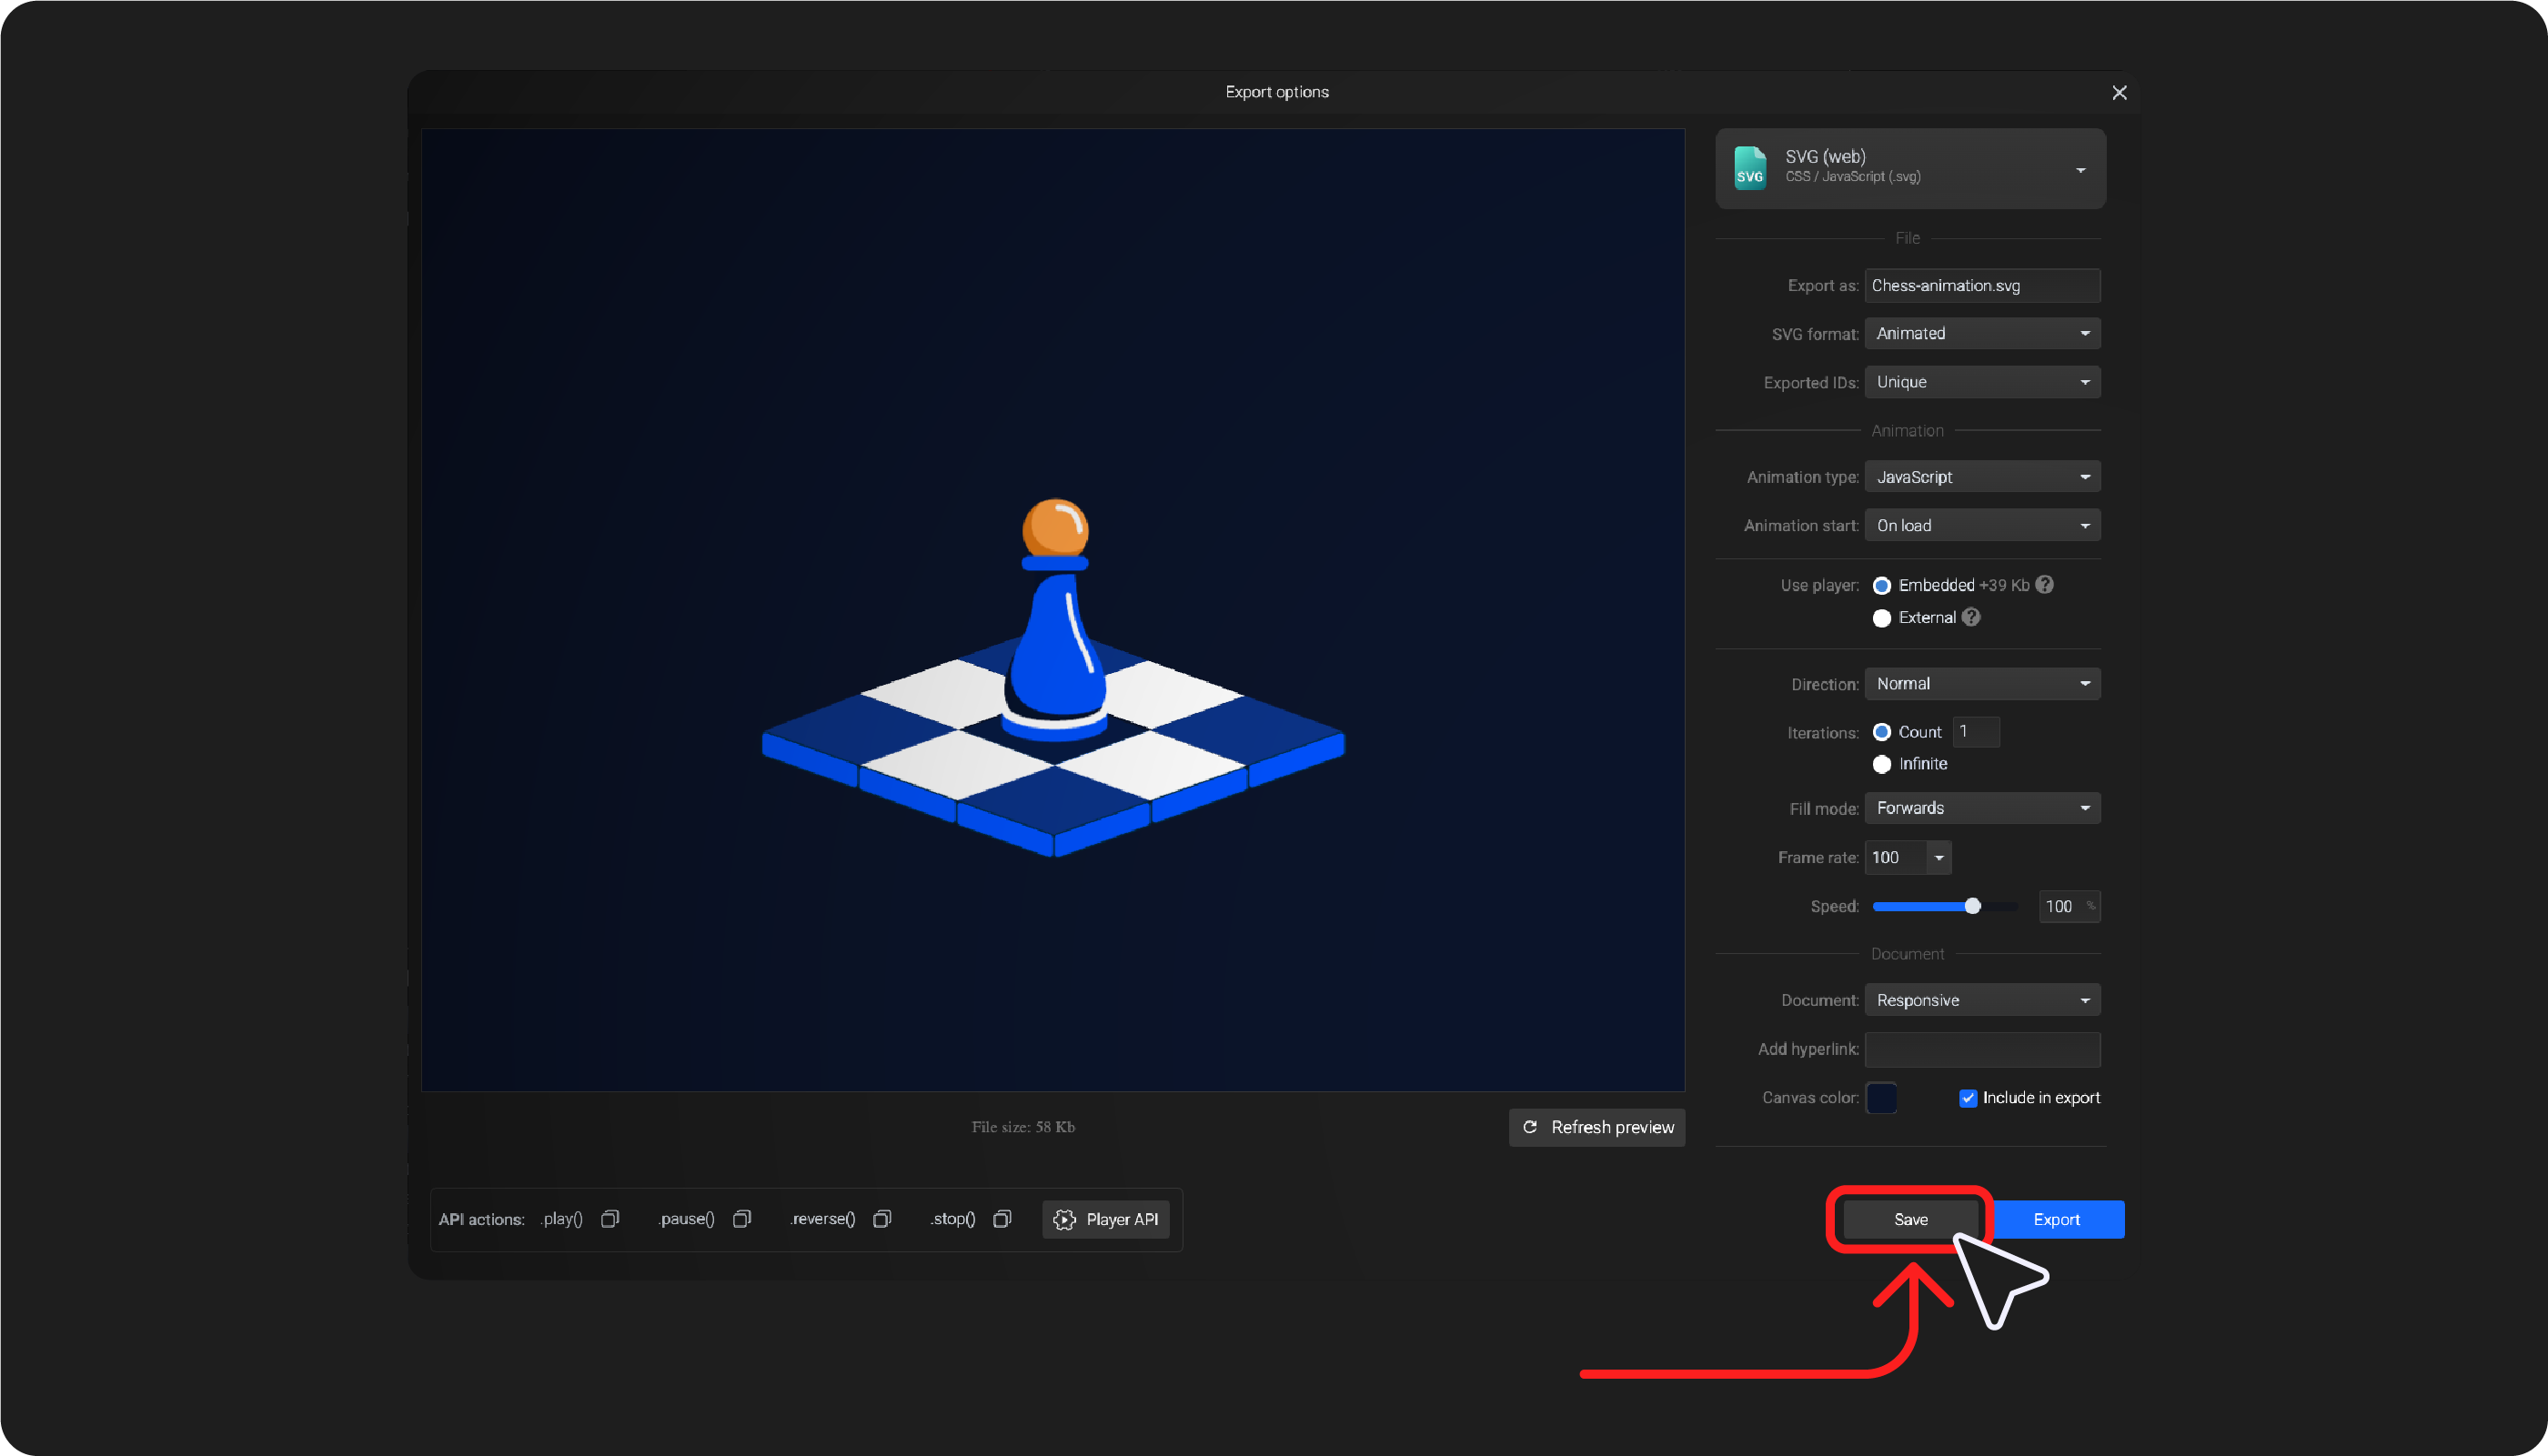
For more export settings, open the Export Panel from SVGator.
Click the gear icon next to Production-ready file, then click Open project to make changes in SVGator's editor.
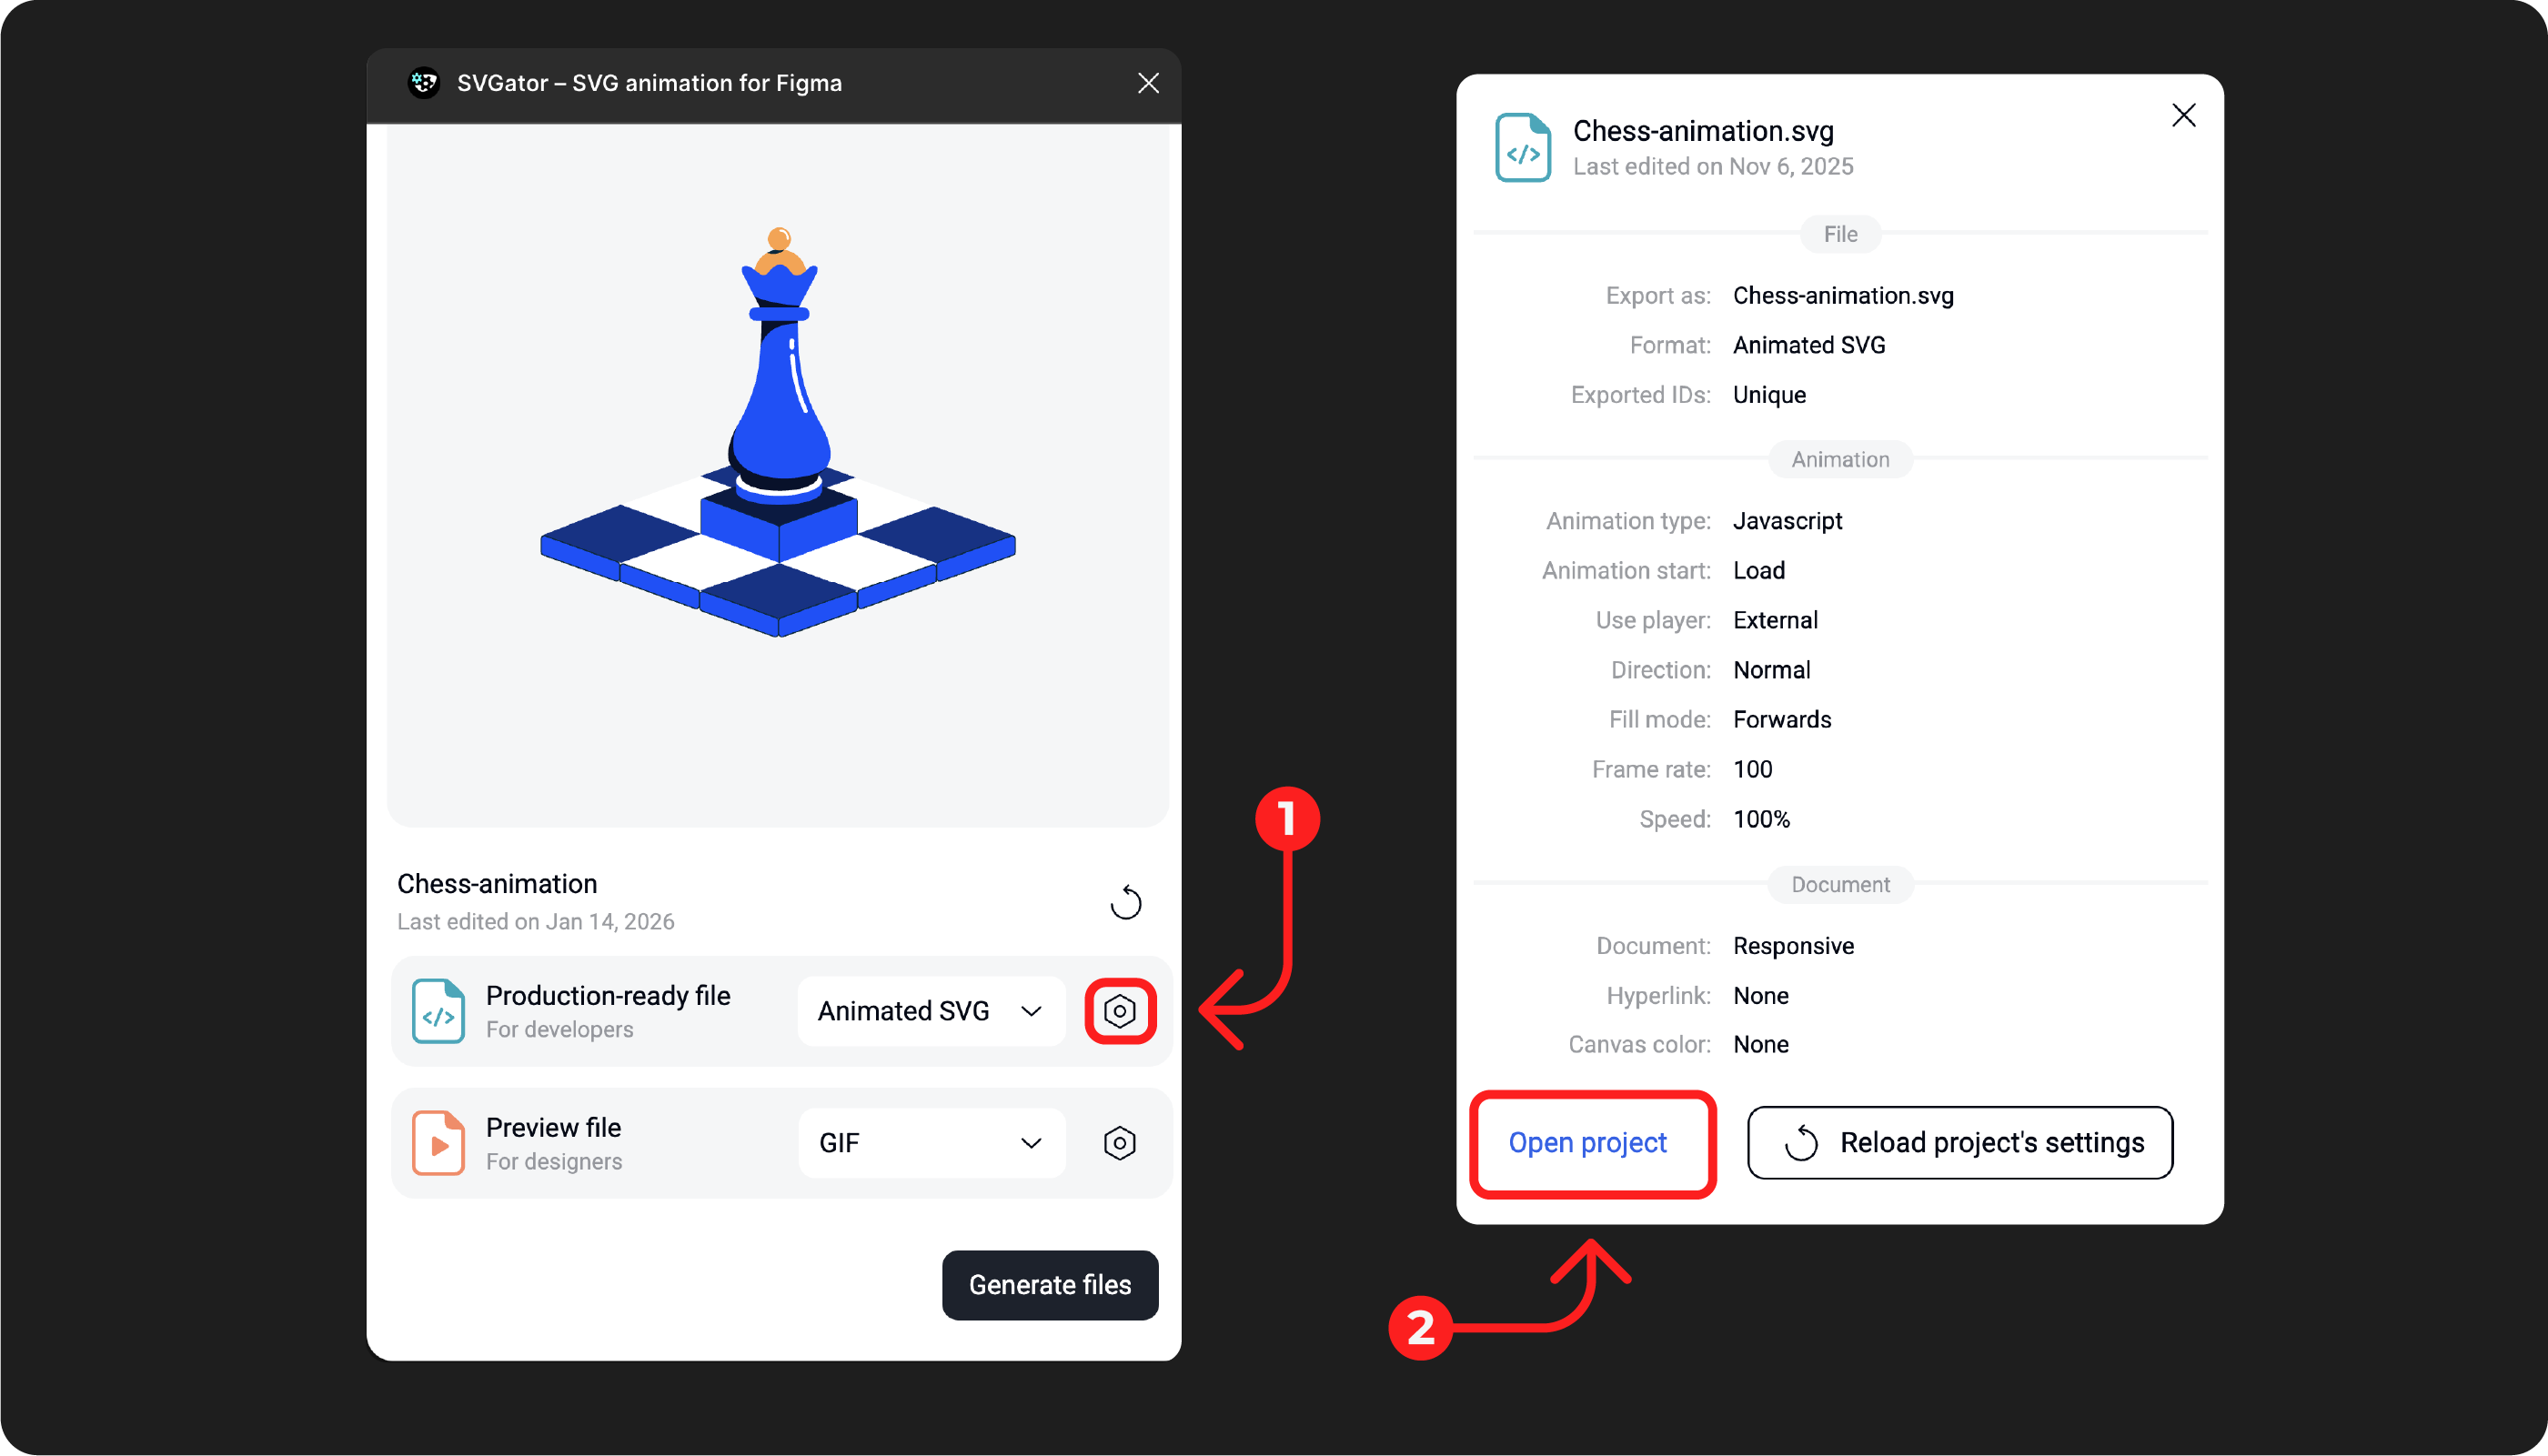
Note: The export settings selected in Figma Plugin reset with every render. The default settings will match the settings saved in the SVGator Export Panel.
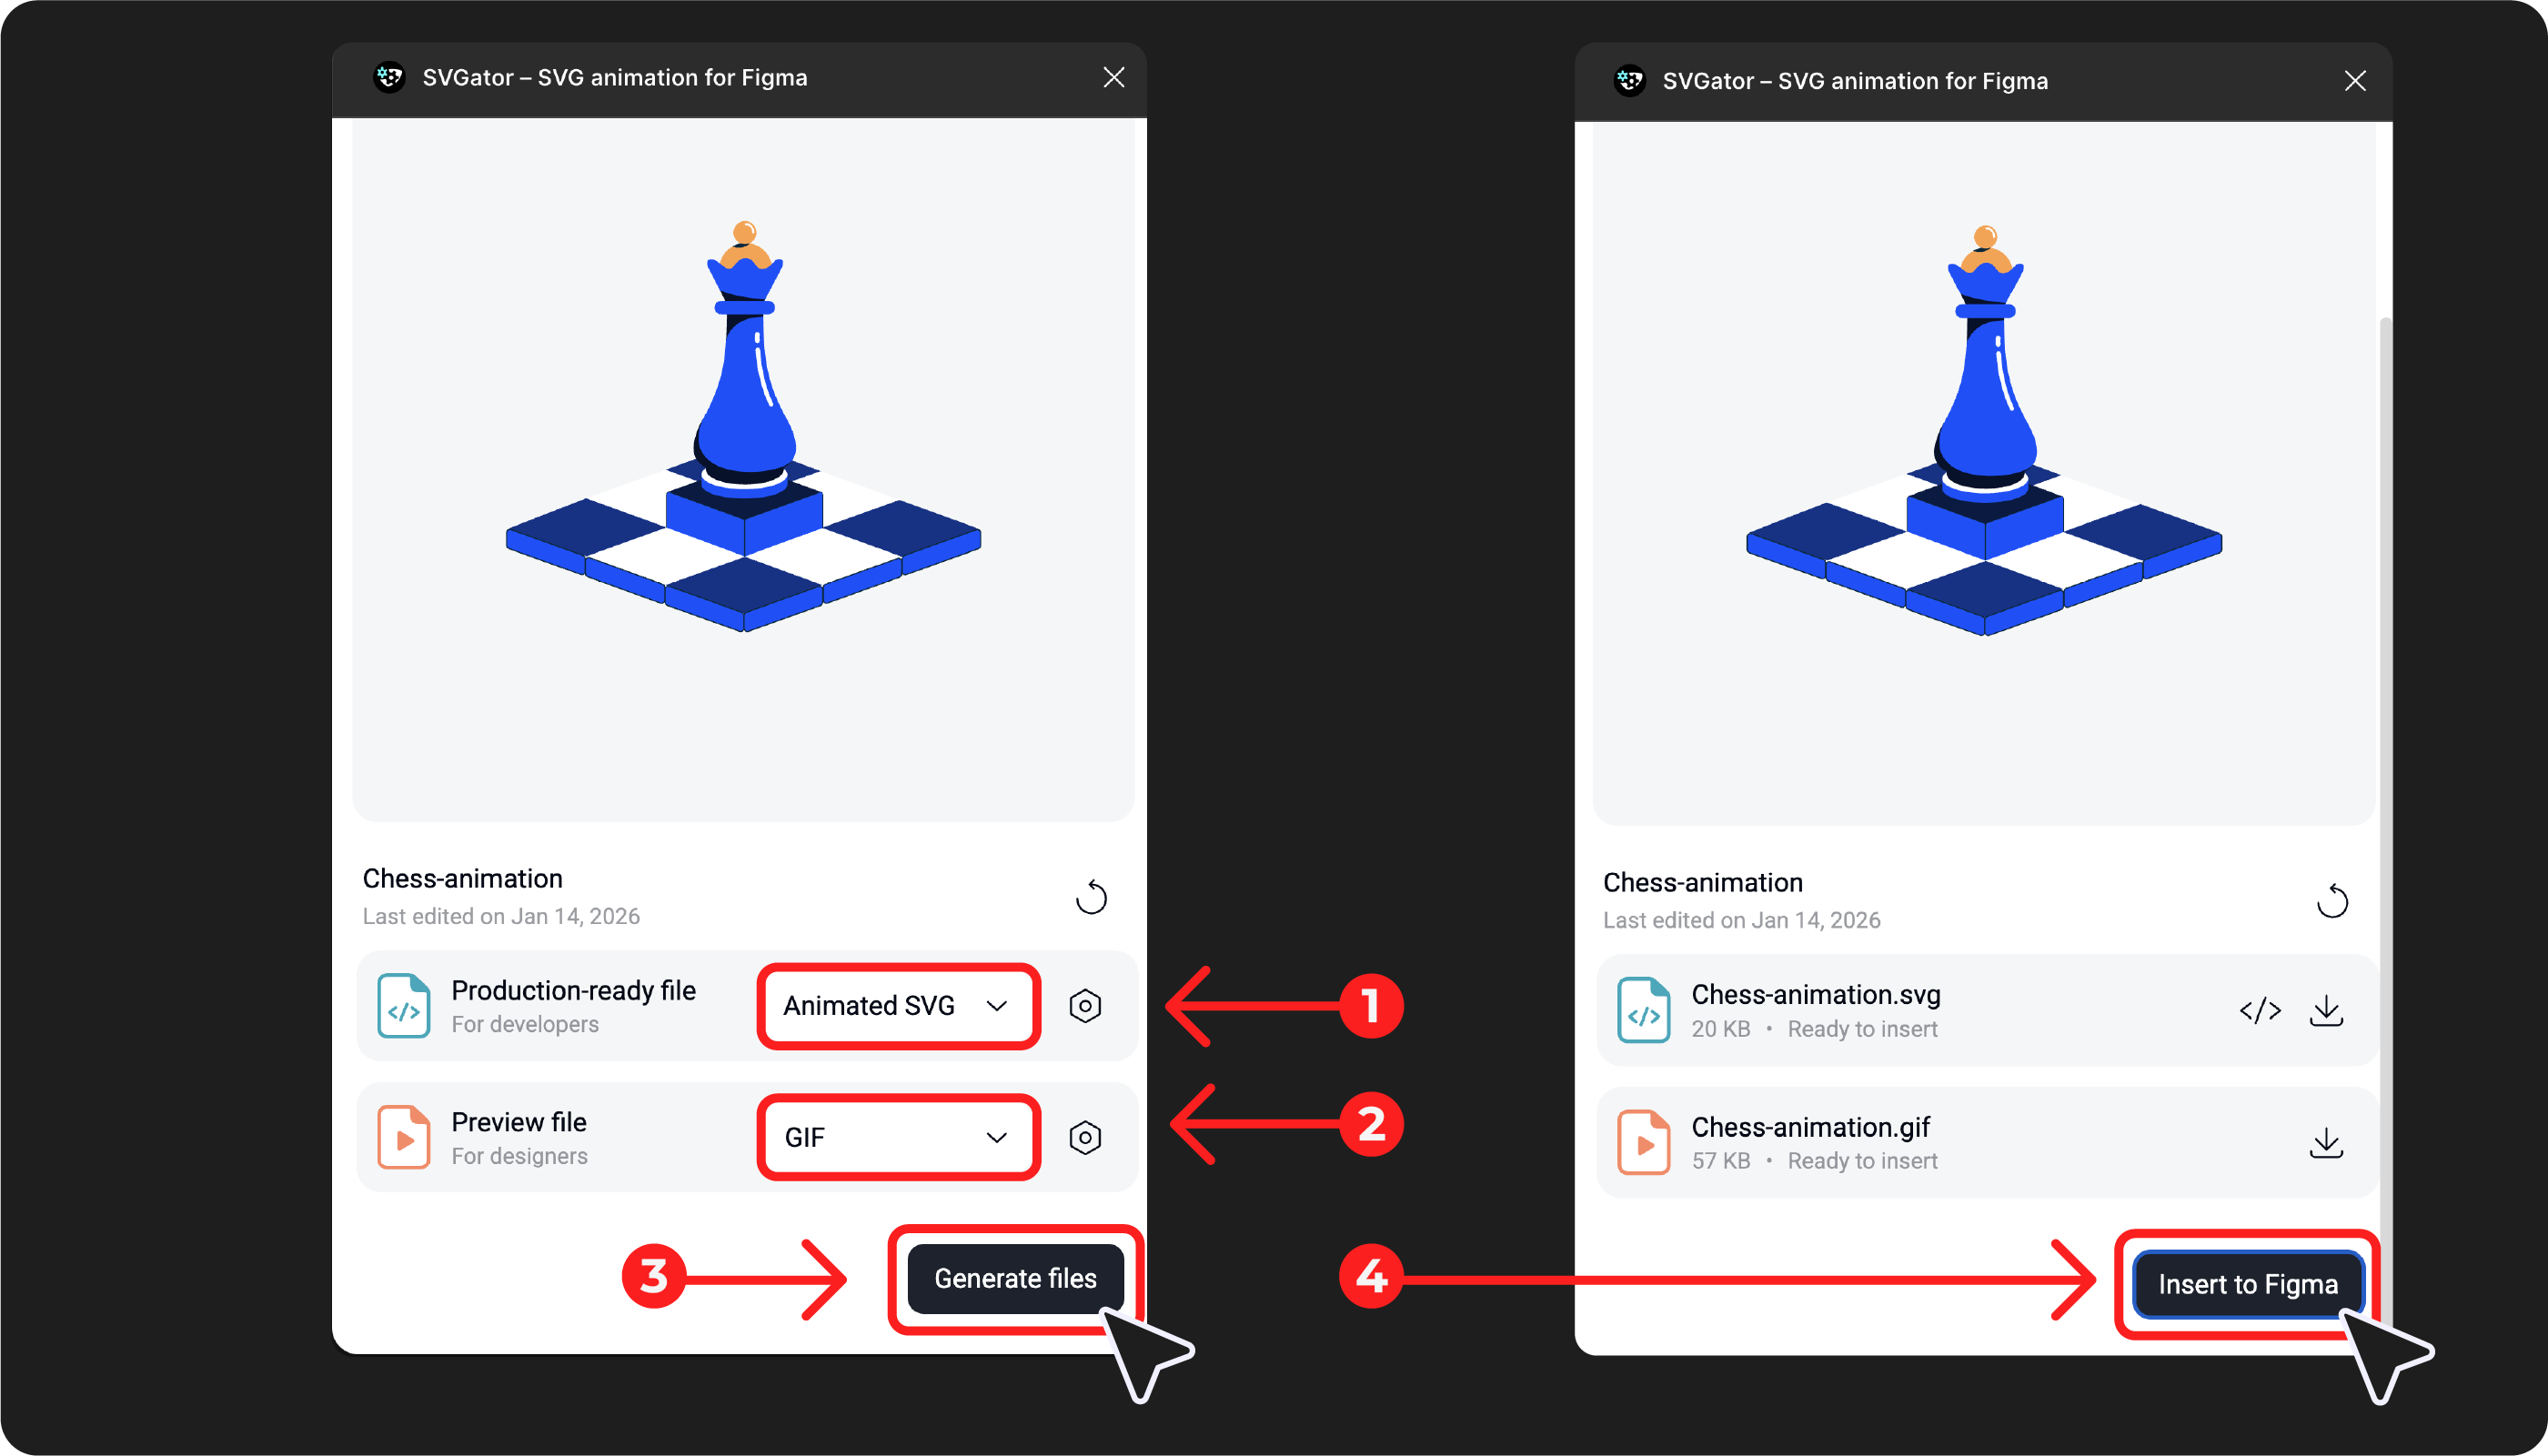
To insert the animation to Figma:
After selecting your Production-ready file and Preview file, click Generate Files. Click Insert to Figma for the Preview file that was rendered to appear in the Figma project.
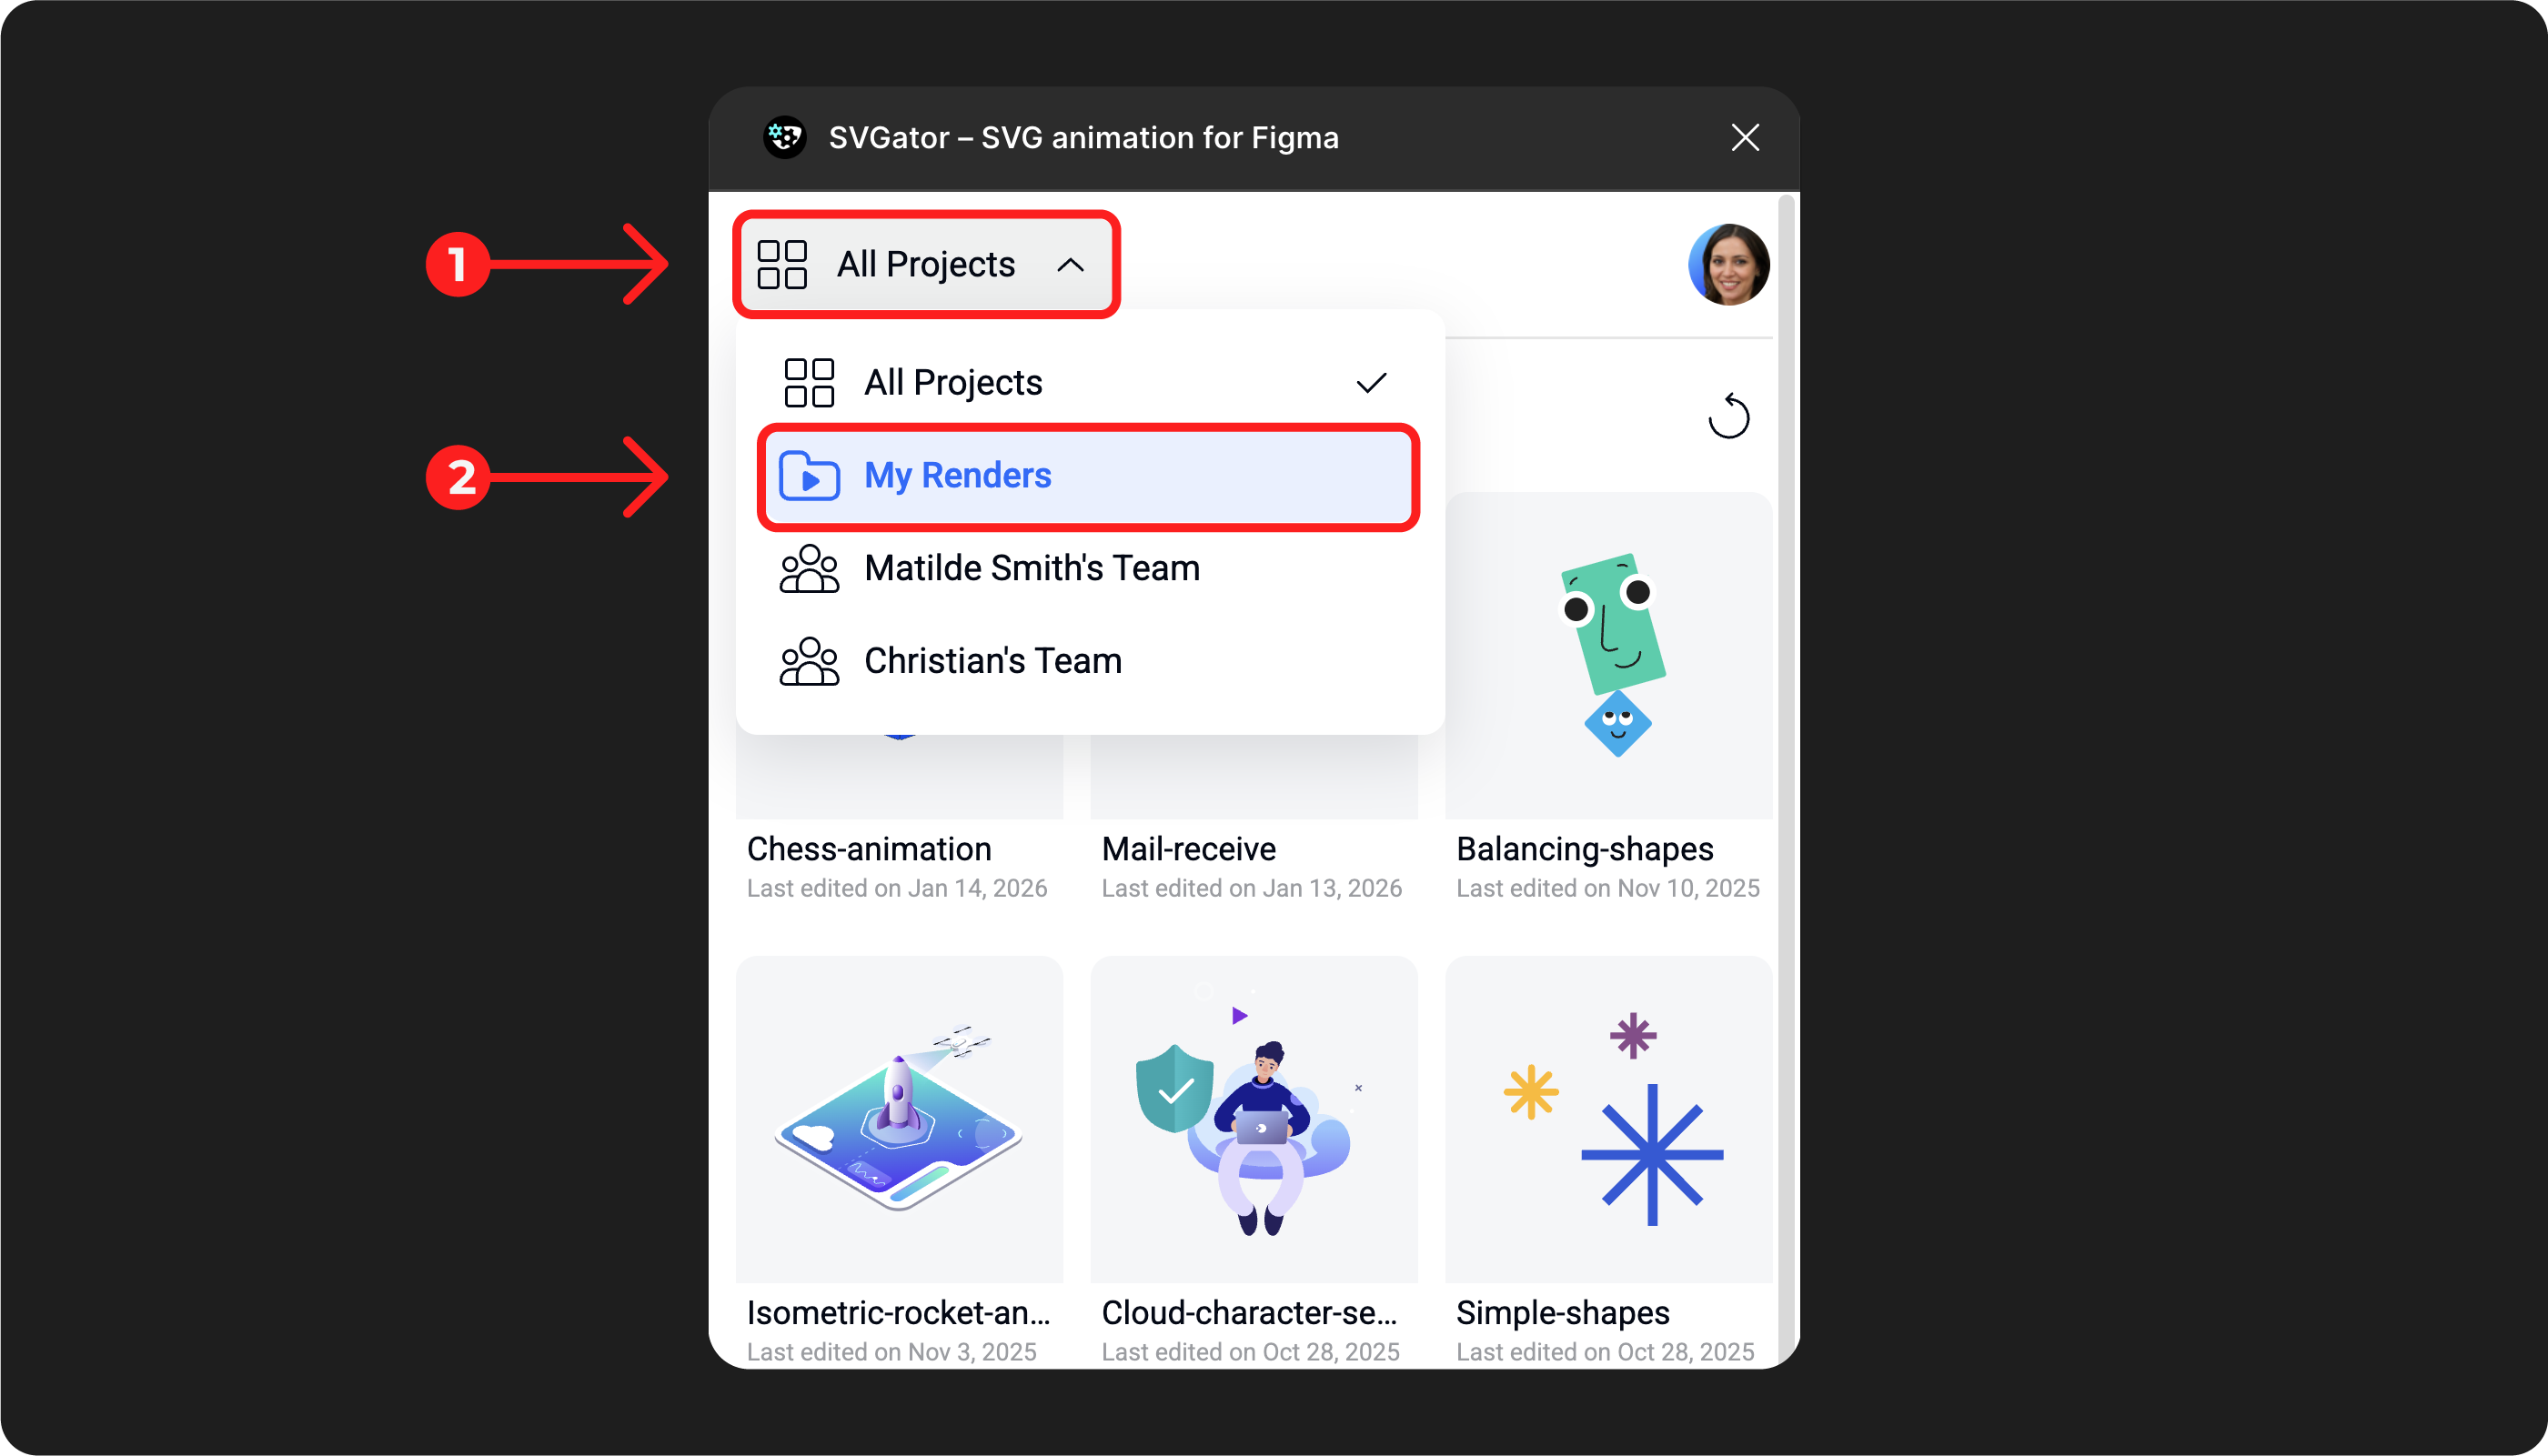
To access the rendered Preview file:
Click ‘All Projects’ and choose ‘My renders’.
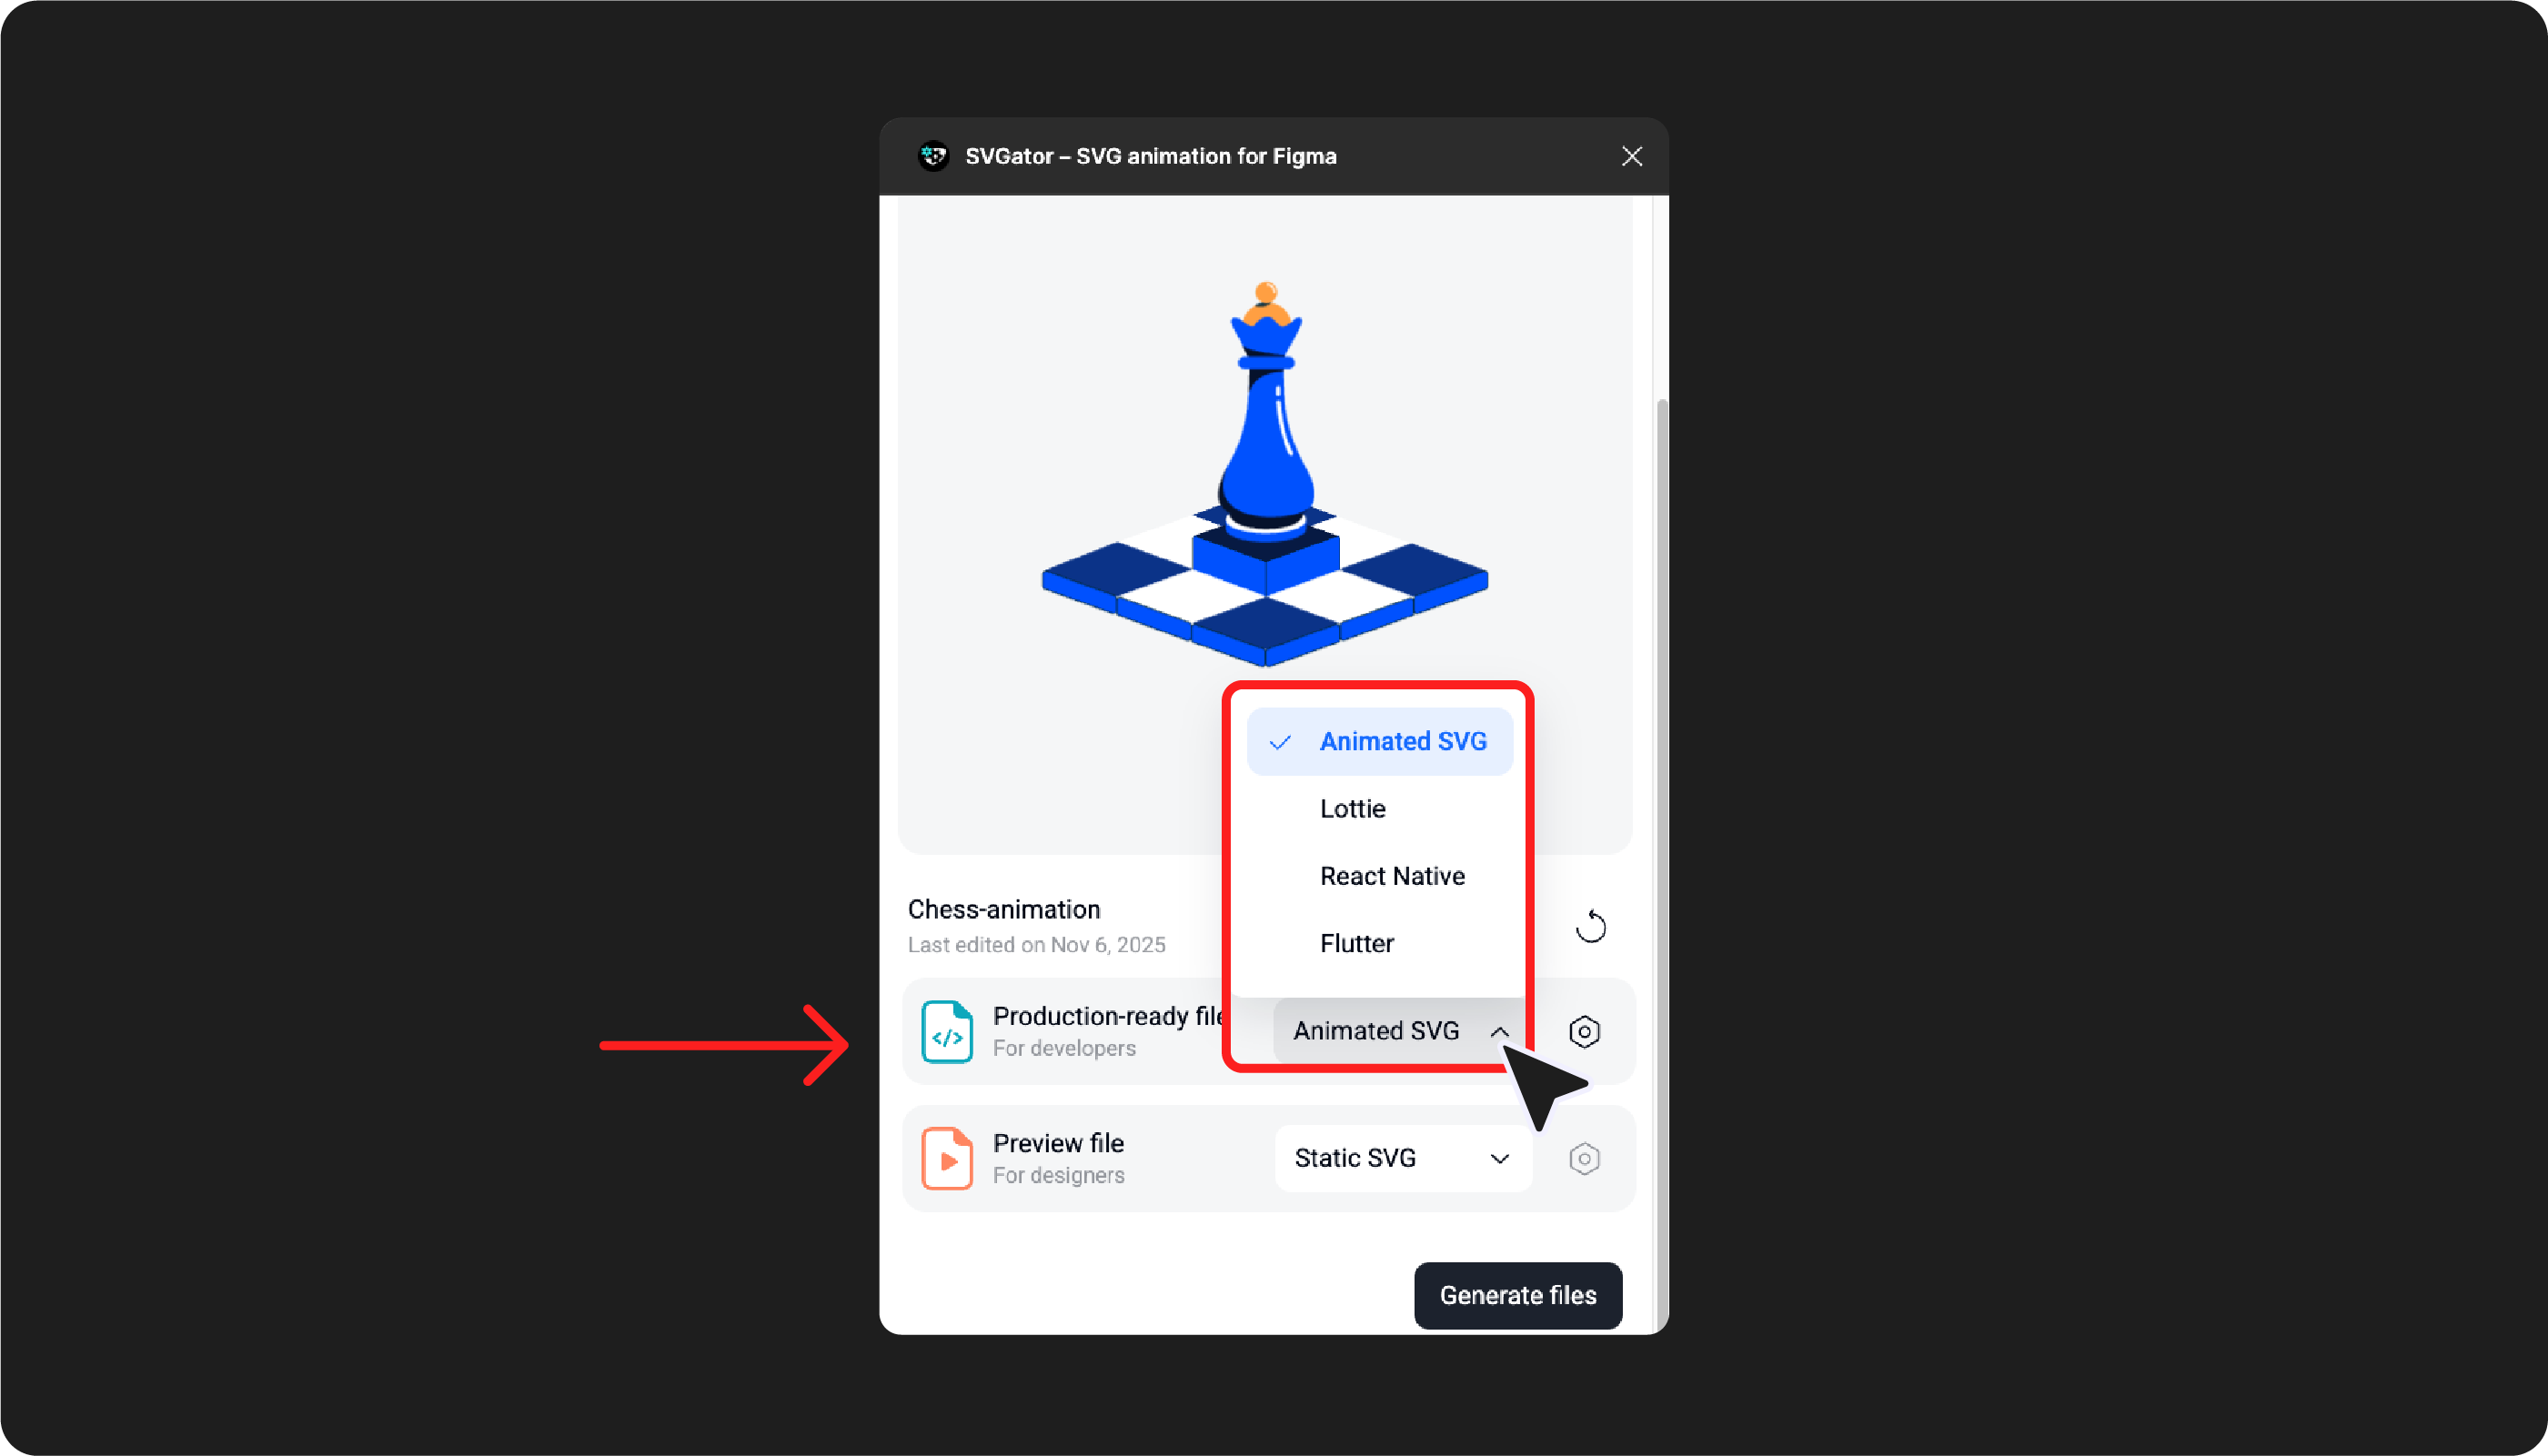
Downloading production-ready files
The SVGator Figma plugin lets you export animations directly from the plugin without switching between tools. Available formats include animated SVG, Lottie, Flutter, and React Native.
There are two ways to export ‘Production-file ready’ files from Figma Edit Mode to your device:
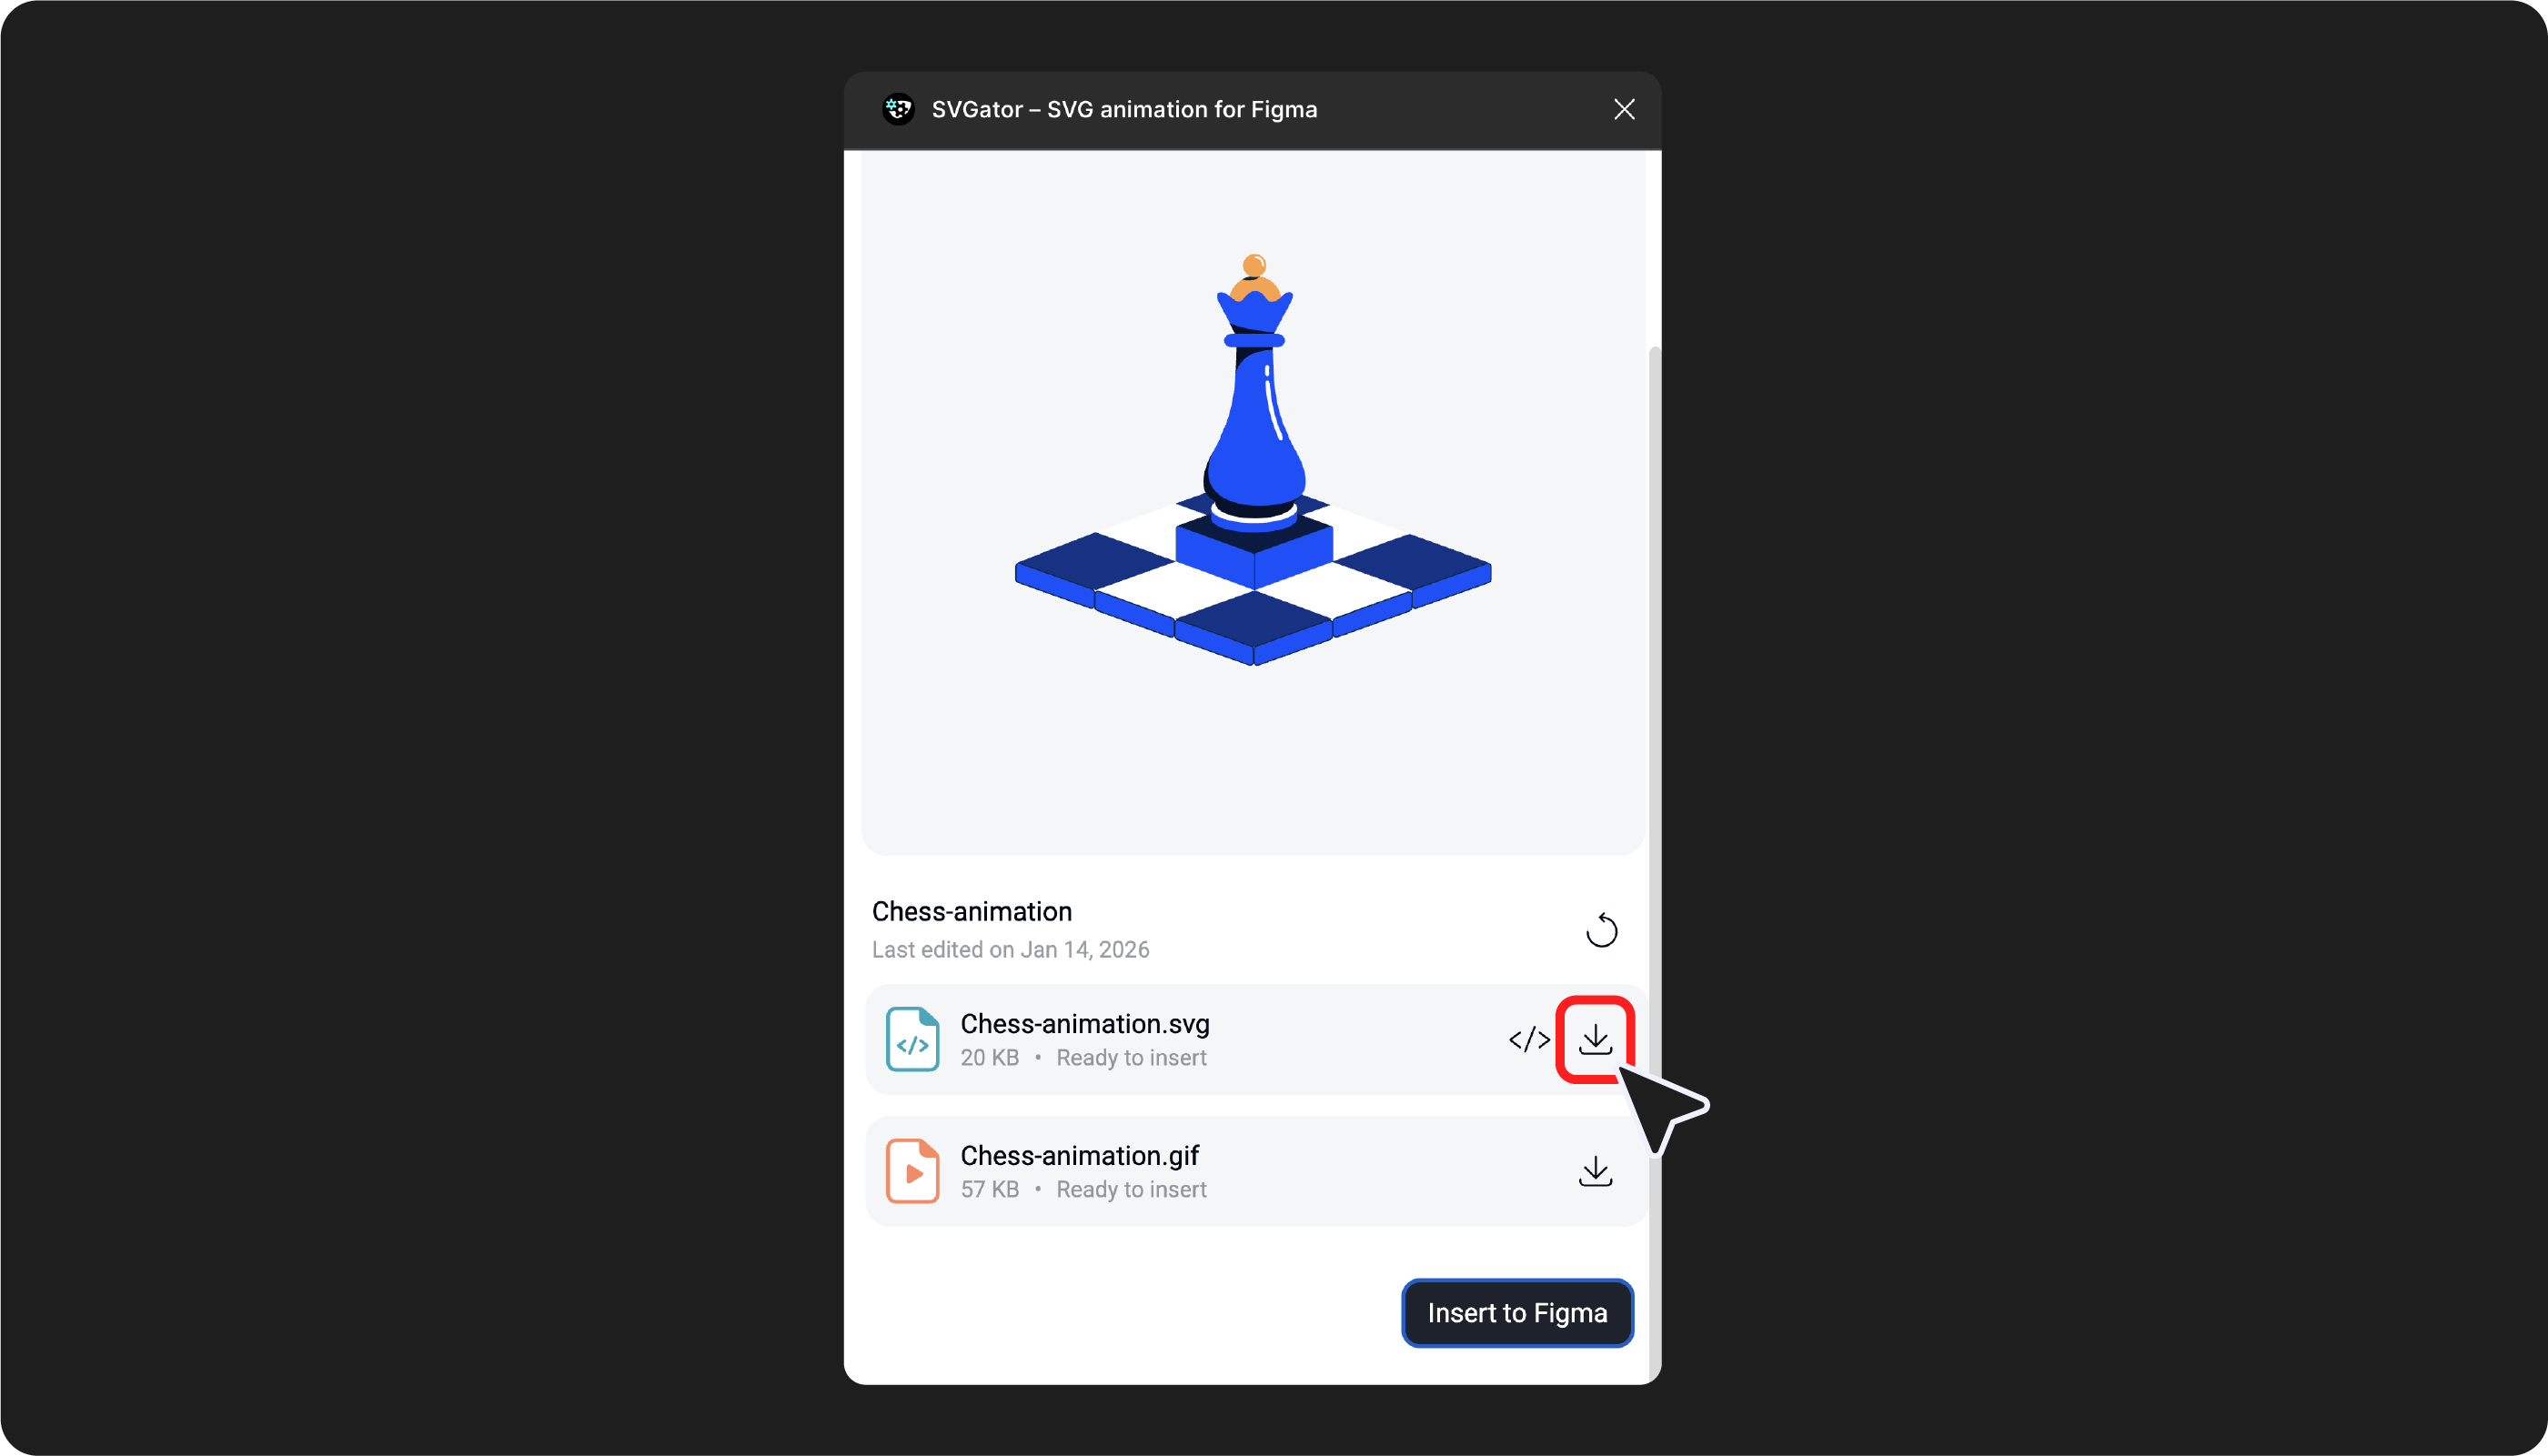
- Just generated: after the files are generated, click the Download button next to the Production-ready file
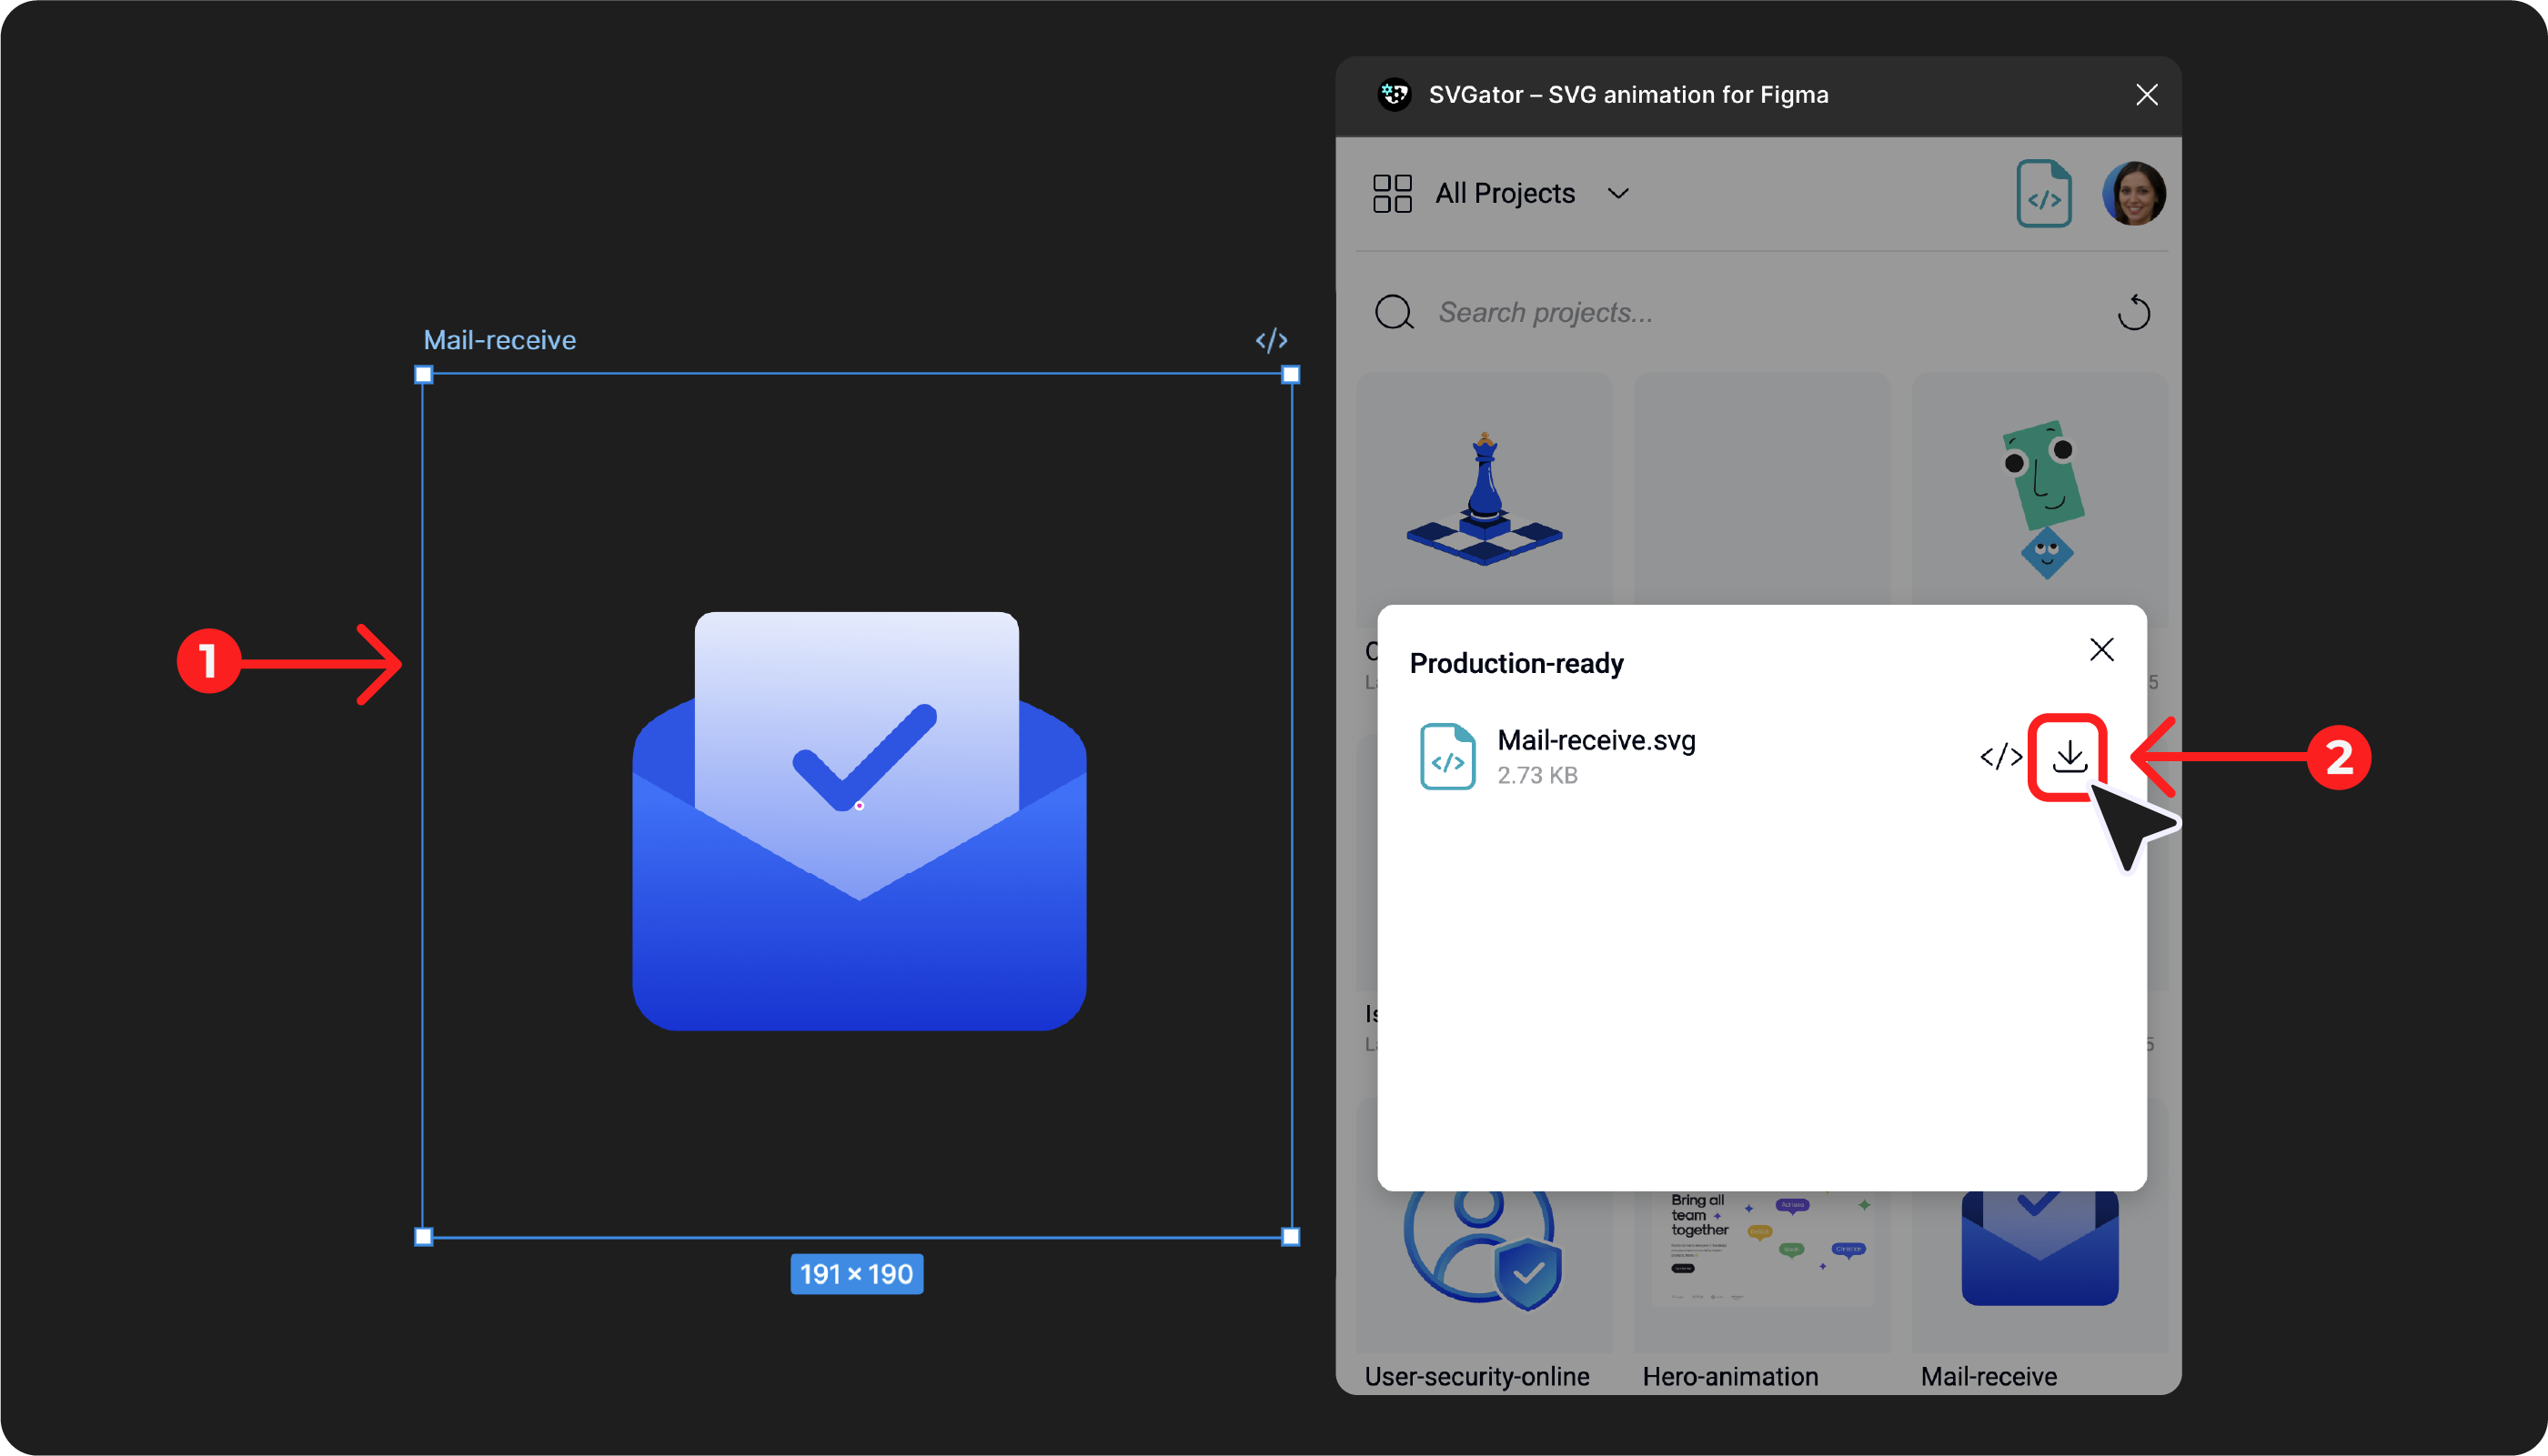
- Previous renders: select the Preview file inserted in the Figma project, while having the SVGator Figma Plugin open, and click on the Download button that will appear in the pop-up. This way, you can select any rendered Preview file and have immediate access to the Production-ready file.
Who can access production-ready files:
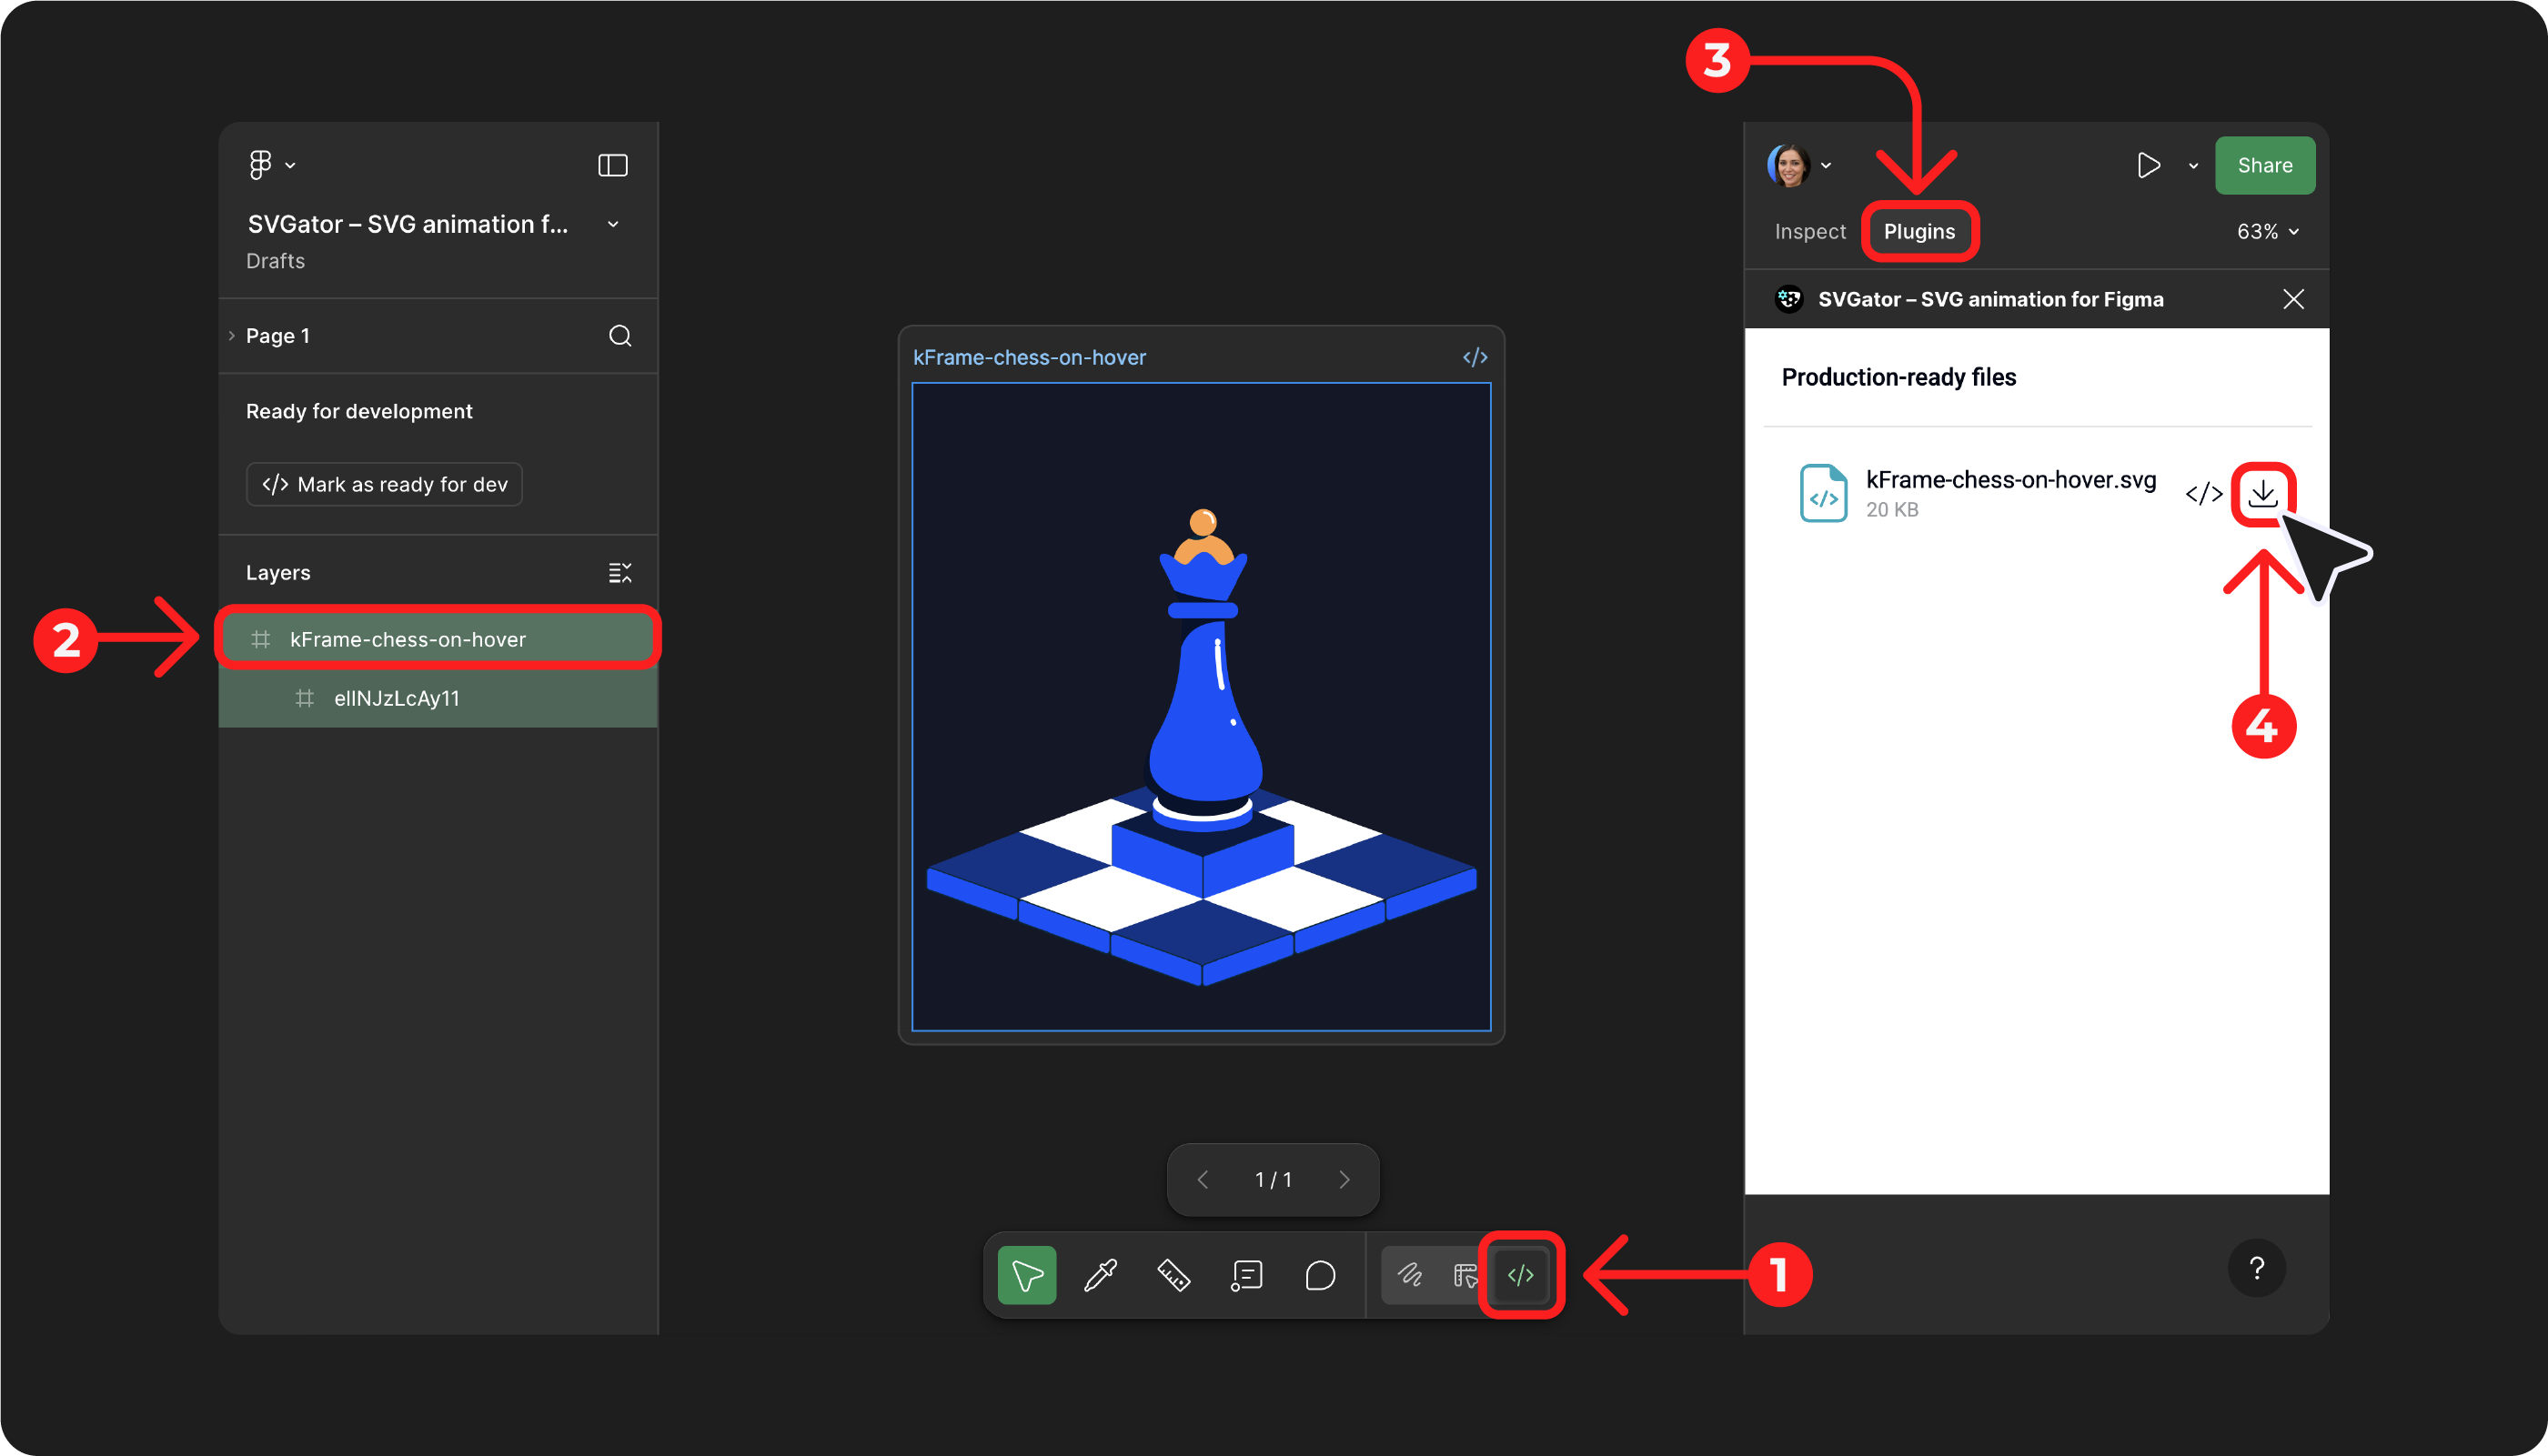
All Figma users with Edit access can download production-ready files, not just the SVGator account owner. Developers without an SVGator account can also access them through the plugin.
Using Figma’s Dev Mode, select the animation layer/group (the Preview File) and, with the Plugins panel open, click the Download button.
To modify export settings:
- Click the gear icon next to Production-ready file
- Select Open project to open the animation in SVGator's editor
- Make your changes and click Save (or use Ctrl/Cmd+S)
- Return to the plugin and click Reload project's settings from the gear icon
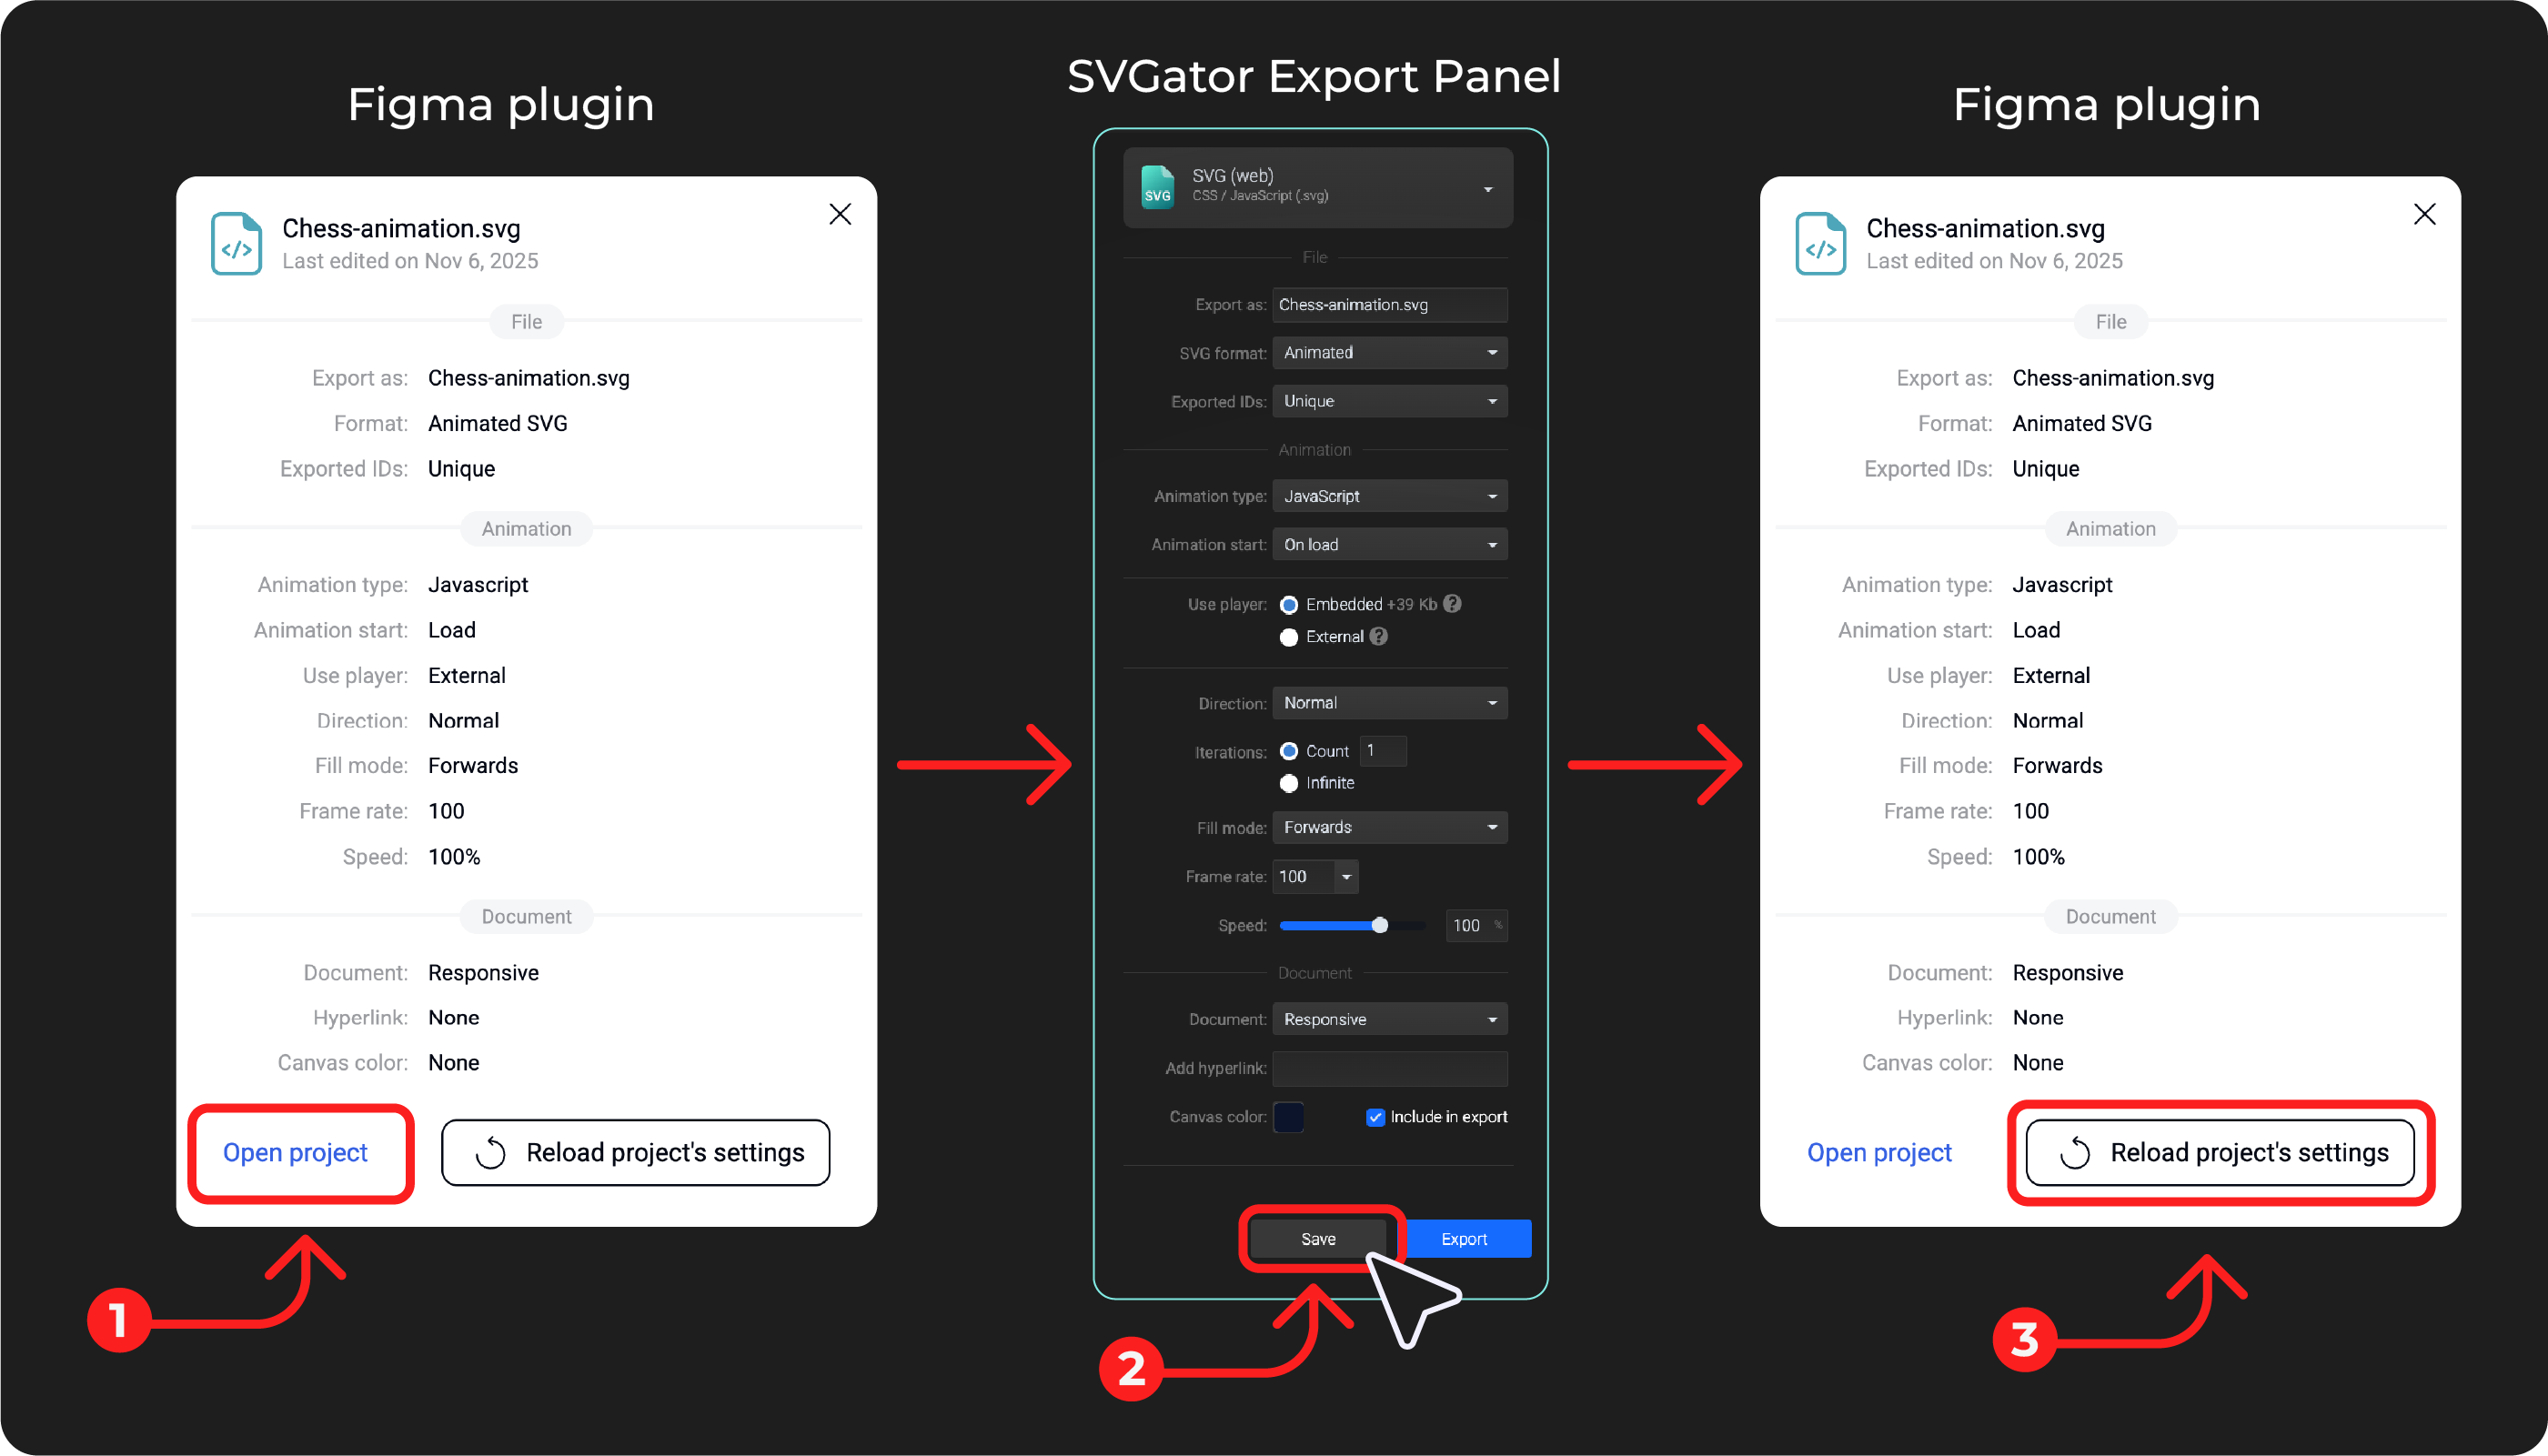
Note: Changes to the animation itself are saved automatically or with Ctrl/Cmd+S. Changes to Export options require clicking the Save button at the bottom-right of the screen.