How to Create Basic Shapes - Part 3 - Boolean Tools
Duration: 04:36
In this video I’ll show you how to combine shapes and paths, to create some graphic elements, with the help of SVGators boolean tools.

Step 1 - Using the Union tool
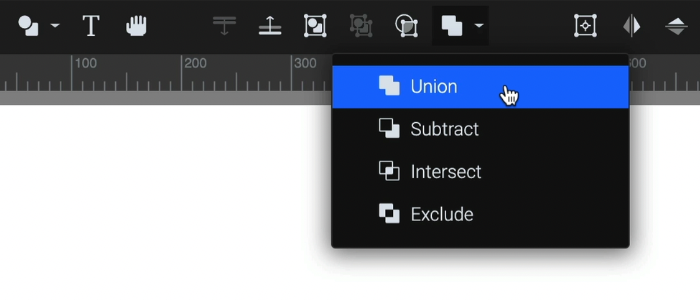
The boolean tools can be found in the toolbar, here. You need to select more than one element to be able to use them and are: Union, Subtract, Intersect, and Exclude. Let’s take a look at how all of these work, starting with Union.
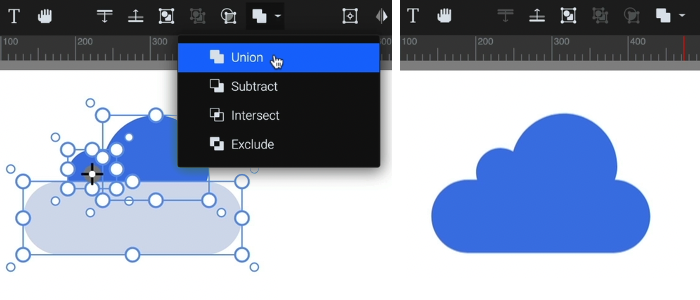
I’ll draw a rectangle over the circle, like that… drag the radius slider all the way to the right, so the ends are perfectly round, then I go to the select tool, and make the circle smaller. That should be good…
I’ll also make a copy of this circle, by holding down alt, and dragging it to the left. I’ll scale this down, like that, reposition it with the arrow keys, and now my three shapes here look like a cloud.
To make them a single shape, I’ll select them, go to the boolean tools, and click on Union. Now, this is a single shape. I’ll just go to the elements list. To rename it, double-click on the name and type in Cloud. Ok…
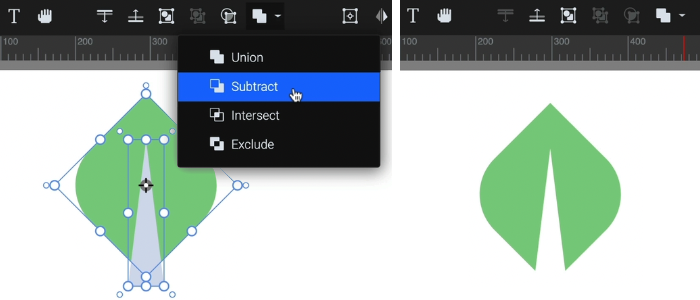
Step 2 - Using the Subtract tool
On this second shape, I want to use the Subtract tool. Let me select it and remove the stroke.
I’ll scroll down in the side panel, click on the stroke color, and press none. Like that. Now I’ll rotate this while holding down Shift, to get a 45-degree angle. Then I’ll go to the polygon tool, and draw a triangle over the leaf shape.
I’m reducing the number of sides with the Down arrow. Then I’ll just scale and reposition it, to get the narrow stem shape that I want.
Now I can select these both, and use the Subtract tool to cut the triangle out of the leaf. I have a new leaf shape now, and it’s cut out in the middle. I’ll rename this to Leaf, by double-clicking the path. Great!
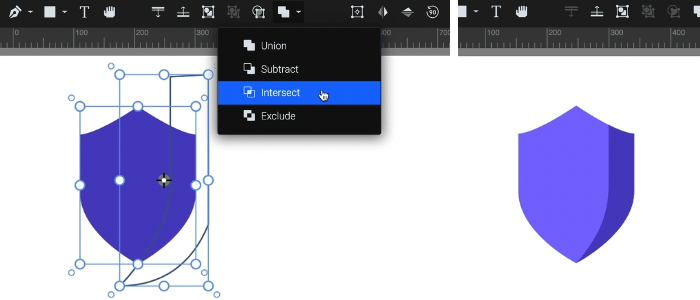
Step 3 - Using the Intersect tool
Now I’ll move on to the shield shape. In the last video, I curved the top two sides manually, and they are not perfectly symmetrical, so let’s fix that. Select, and press delete, to have only half of the shield.
I’ll go to the transform tool to see the origin, then I’ll Right click, go to copy/paste and click on duplicate, to get a copy, and mirror it horizontally with this button in the top.
Now I’ll just join the two using Unite, to get a single, symmetric shape.
I’ll press 1 to fit the artboard back on the stage... Now I’ll go and select the pen tool, and draw a shadow for my shield. I’ll start by drawing the inside edge… I can hold down Command or Control to move a node around, or the Option of Alt key to change the direction of a handle. Good…
With the select tool, I’ll select my shield, and make a copy of it: Right-click, Copy/Paste, and Duplicate.
This will be the base of the shadow, so I’ll also change the color to a darker shade. Like that. Now I can select these both and click on the intersect tool up here, to create the shadow.
I can adjust it if I want, I’ll press A for the node tool to access the nodes. That looks good.
Let me select these again, the two shapes are here in the elements list. I’ll right-click, choose Group, and rename this to Shield by double-clicking on the name.
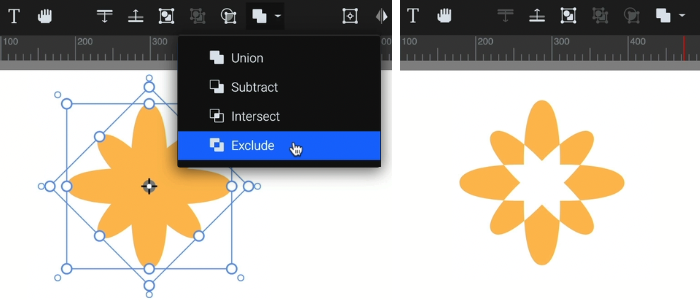
Step 4 - Using the Exclude tool
The last tool is Exclude. This is the opposite of intersect. To show you how it works, I’ll make a duplicate of the flower, and I’ll rotate it while holding down the Shift key, and also scale it down a little. Now I’ll select them both, and click on the exclude tool. All parts are combined into a single path, except for the part where my two original paths were overlapping.
One thing to keep in mind is that the boolean tools work on closed paths. For example, if you’d like to get a segment of this stroke with the Intersect tool, and draw a rectangle over it, you won’t just get part of the stroke. It will treat the stroke as a closed path.
Let me just undo that, and delete the rectangle. If you want to change a stroke, use the node tool instead. Hold alt and click to add nodes, select them, change the node types, and move them around to get the shape you want.
And that’s it. Hope you enjoyed this video. Thanks for watching.
Still have questions? Send us an email to contact@svgator.com and we will get back to you as soon as we can!
Related resources to help you out: