How to Create Basic Shapes - Part 1 - Creation
Duration: 05:27
Today we’re going to look at how to create basic shapes in SVGator, and how they work.
Shapes are the main building blocks of vector graphics. In the next video, you will learn how to convert them into paths, edit them, and combine them to create vector graphics.
Let’s get started!
Step 1 - Create a new project
I’m creating a new project, name it Shapes, and set the size to 1000 by 600 pixels. I’ll click on Create, and a new canvas opens up, where you can start drawing right away
Step 2 - Find the shapes
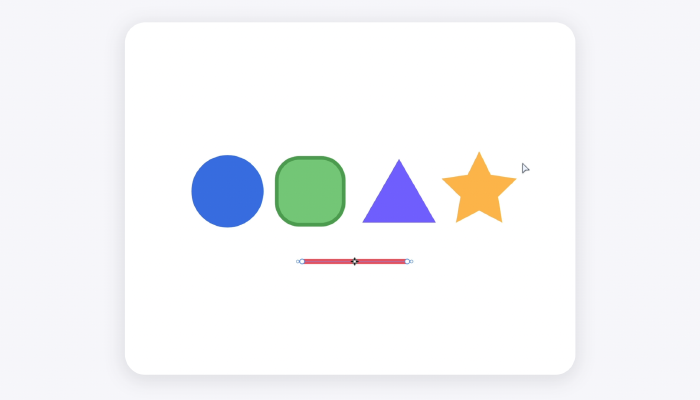
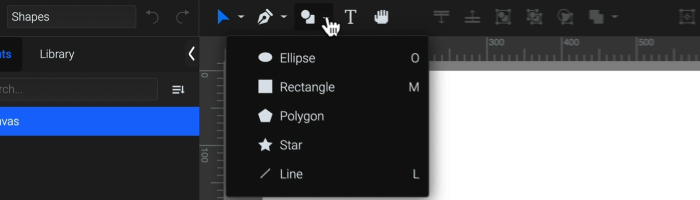
You can find the shapes up here, in the tools panel. These are the Ellipse, Rectangle, Polygon, Star, and Line. Let’s go ahead and draw an ellipse.
Step 3 - Draw the shape
The default snapping lets me draw from the exact center of the canvas. Click and drag while holding the left mouse button to start drawing. Hold the Alt or Option keys to start from the center. And hold Shift, to keep the sides proportional, and draw a circle.
Releasing the mouse button will create the shape, which will appear in the Elements panel.
Step 4 - Change the color of the shape
To change its color, click the Transform tool on the top, and scroll down in the Properties panel.
Click here to open up the fill color panel, and make the circle blue, like this. I’ll move the circle to the side, and draw a rectangle next.
From the shape dropdown, choose Rectangle. I can snap the new shape to the circle I drew earlier. Holding down shift will make it a perfect square.
I’ll change the color of this one to green. Like that.
For the stroke, I’ll use the eyedropper tool next to the stroke color, click on the rectangle to set it to green, make it darker, and increase the stroke width to 10.
Step 5 - Change the radius of the shape
If I want to round the corners, I can also do that from the Properties panel. Make sure it’s selected, and use the radius slider. You can also click on the value, and use the arrow keys to change the Radius. Holding down Shift while pressing the arrow keys will change the radius in increments of 10.
Step 6 - Change the scale of the shape
If I scale an element with the transform tool, the stroke and corners stretch with the shape. Let’s undo this. To keep the corner radius and strokes uniform, I need to use the resize tool from this dropdown, instead of transform. Now if I drag one of the corners of the rectangle, the radius and stroke will not get distorted, they will stay nice and uniform. I’ll undo by pressing Control or Command Z.
You can also change the scale and size in the properties panel. 1 is the default scale, which means 100%. If I change the scale on X to 2, the square will be twice as wide as it was before.
Let’s Undo again. To change the original size, enter it in pixels in the Size fields. I can change this to exactly 180 pixels, and the scale will stay 1.
Step 7 - Moving the shapes
If needed, reset the origin point to the center with this button, here. Let’s move this to the left. You can also use the arrow keys. Holding down shift while pressing the arrows moves elements in bigger increments.
Step 8 - Creating Polygons and Triangles
Now I’ll select the polygon tool. Polygons automatically draw from the center point, and stay proportional. While still holding down the mouse button, I can press the up arrow key on the keyboard to add more corners, or the down arrow to reduce them, until I get a triangle.
While drawing shapes, I can hold down Command or Control to move the shape around, and holding down Shift will keep the shape perfectly straight. The shape will be created when I let go of the mouse button.
I’ll scroll down the Properties panel to open the Fill color panel, and this time I’ll just copy a Hex code from a color palette, and paste it in this field to apply it to the triangle.
Step 9 - Creating Stars
Looks good, now let’s move on to the star shape. Similar to the polygon, stars also draw from the center, and you can change the number of points with the up and down arrows. Holding down Shift will make it straight.
After a star is created, and you select it, you can use this slider, in the properties panel, to add, or remove points. You can use the slider below to change the inner radius of the star.
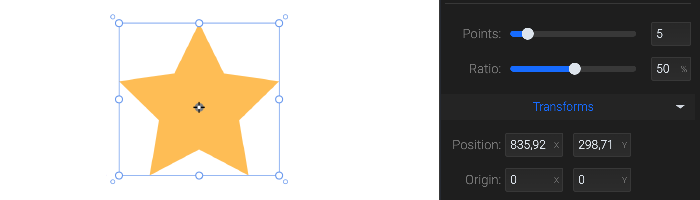
I’ll scroll down and change the fill color to yellow by pasting in another hex code from my palette… Looks good…
Step 10 - Creating Lines
Now as the last shape, let’s draw a line, the last shape from the dropdown. As the name suggests, it’s just a simple line with two points, and a stroke that you can draw in any direction. Holding down Alt will draw the line from the center, and the Up and Down arrows will change the width of the stroke while still drawing.
I’ll hold down Alt, and Shift, to make them straight, and release the mouse to finish creating it.
If I scroll down a little in the Properties panel, I can change the line ends to Round or Square, using these buttons. This one for round ends, and this one for square ends.
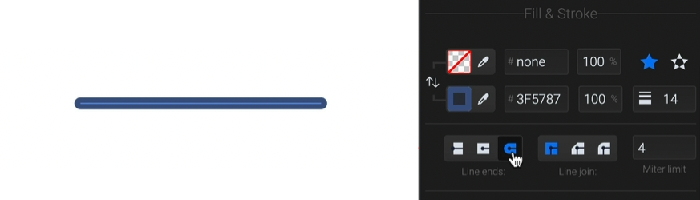
I’ll leave this as round, and open up the Stroke color panel, right here, to change the stroke color to red. That looks good.
All of these shapes will keep their characteristic properties, and don’t have any bezier handles. To be able to change them freely, they need to be converted to paths. We will look at how to do that in the next video, so stay tuned. Thank you for watching.
Still have questions? Send us an email to contact@svgator.com and we will get back to you as soon as we can!
Related resources to help you out: