Parts of the SVGator app interface
This Help Center article showcases key parts of SVGator's interface and shows you where to find them and how they're named.
You will find screenshots and details about the following sections from our tool's interface:
- Creating a new project
- General UI Sections
- Timeline (1)
- Timeline (2)
- Timeline (3)
- Timeline (4) - Easing functions
- Elements Lists
- Assets Library
- App Header
- Properties Panel (General)
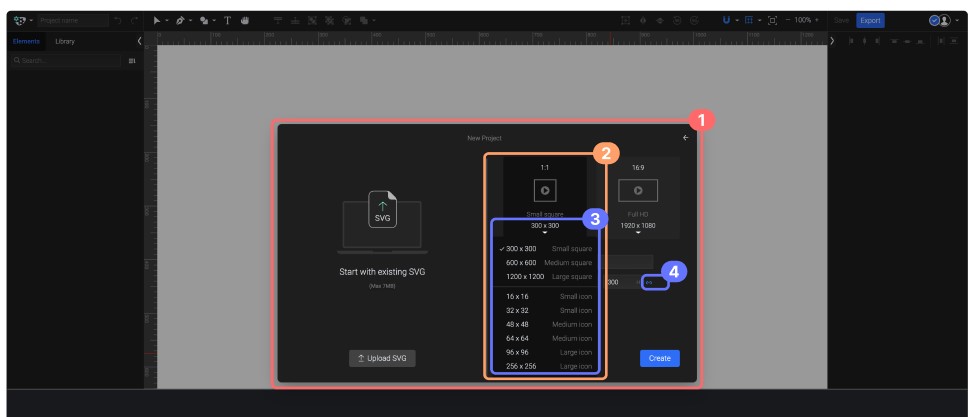
Creating a new project
The "Create a new project" section contains the following elements:
- New project panel
- Canvas size presets
- Dropdown menu
- Maintain/Don’t maintain proportion
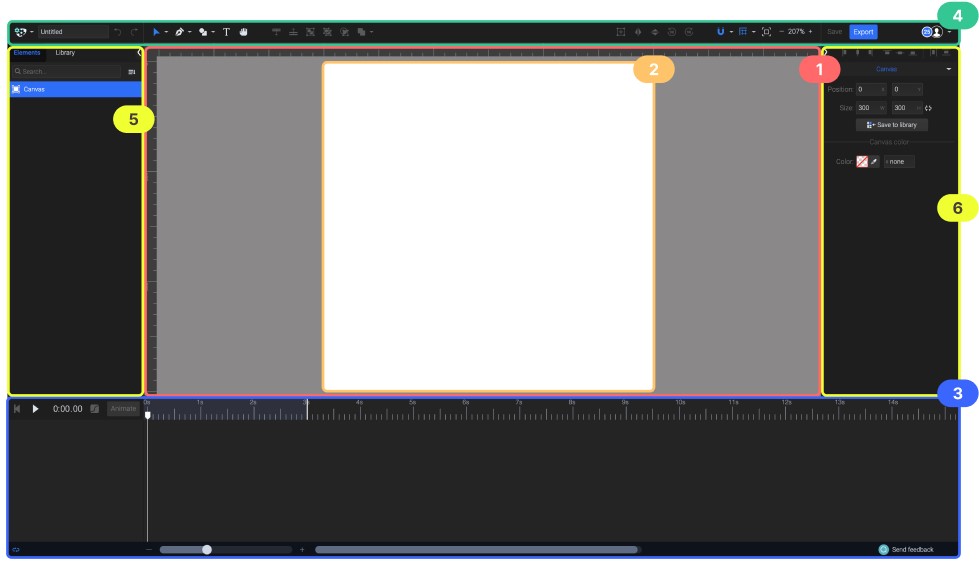
General UI Sections
The General UI sections contain the following elements:
- Stage
- Canvas
- Timeline
- Header
- Elements list
- Properties panel
Timeline (1)
The "Timeline (1)" section contains the following elements:
- Timeline ruler
- Time indicator
- Vertical scroll
- Horizontal scroll
- Timeline zoom slider

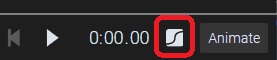
Timeline (2)
The "Timeline (2)" section contains the following elements:
- Playhead
- Animators list button
- Easing functions button
- Play button / Pause button
- Reset (time) button
- Timeline limit marker
- X second mark (e.g: “2.3 second mark”)
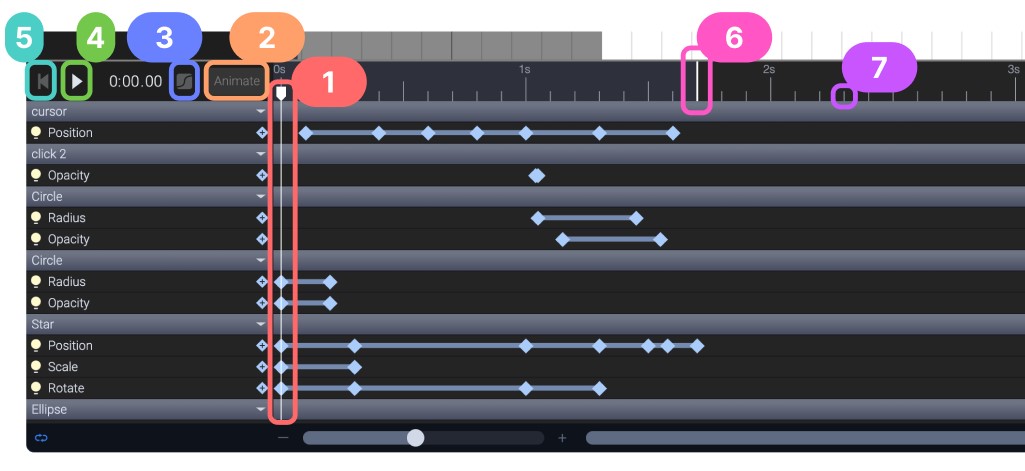
TIP: Press and hold the Shift key while dragging the Playhead with the cursor for smoother movement compared to dragging without the Shift key, making it easier to check each frame of your animation.
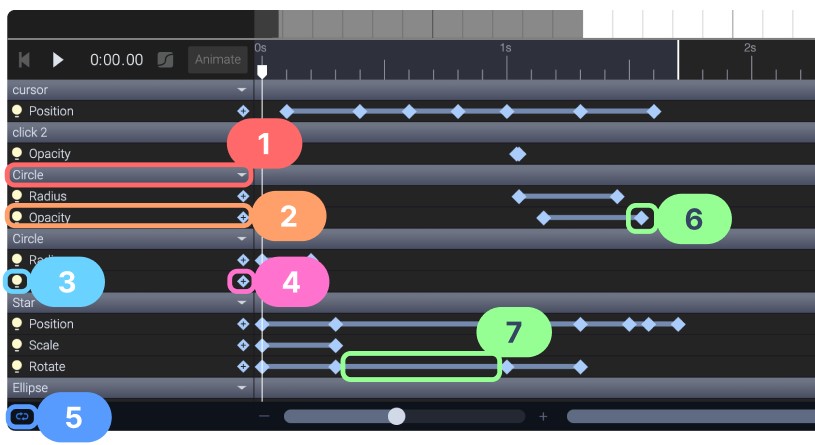
Timeline (3)
The "Timeline (3)" section contains the following elements:
- Element
- Animator (element’s animator)
- Animation visibility toggle (enables/disables the animator)
- Add keyframe button
- Loop button
- Keyframe
- Segment
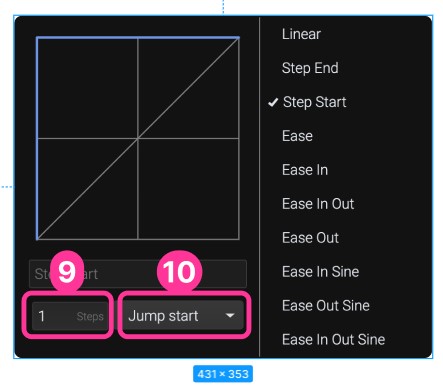
Timeline (4) - Easing functions
The "Timeline (4) - Easing functions" section contains the following elements:
- Easing panel
- Easing presets
- Graph editor
- Easing curve
- Bezier handle
- Current easing function name input
- Easing function values input
- Step Keyframe (step start keyframe/step end keyframe)
- Step count input
- Step keyframe options
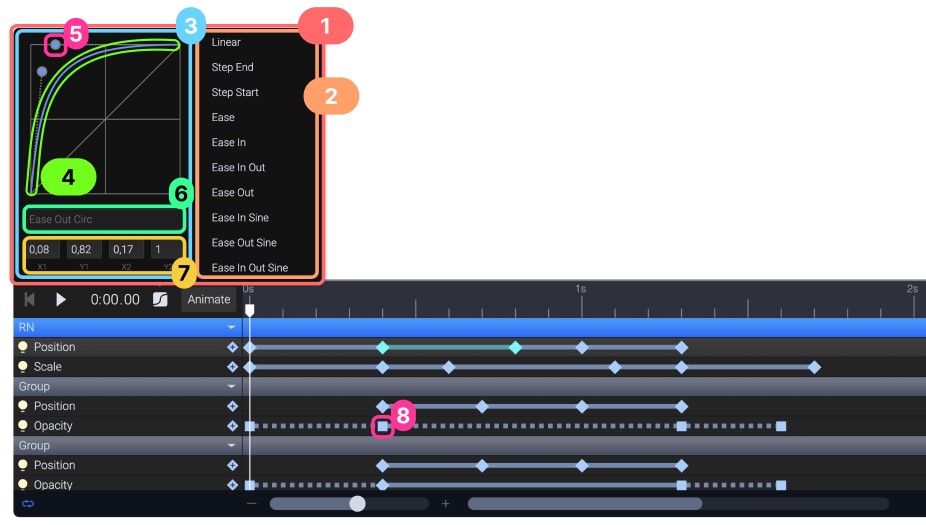
TIPS: You can customize the easing graph using the bezier handles, thus you will create custom easing functions that will appear at the top of the presets list.
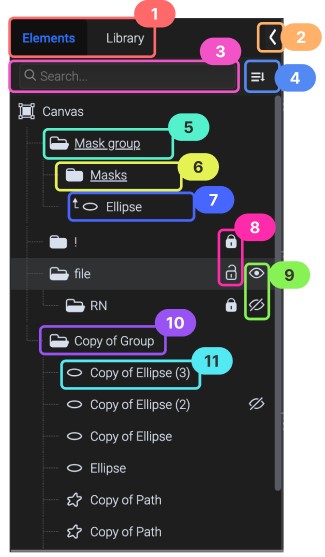
Elements Lists
The "Elements Lists" section contains the following elements:
- Elements tab and Library tab
- Hide/Reveal ‘Elements List’ toggle
- Search Element input
- ‘Elements List’ display order
- ‘Mask group’
- Mask elements group
- Masked element
- Lock element toggle (Lock/Unlock)
- Element visibility toggle (Hide/Show)
- Group element
- Element
TIPS for the Elements Lists section:
- You can reorder elements within the project using a simple drag and drop in ‘Elements list’.
- Right-click on the Element -> Arrange -> and there is the list of options to arrange it.
- With the element selected, there are 2 arrow symbols (down and up) in the header, right next to the hand tool, which will allow users to move the selected element one position up or down.
- Shortcuts for the ‘Arrow’ buttons on the toolbar: Ctrl + Arrow up / Cmd + arrow up (for MacOS) will also move an element up or down one position. Also, including Shift in this key combo will bring the element all the way to the top or to the bottom, among its sibling elements. Those shortcuts are also mentioned in the right-click menu (Arrange) as written above.
- You can toggle an element's visibility by clicking on the Eye icon next to it. This might help you focus on other elements in more complex projects.
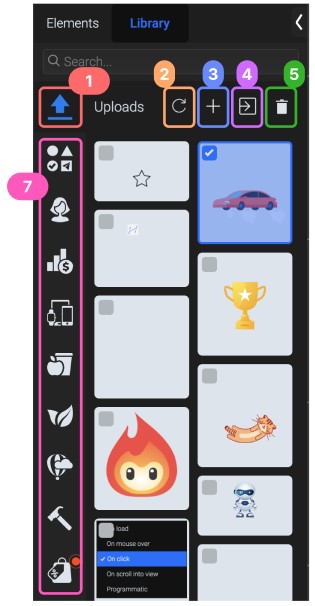
Assets Library
The "Assets Library" section contains the following elements:
- ‘Uploads’ (refer to as ‘My uploads’ or ‘Uploads’)
- Refresh list
- Upload new
- Insert asset
- Delete asset
- Assets categories
App Header

The "App Header" section contains the following elements:
- App menu
- Project name input
- Undo/Redo buttons
- Transform tool (V), Node tool (A), Resize tool (S)
- Pen tool (P), Add Node tool, Remove Node tool, Pencil tool (N)
- Shapes tool [Ellipse (O), Rectangle (M), Polygon, Star, Line (L)]
- Text (T) tool
- Hand (H) tool
- Move up / Move down (Elements order in list)
- Group elements
- Ungroup elements
- Create Mask
- Boolean options (Union, Subtract, Intersect, Exclude)
- Center Origin
- Flip horizontally
- Flip vertically
- Rotate 90 deg. counter-clockwise
- Rotate 90 deg. clockwise
- Snapping options [Snap to Objects, Snap to Points, Snap to Guides, Snap to Grid, Snap to Pixel, Enable Snapping (Alt+S)]
- Stage options [Front Grid, Back Grid, Show Ruler (Alt+R), Show Guides (Alt+L), Collapse Sections /]
- Fit Canvas into view
- Zoom options
- ‘Save’ button
- ‘Export’ button
- User menu
- Render status notification

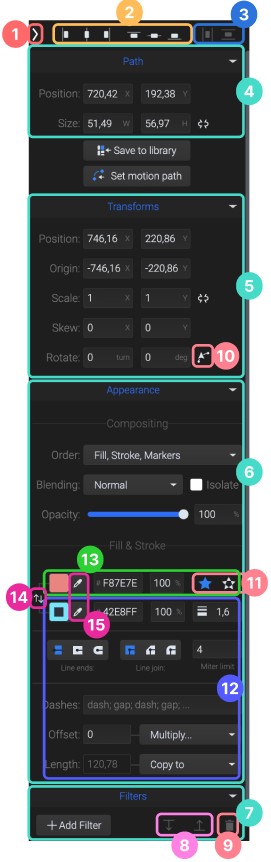
Properties Panel (General)
The "Properties Panel (General)" section contains the following elements:
- Hide/show properties panel
- Align options
- Distribute option
- Element’s properties
- ‘Transforms’ panel
- ‘Appearance’ panel
- ‘Filters’ panel
- Arrange selected filter (move up or move down)
- Delete selected filter
- Auto orient (for move on path animations)
- Fill mode (Non-zero / Even-odd)
- Stroke properties
- Fill properties
- Swap colors
- Color picker
Discover other useful articles from our Help Center:

Still have questions? Send us an email to contact@svgator.com and we will get back to you as soon as we can.