Creating masks in Affinity Designer
Please note that you can also create masks in SVGator, so there's no need to use a third-party editor tool. To learn how to create one, watch the following SVG Masks Tutorial. If you would rather create the mask in Affinity Designer, please follow the steps below.
Similar to other vector editing softwares, in Affinity Designer the object you want to use as a mask must be in front of the other element. In this case we will use the blue circle to mask the orange star. In The Layers panel, right click on the blue circle (Ellipse) and choose “Mask to Below”.

Go to File and choose Export…
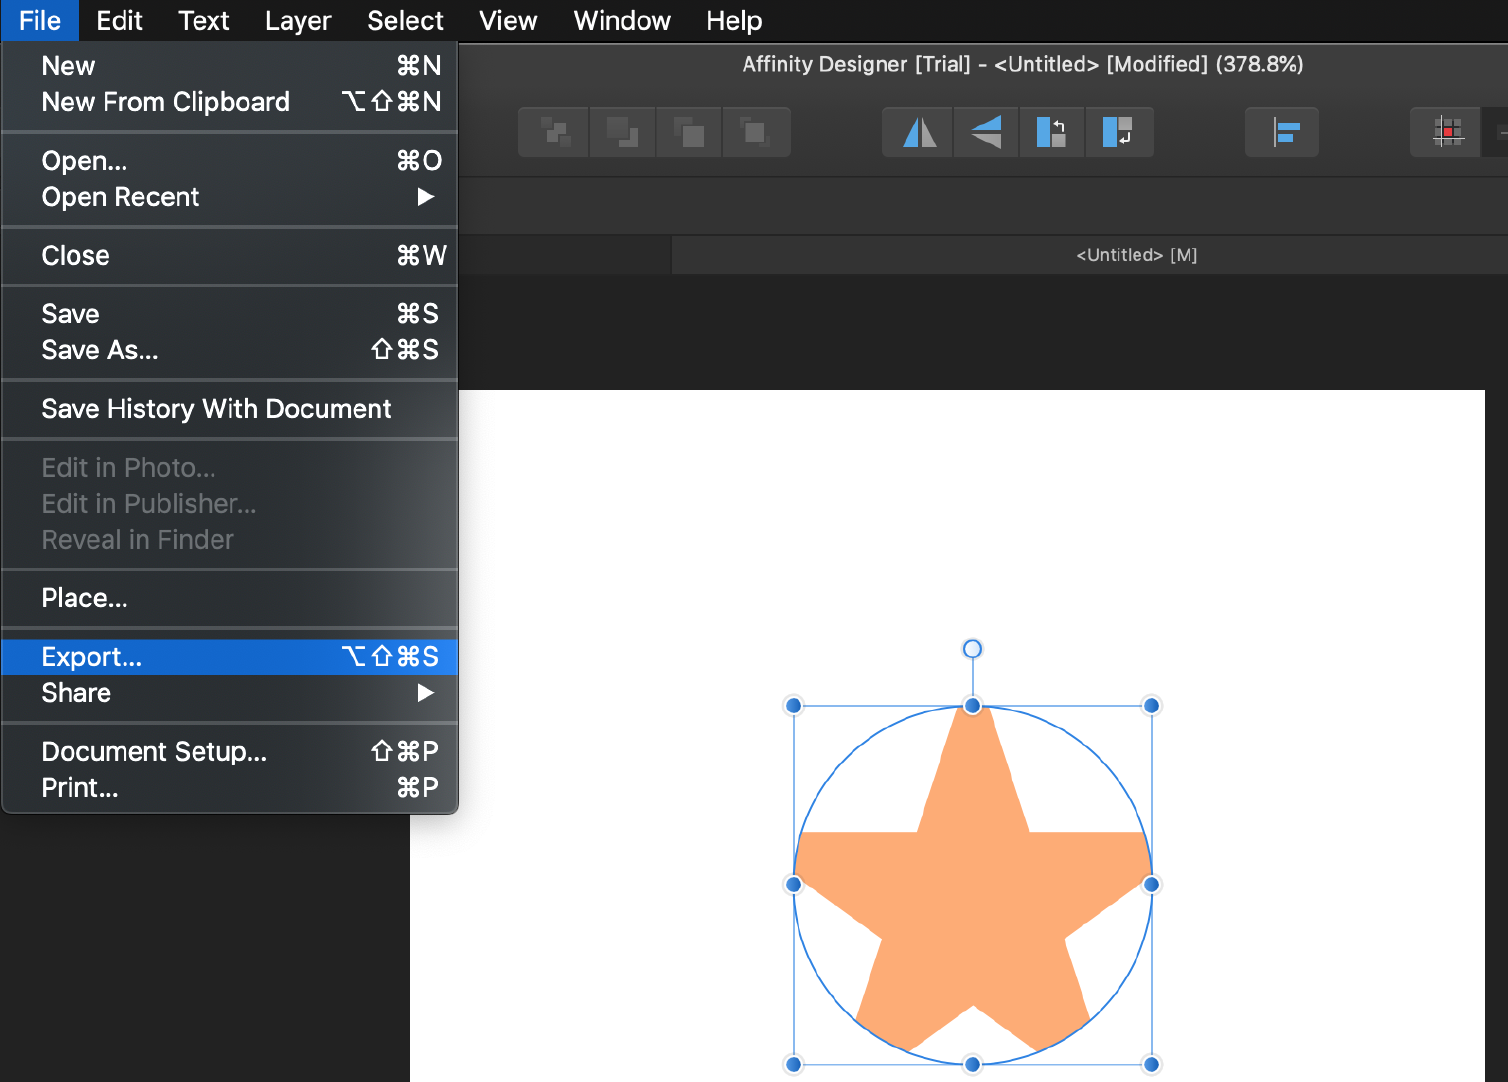
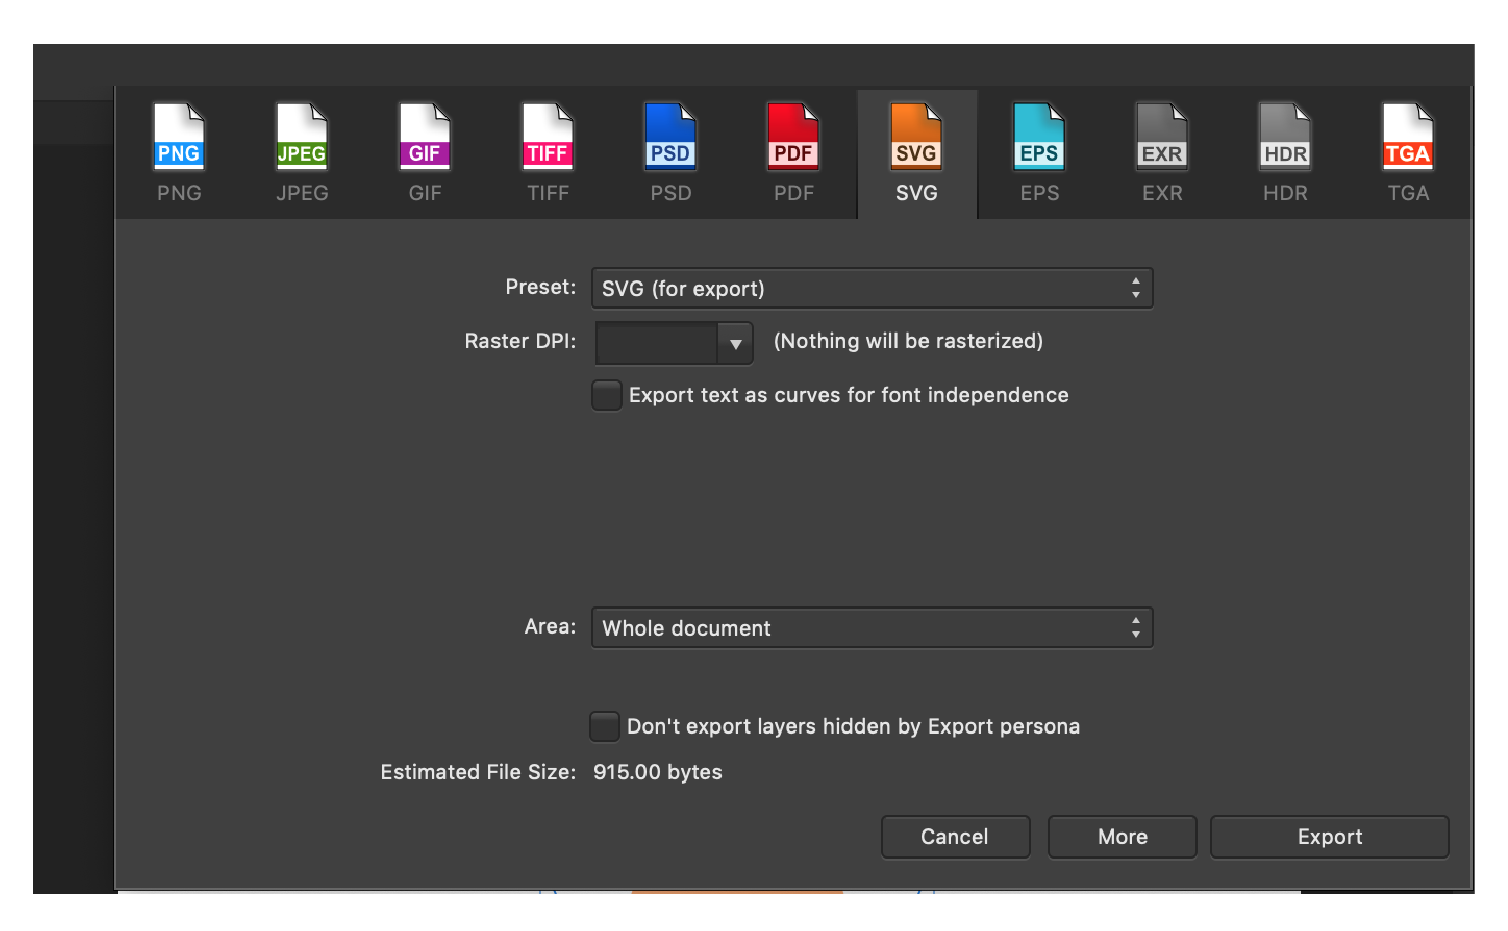
Select SVG format (the orange file icon at the top of the panel) and click Export.
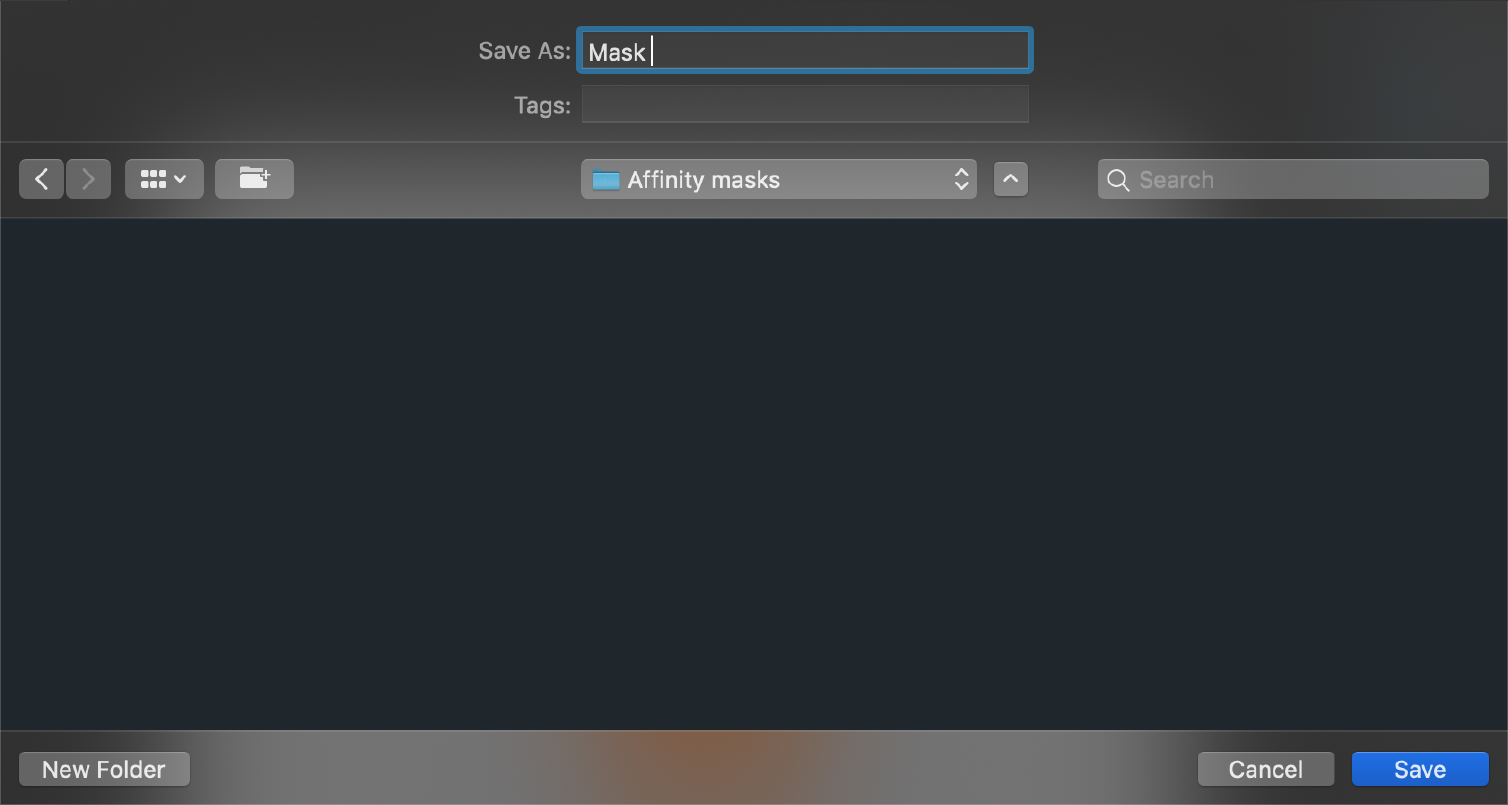
Choose a name and the destination folder:
Import the SVG file into SVGator.
Please note that there's a browser compatibility error with Safari. In case you are running SVGator in Safari, the clipping mask will not be visible after the import. You can read more about this here.
More articles:

Still got questions? Send us an email to contact@svgator.com and we will get back to you as soon as we can.