Update Your Project With New Elements
Duration: 14:29
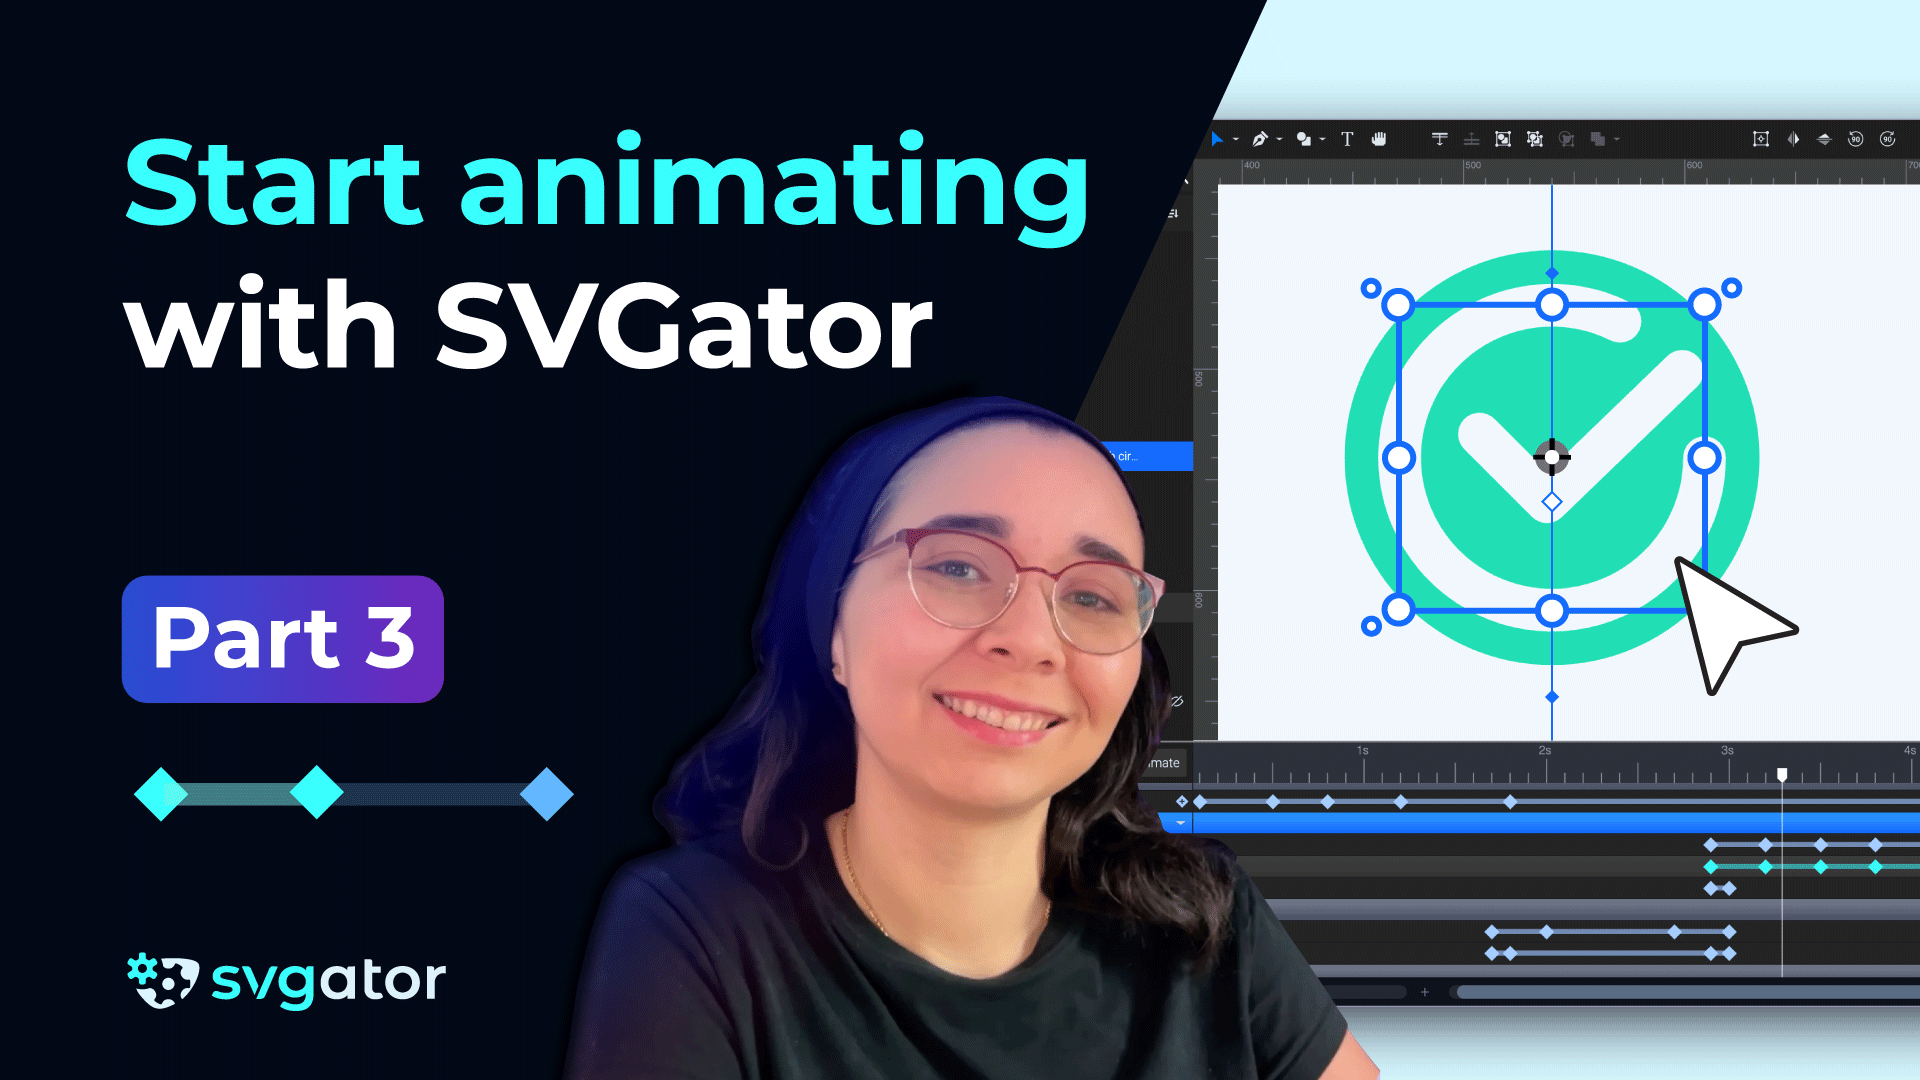
In this tutorial, we built an illustration using SVGator’s library and started animating it. The goal was to create a folder with paper inside and some extra details like a label and a checkmark.
We added SVGs to the canvas and adjusted their size and position. Using the node tool, we aligned elements precisely. We also used a rounded square as a label, converted it to a path for flexibility, and added pen tool lines to simulate text.
To keep elements organized, we grouped related parts and used snapping and alignment tools to make sure everything lined up. We then inserted a piece of paper behind the folder by adjusting layer order and grouping it properly.
The animation began by skewing the folder’s front and back layers to create an opening effect. After the skew, both parts moved out of view and faded using position and opacity animations. We worked on the paper and checkmark animations afterward.
This technique can be extended to other illustrations, allowing you to replicate the process.
Still got questions? Send us an email to contact@svgator.com and we will get back to you as soon as we can.