Add animated SVG to Webflow
To add animated SVG to Webflow, you just need to follow one of the methods presented below:
I. Add animated SVG - animate on load:
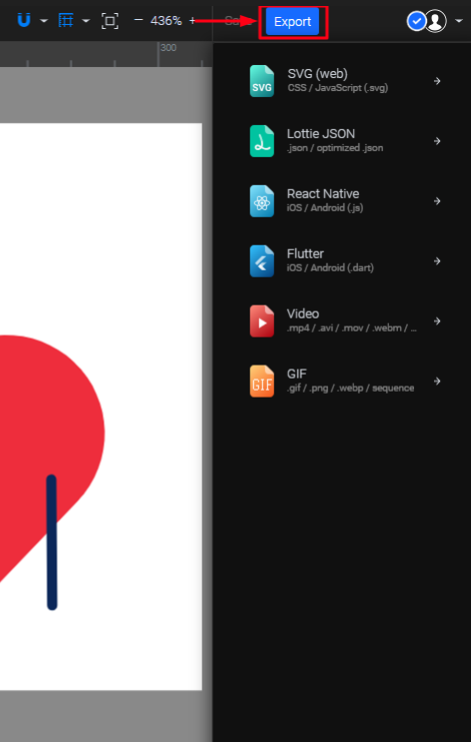
1. Animate your SVG in SVGator.
Once you are done, just click on the Export button in the app’s header:
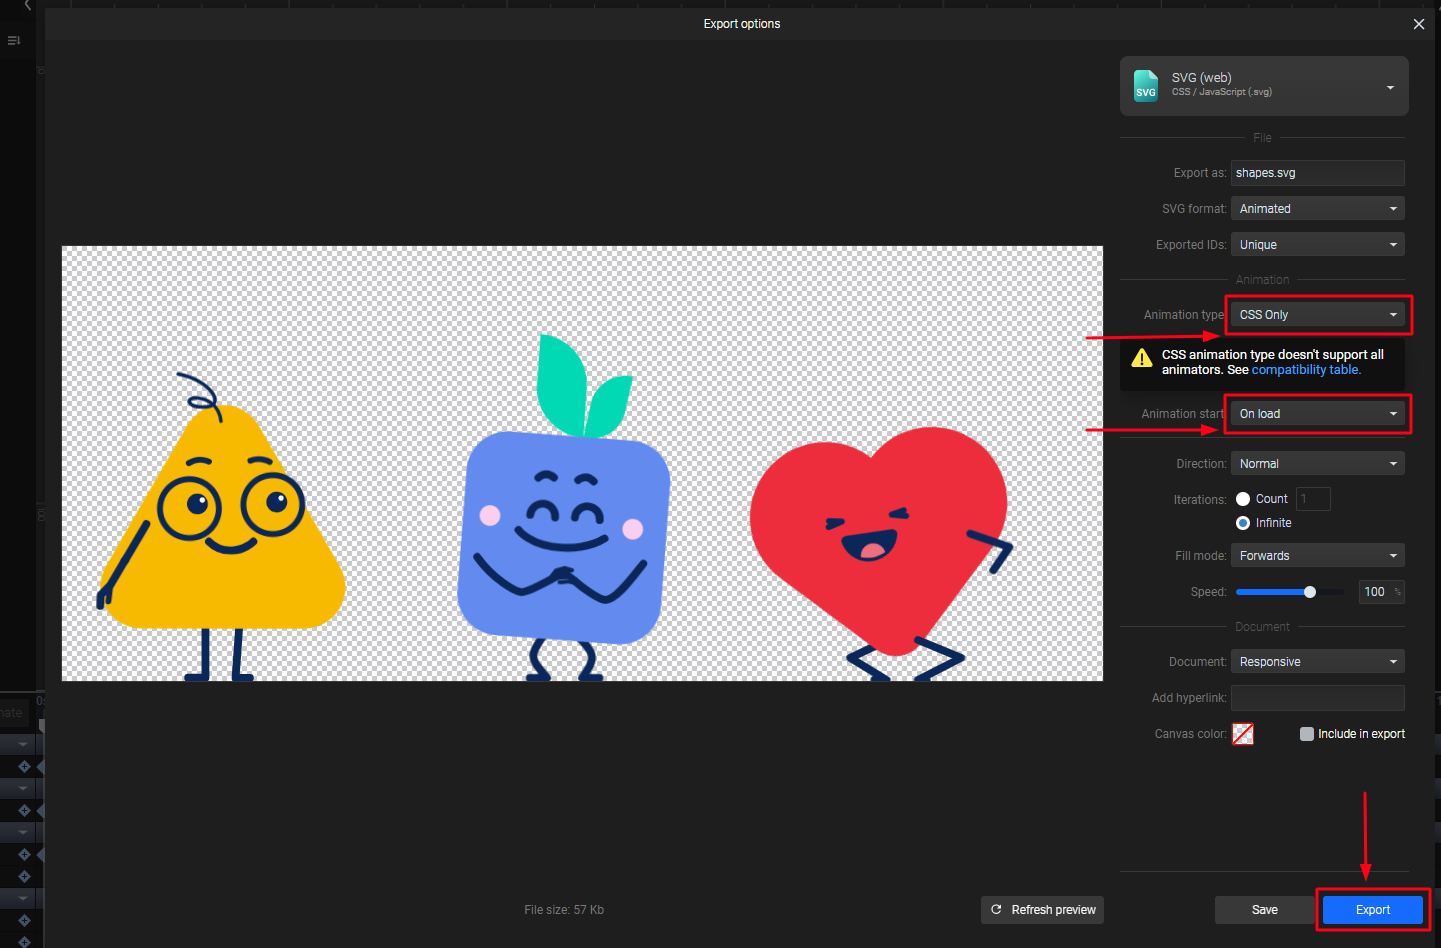
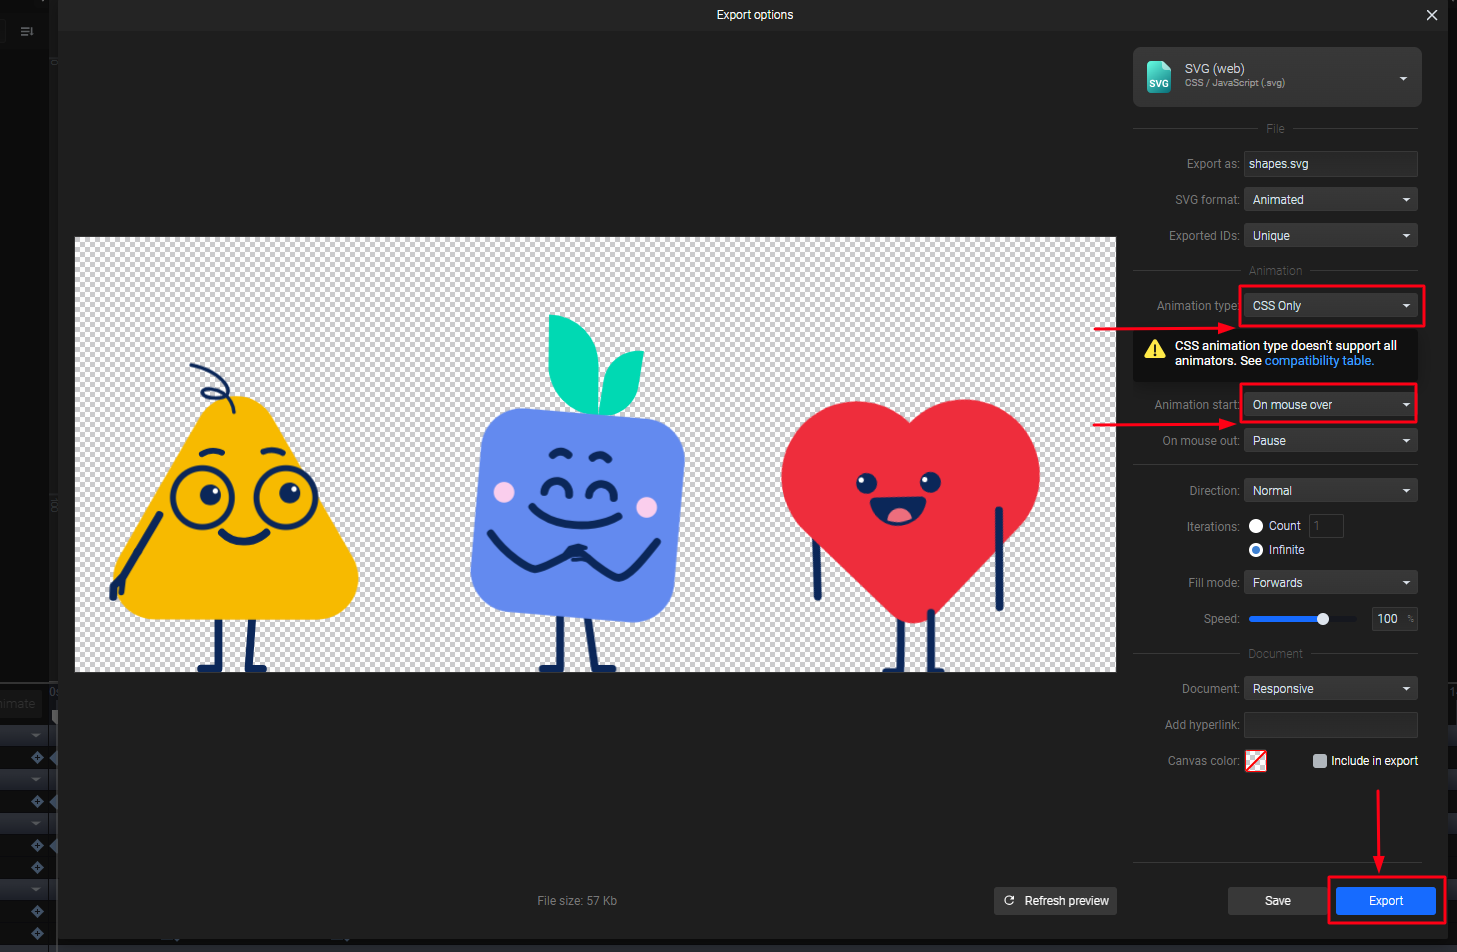
2. In the Export panel, make sure you select “CSS Only” as the animation type, and let the animation start when the page loads (On load). Click the “Export” button:
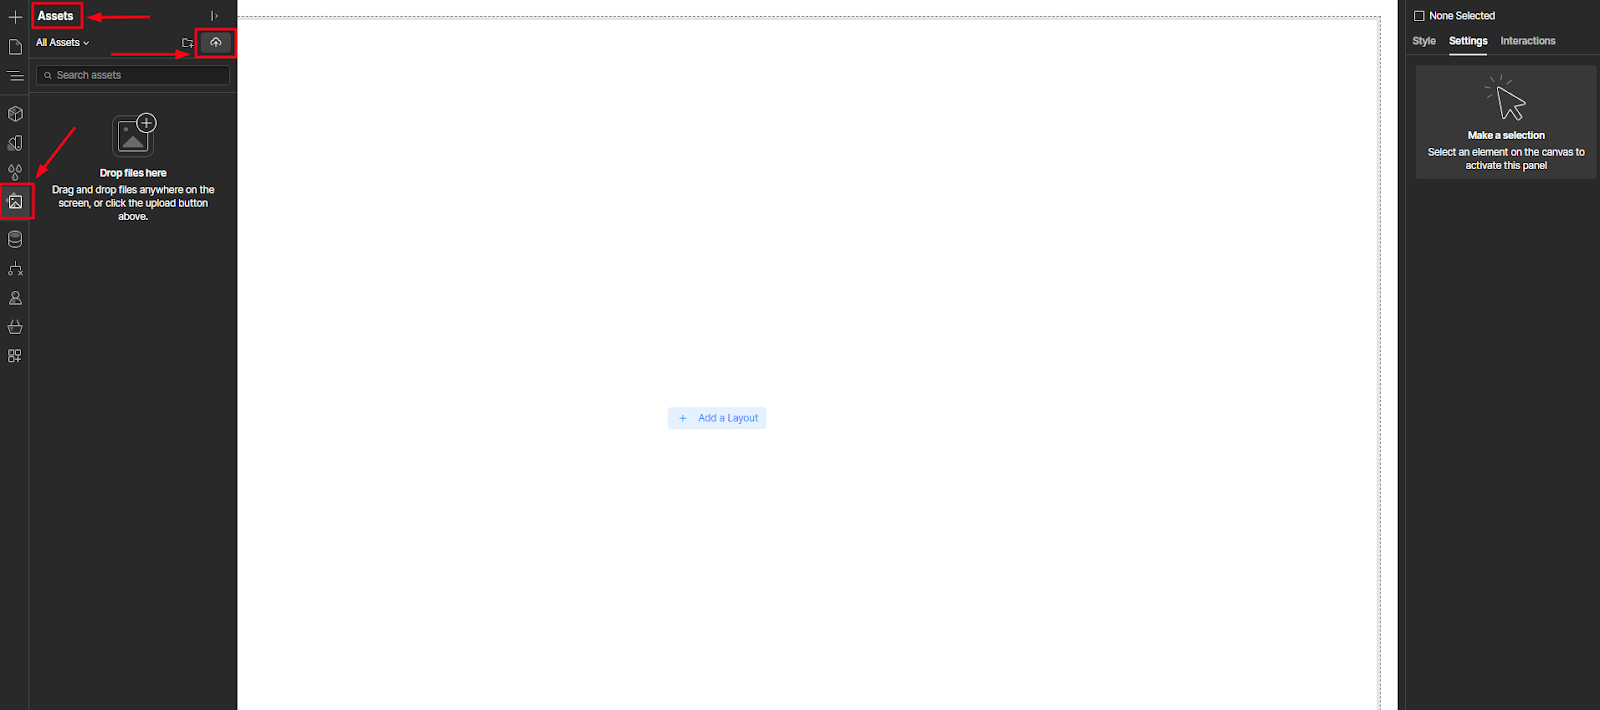
3. In Webflow, go to the “Assets” panel, click on the “Upload” icon, and select the animated SVG that you just exported from SVGator:
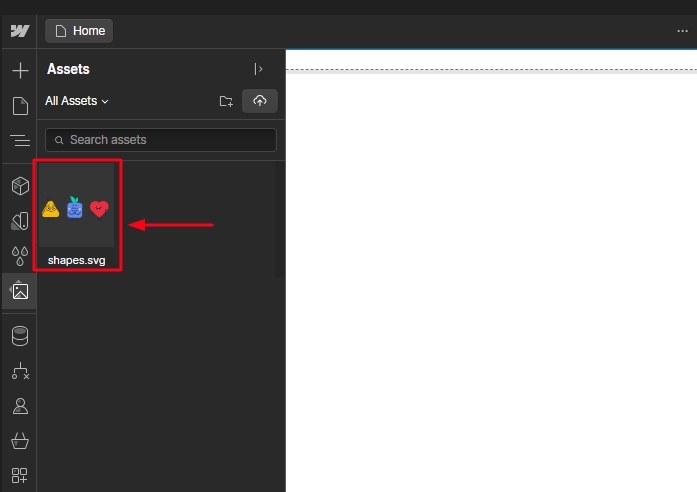
4. You can see that the SVG animation is playing in the preview thumbnail.
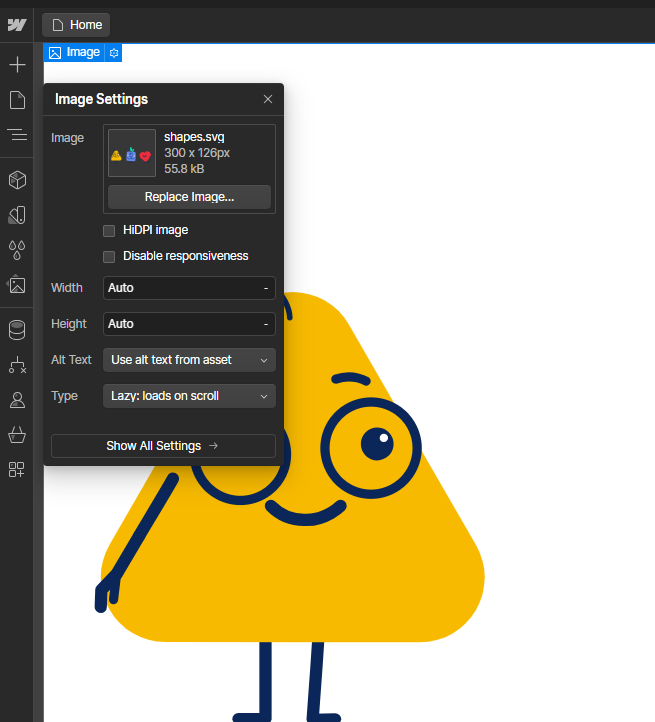
5. You can simply drag it into your Webflow project, where you can edit its properties in the same way as you would for regular images.
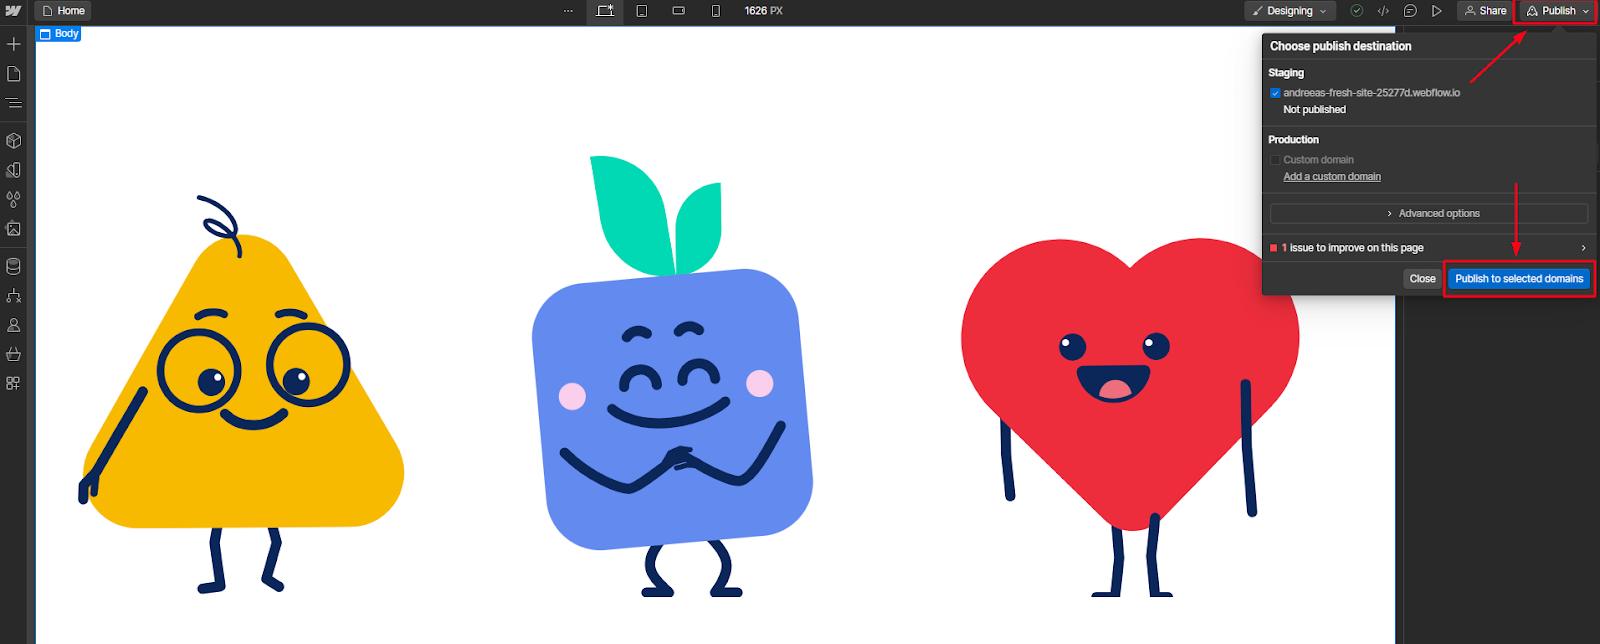
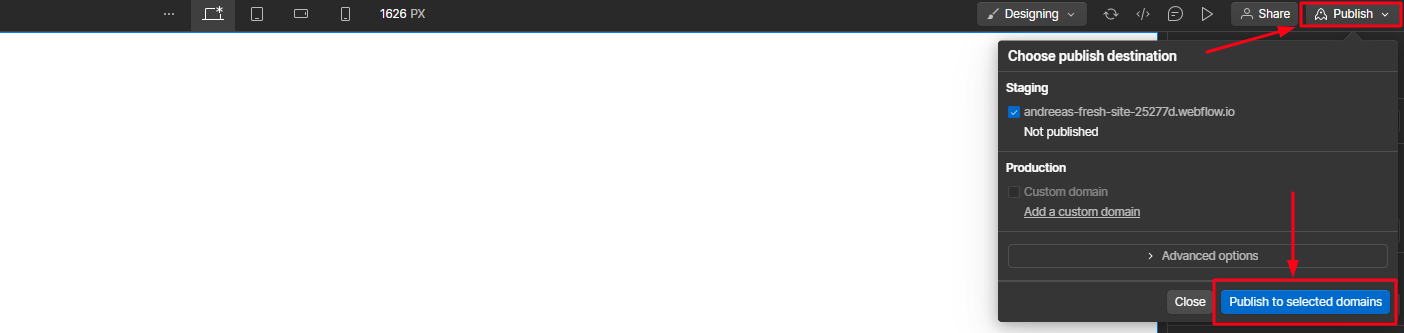
6. After adjusting your animation as desired, navigate to the right side of the header, and click on the “Publish” button. This will make your changes live and visible on your website:
II. Add interactive SVG animation:
Method 1 - Using embedded code:
We recommend this solution for interactive animations starting on mouse over.
1. Before exporting the SVG from SVGator with “CSS Only” as the animation type, set the animation to start “On mouse over”. You can also set the animation to Pause or Reset for the “On mouse out” setting. You can change the direction of the animation to be on “Reverse”, “Alternate” or “Alternate Reverse”.
2. Open the file in a text or code editing tool. Make sure that you select all the code and copy it to your clipboard. The code should look similar to this:

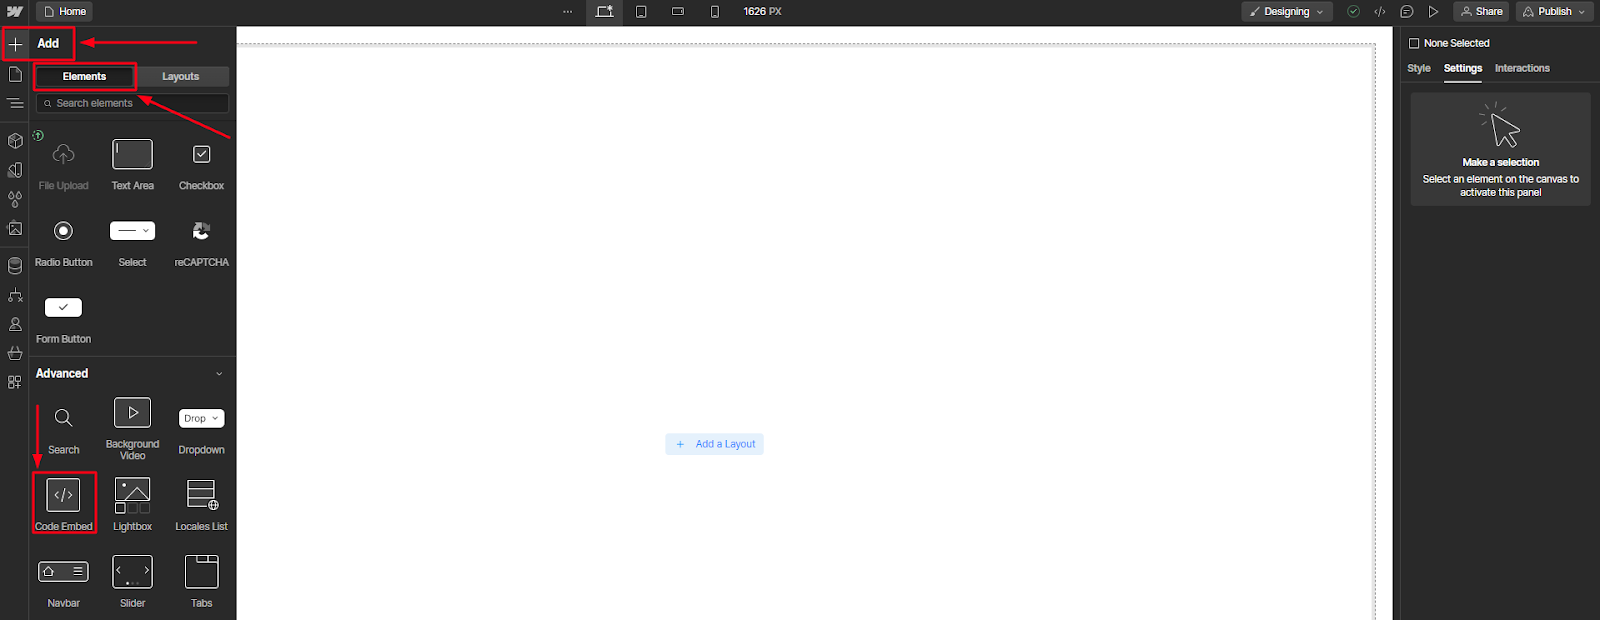
3. In Webflow, go to the Add panel and drag an Embed element into your canvas from the Components section. You can also use quick find (CMD/CTRL+E) and type “embed”.
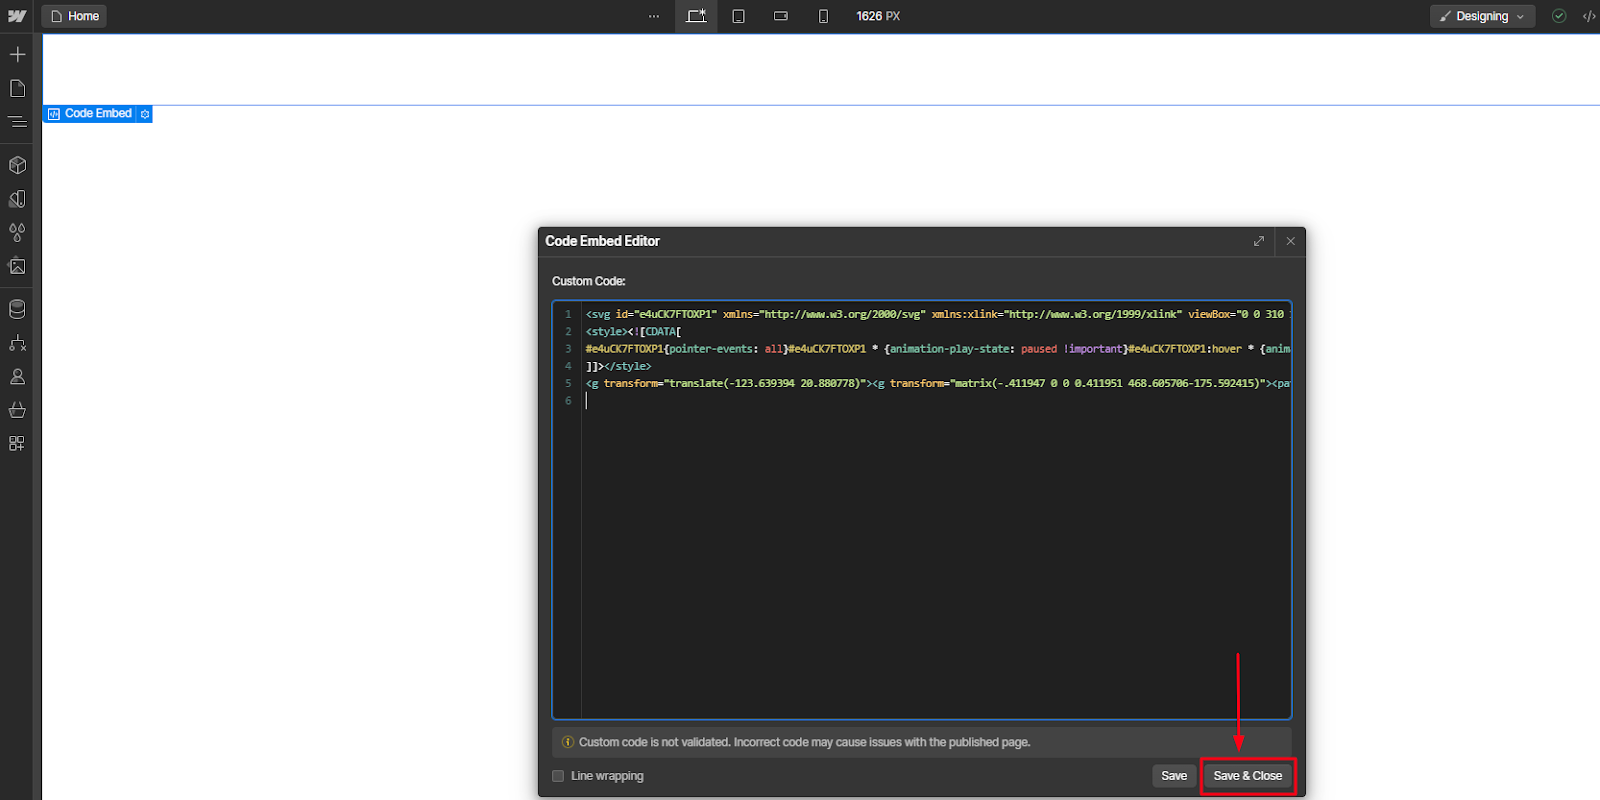
4. You can paste the SVG code from the clipboard here and click on the "Save & Close" button.
5. The animation will not be visible in the project edit mode. It only becomes visible after you publish and preview the website in the browser, where the animation will start on mouse over.
Note:
This method will only work for SVG files that do not exceed the 50,000 character code limit allowed by Webflow.
Method 2 - Using an Object Tag:
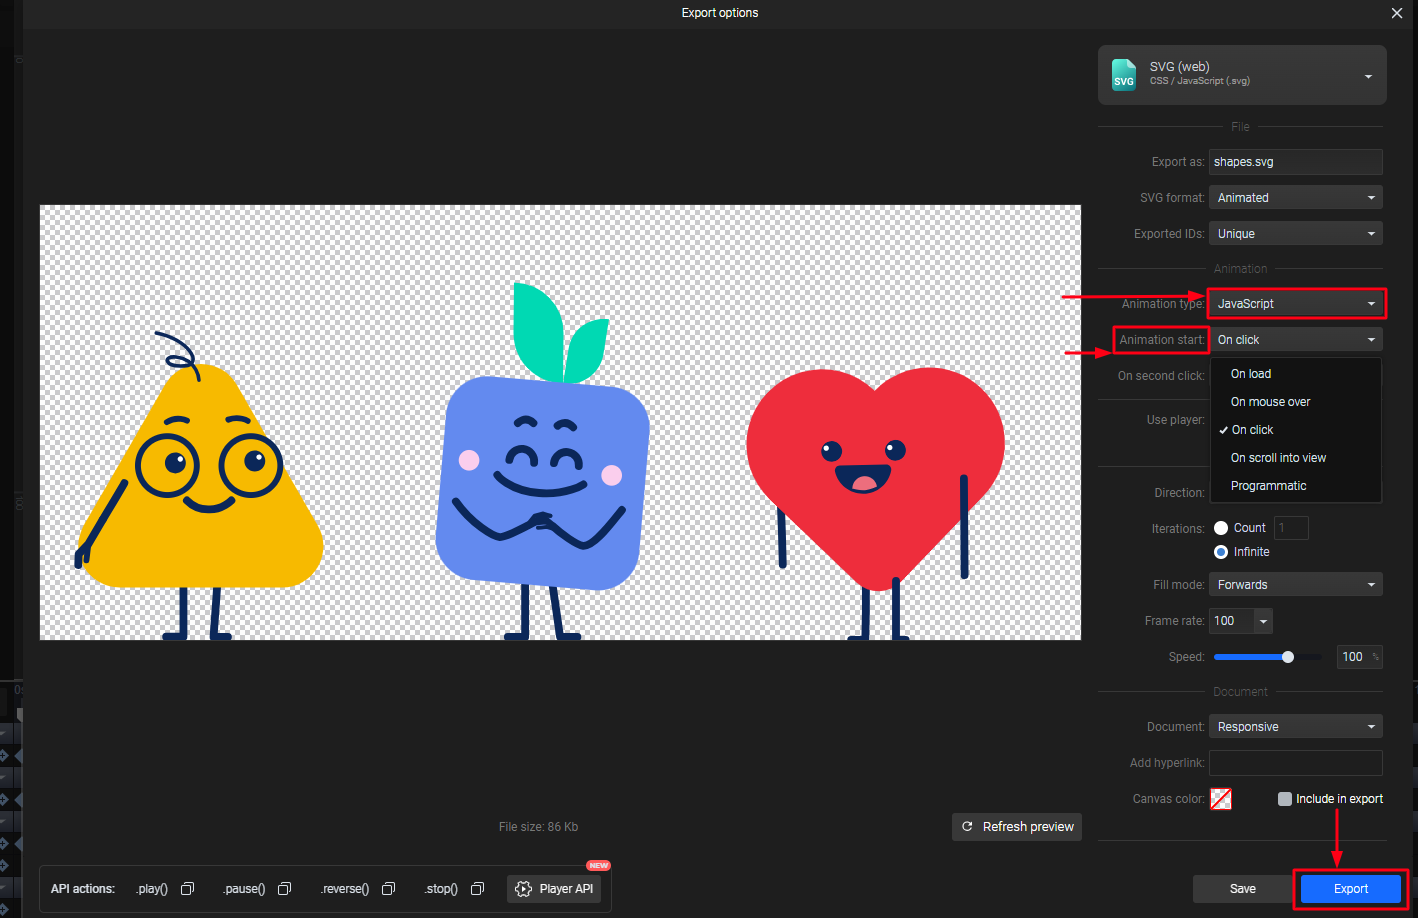
We recommend this solution for interactive animations starting “On scroll into view”, “On click”, but also for animations starting “On mouse over”.
- In the Export panel, make sure you select “JavaScript” as the animation type, and let the animation start when you please (“On click”, “On scroll into view”, “On mouse over”). Click the “Export” button:
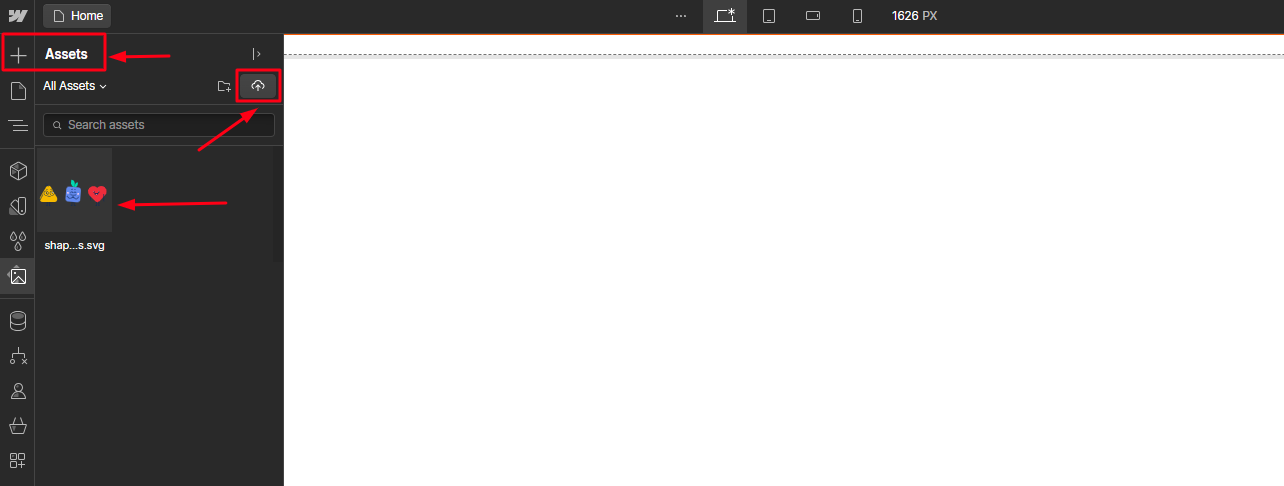
2. Upload the SVG file to Webflow, in the “Assets” section:
3. Copy the asset link of the SVG by clicking on the cogwheel icon on the SVG’s thumbnail and selecting the icon seen below:
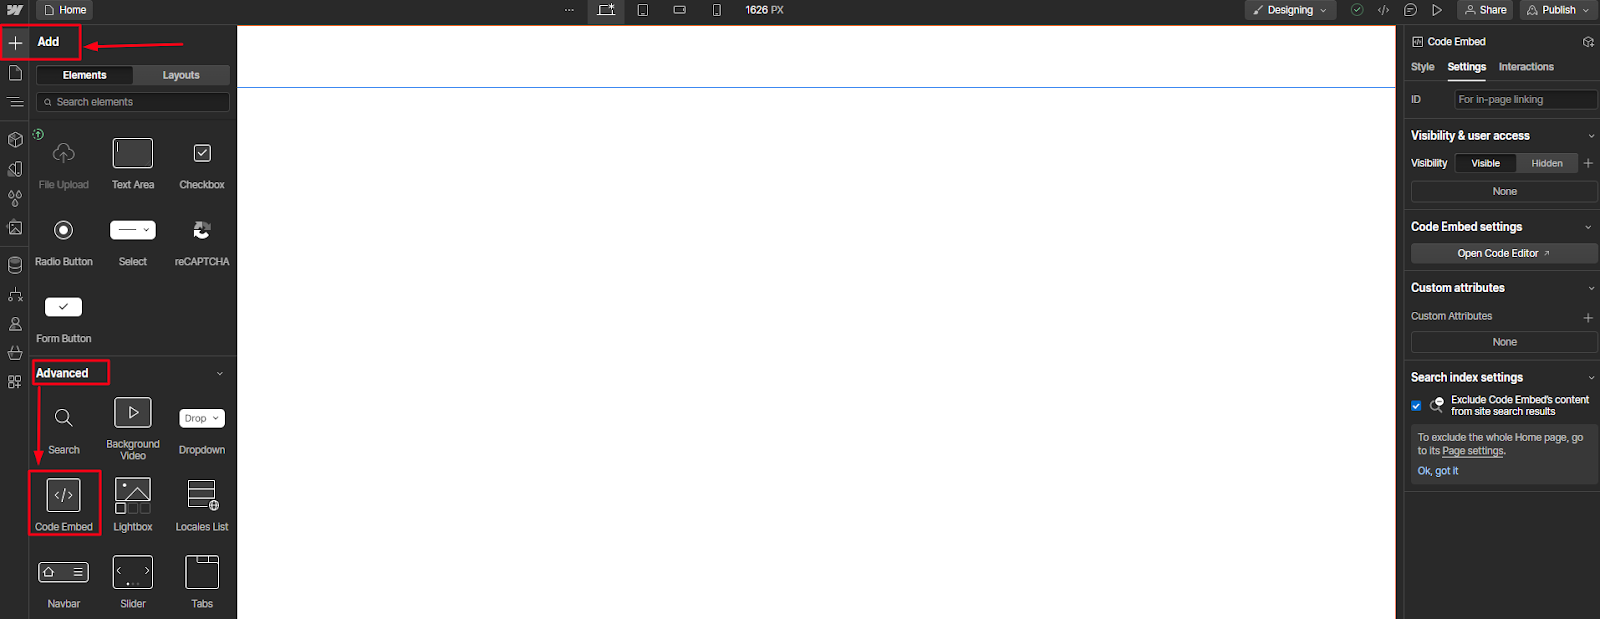
4. Navigate to “Code Embed” from the Advanced section (Please note that this feature is exclusively available for paying users):
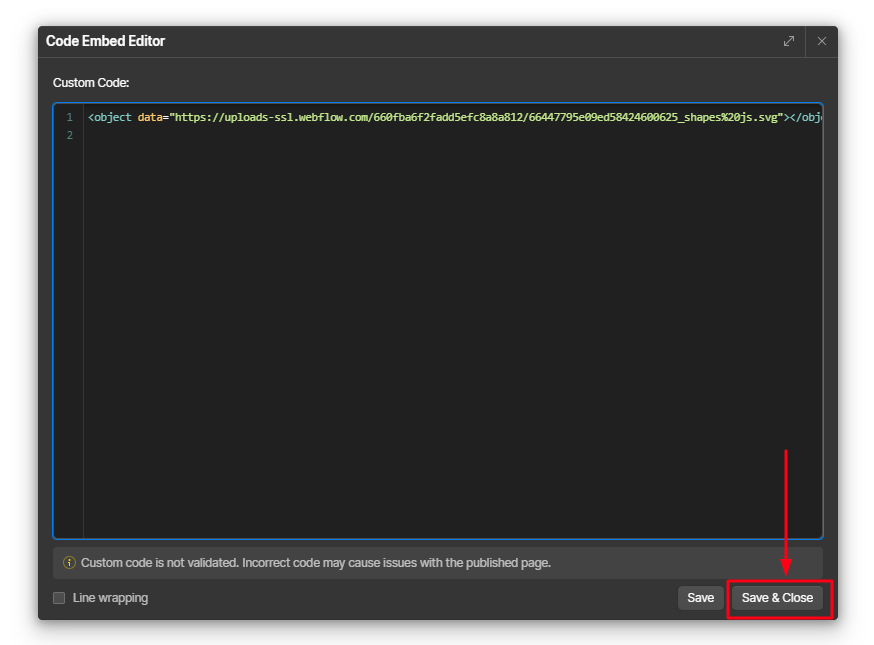
5. In the "Code Embed Editor" section, add the asset link of your SVG by setting an object tag as shown in the example below. Paste the SVG asset link (previously copied) between the quotation marks, and then click on "Save & Close".
<object data="paste_the_svg_link_here"></object>
6. The animation won’t display until you hit the “Publish” button:

Discover more articles on SVG implementation: