How to Create Basic Shapes - Part 2 - Paths
Duration: 03:56
In this tutorial we’re going to look at the difference between shapes and paths, and how to make changes to the basic shapes in SVGator.
In the previous video, we looked at features of basic shapes, like the corner radius of the square, sides of the polygon, points and radius of the star. These are all editable from the properties panel, until they are converted to paths.
Step 1 - Convert to path
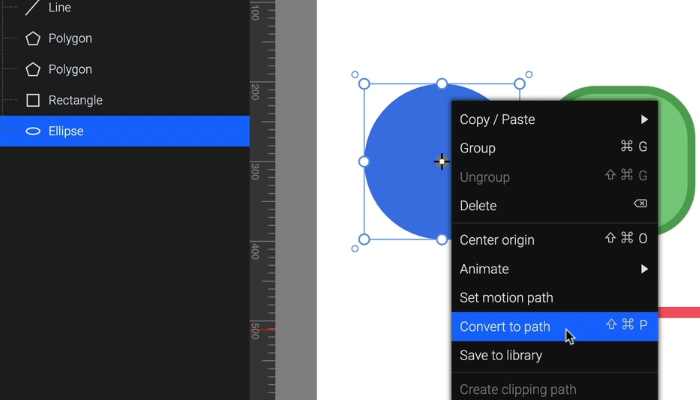
Maybe I’d like just part of the circle. If I select the circle now and go to the node tool, I can’t see any nodes, because as long as this is a shape, it will keep its property as a perfect ellipse. To change it, I’ll right-click the circle, and choose Convert to path. Now the nodes do appear and I can freely move them around or change them. The icon of the element has changed as well, to that of a path.
Step 2 - Manipulating nodes
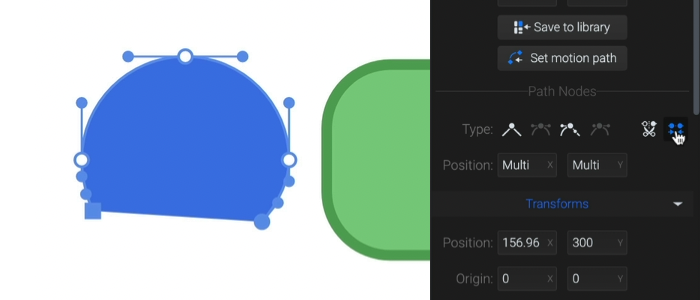
I can go ahead and add new nodes by holding Alt while clicking on the path, and delete existing nodes with the delete button. To join the ends, I’ll just select them, and use this button in the properties panel, here.
The same is true for the rectangle. If I select it, I can’t see any nodes. In the properties panel, I still have access to the corner radius slider. So I’ll just right click, choose Convert to path, and now I can change this rounded rectangle like a regular path, and the radius slider is not available anymore in the properties panel.
I can remove nodes by holding down Alt and clicking on nodes, change the type of nodes by selecting them, and clicking Corner node for example, or align them together, with the align buttons in the properties panel.
Now let’s look at the polygon and the star. These two do have nodes. If I select the polygon, I can still control the number of sides from the properties panel. I am able to move the nodes around too, but as soon as I do that, I lose the side controls because it’s not a symmetrical shape anymore.
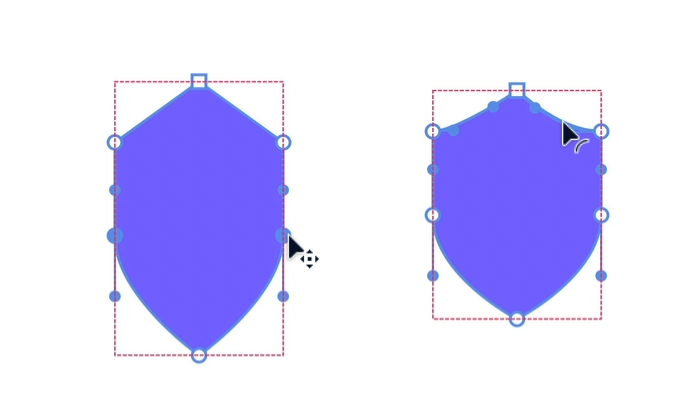
Let’s try to make a Shield shape out of this. I’ll just move these nodes with the arrow keys, to get the overall shape. All of the sides of the polygons are straight right now, and I can’t see the node options in the properties panel, until I right click, and convert it into a path.
Now, if I select nodes, I am able to change the node type, and move node handles, and nodes freely. Let’s adjust these nodes a little too so it looks more like a shield… Looks good. I’ll select it again… I can click and drag any of the lines to make a curve, and the shield is finished.
Step 3 - Points and Ratios properties
The same goes for the star. Stars are just polygons that have Points and Ratio properties. If I move a node, the control disappears, because it’s not a symmetrical shape anymore. I’ll just undo that, and the sliders are back in the side panel. I can still edit the number of points of the star in the properties panel, and the size of the Radius as well, while it’s still a shape.
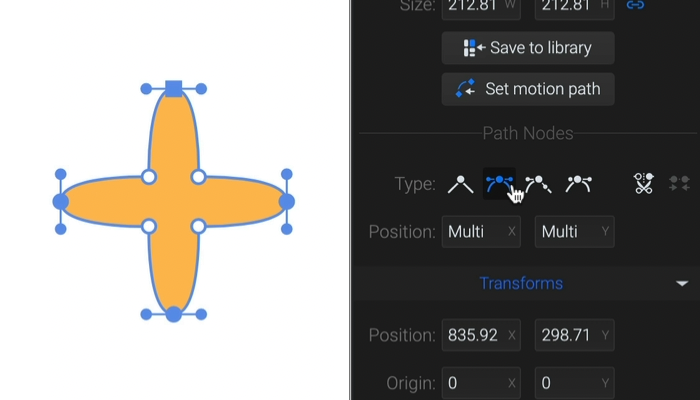
I’ll convert this to a path as well, so I can see the Node-type buttons. I can select these inside nodes and change them to symmetrical to create a smooth four-pointed star easily.
I’ll just Undo that, and I can select the outer nodes, and click on the Mirrored node button to create a flower-like shape. Like that.
Step 4 - Lines Endpoints
Lines only have two endpoints. I can move these around, but if I hold down the Alt key, I can’t add new nodes. First, the line has to be converted into a path. Now, I can grab the line, and drag it, to make a curve, and I can also add new nodes to it while holding down the Alt key.

In the next video we will change the shapes some more by using the path combine tools. Thanks for watching.
Still have questions? Send us an email to contact@svgator.com and we will get back to you as soon as we can!
Related resources to help you out: