How to Create a Motion Path Animation
Duration: 03:27
In this video you’ll learn how simple it is to automatically animate an object along a custom motion path.
Step 1 - Set a motion path
Use the stroke path that we’ve created with the pen tool, as a route on the map for the yellow car.
The path is customizable, and you’ll also be able to edit it even after you turn it into a motion path. Select the car using the Transform tool from the menu, or simply press V on your keyboard.
Click on the car, and all you have to do is to go right here in the right panel and click this button, Set motion path.
As it says here in this panel, the next step will be to select an object to set it as a motion path, so simply click on the path.
Notice how the nodes changed their shape, and they now look like keyframes, which will also appear in the timeline.
Step 2 - Set the timeline
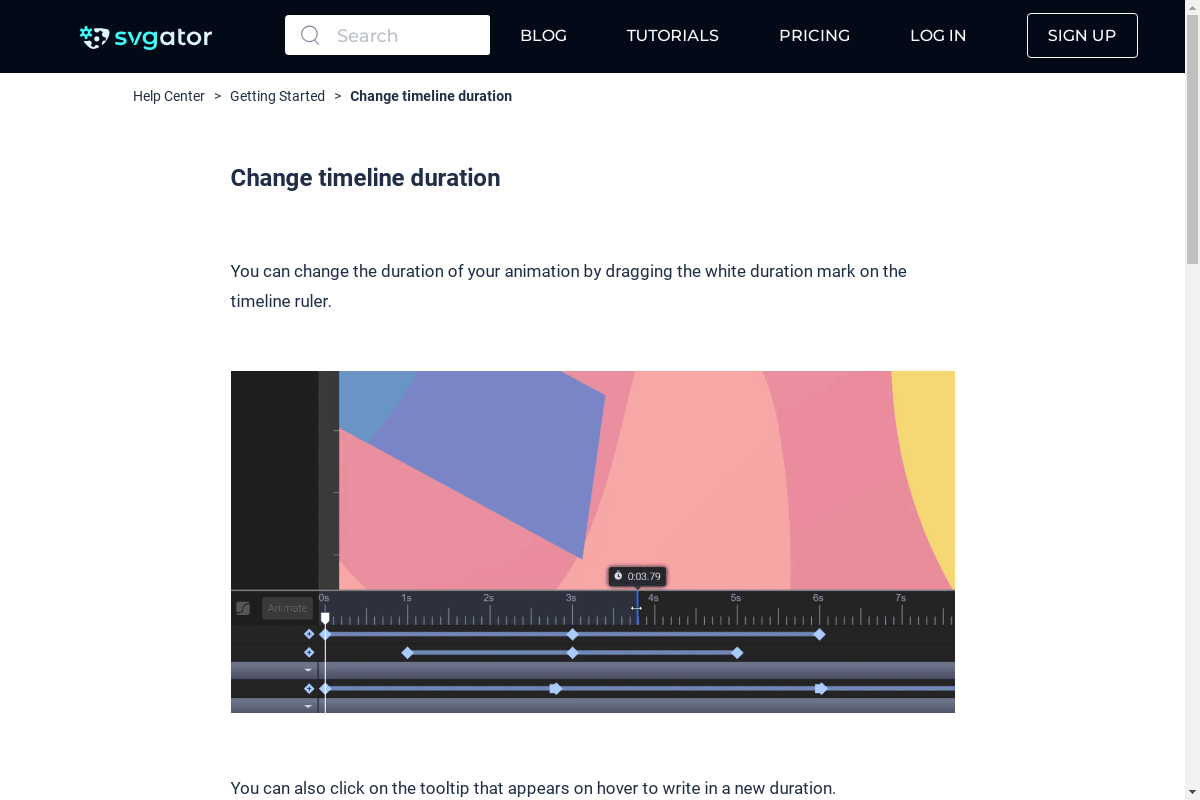
All that’s left now is to specify the timing for the animation
There is the start, set to 0, right where the playhead is. Set the end time too, which is at second 3 by default, and the duration, which is defined by the seconds between the start and the end time. In this case, 3 seconds.
The timeline is extended to 10 seconds, but we want this animation to last only 9 seconds. Change the ending time to 9 seconds and then just click Done. All the keyframes from the path are now in our timeline. Hit Play and see the result.
The car is following the path, but not as expected: its position seems all wrong…
Step 3 - Set the element position
Luckily, there is a super quick way to make it auto-orient along the motion path.
Just go there next to the rotation properties, and click on the icon. Rotate the car to face the right direction on the path, by holding and dragging one of those small circles in the corner of the bounding box.
You’ll see how the car will rotate properly at every turn along the motion path. Hit play and you can see that the car is now auto-orienting all the way along the path, without the need to manually adjust the rotation for each turn.
Step 4 - Adjust timing
However, there are some time adjustments you can make there:
To make the car slow down while turning and make the animation look more natural, focus on the first turn, the motion-path segment between the two keyframes.
By selecting them from the stage, they will also highlight in the timeline.
All you need to do is to increase the distance between them. By doing so, you're actually adding more milliseconds to the transition between those two keyframes.
Do the same for all the other turns. This will make the car move slower on those specific time segments. Then hit Play and see how it goes.
Notice how the car is slowing down right on the curved motion path segment where the road turns.
Of course, you can make more adjustments on the timing. The bigger the distance between keyframes, the longer it takes for the car to turn.
So that’s basically it!
It is this simple to create and adjust a custom motion path for any object in your animation.
Still got questions? Send us an email to contact@svgator.com and we will get back to you as soon as we can.