How To Add Animated SVG to Wix
To add animated SVG to Wix, you just need to follow the seven steps presented below:
- Export your animation from SVGator as CSS only or Javascript
- Open the exported animation in your browser, right-click it, and press View page source or CTRL+U to see its source
- Copy the source code of your exported SVG animation
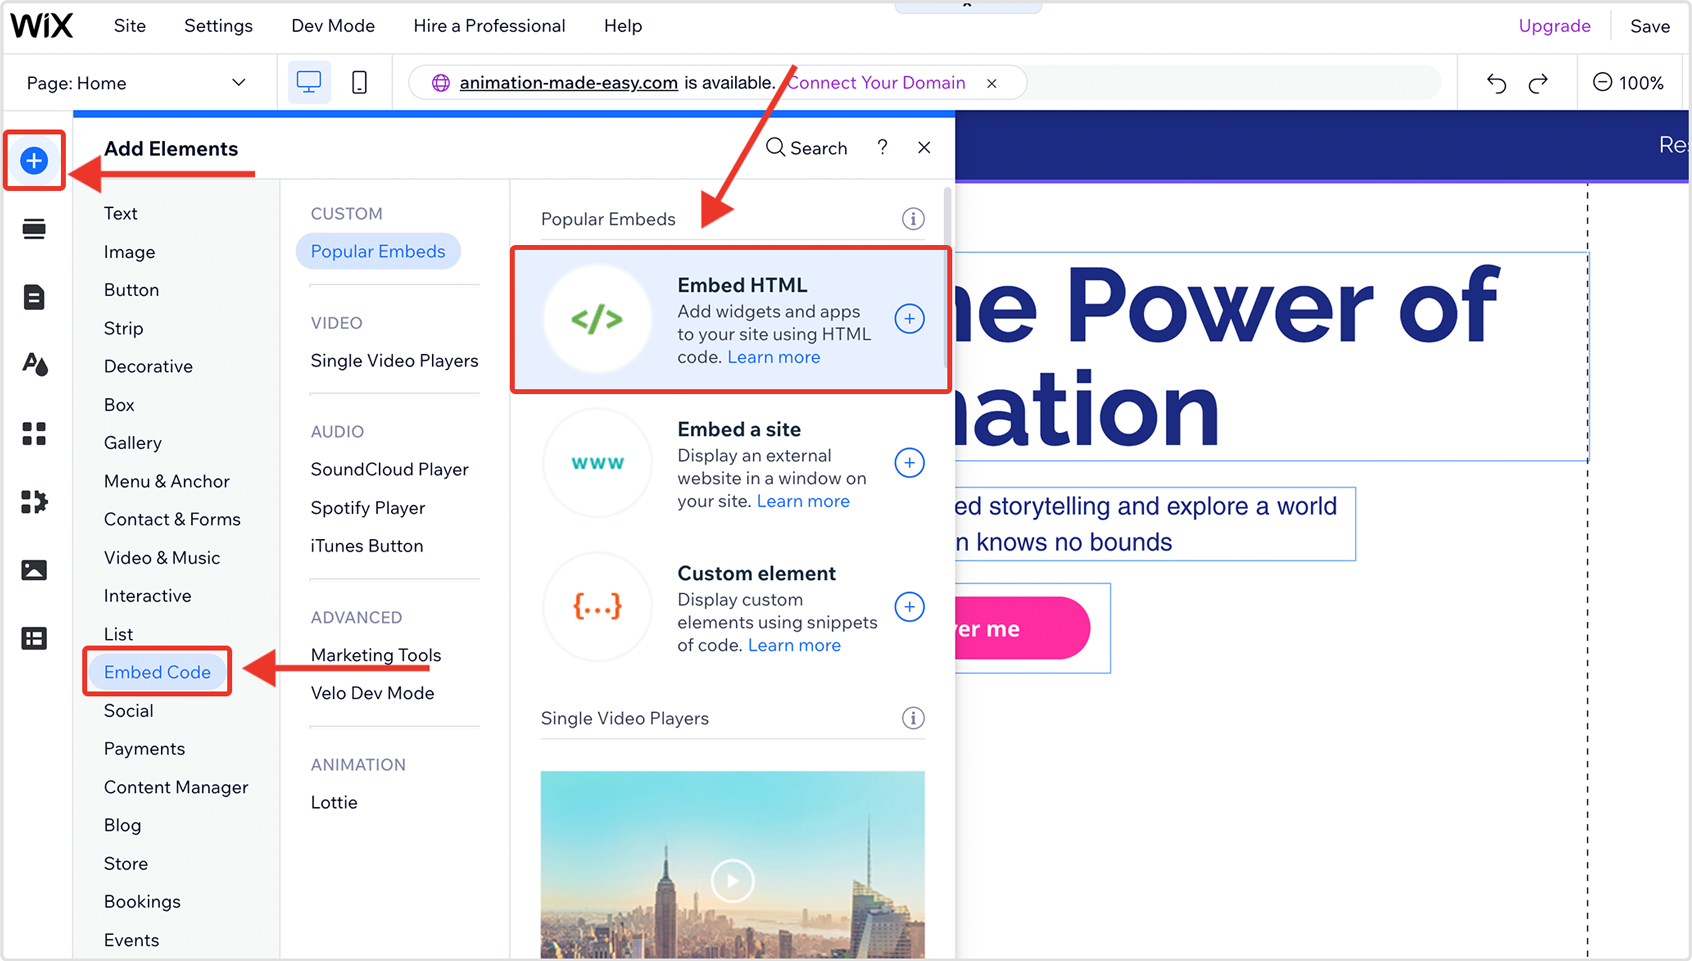
- Go to Wix editor and click on the Add elements option from the left sidebar
- Select Embed Code and then Embed HTML
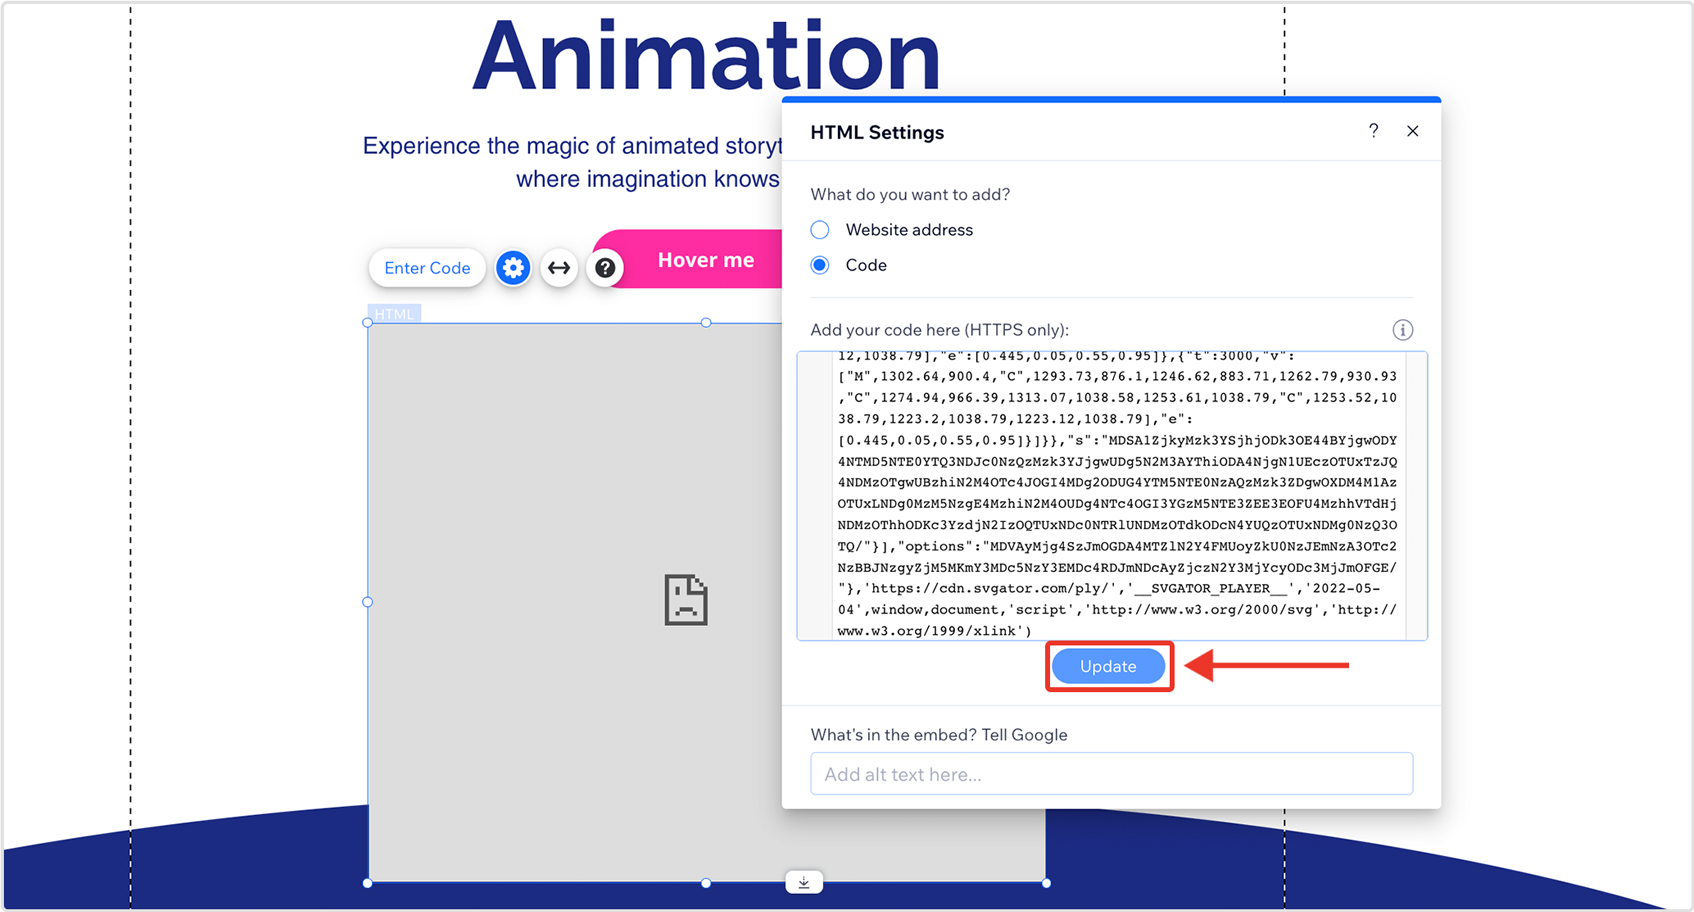
- Paste the code into the given box and press Update
- Press Save and then Preview to see your animation
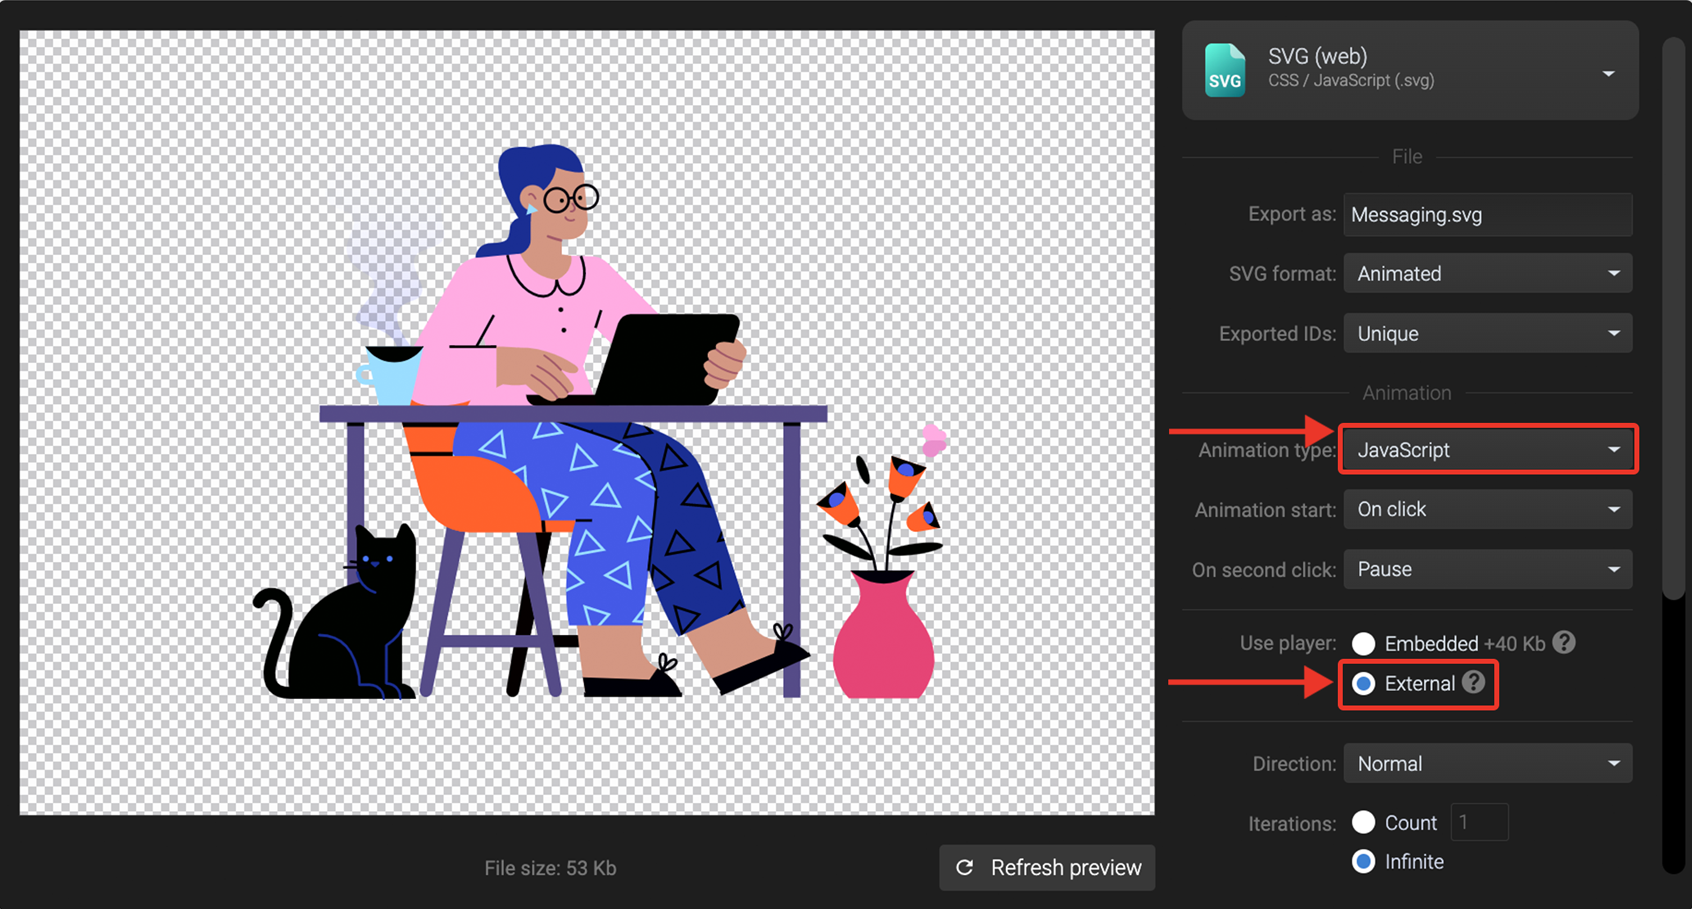
1. Export your animation from SVGator as CSS only or Javascript
Click on the Export button in the top right corner and choose your export settings. In the example below the animation is set to start on load, on an infinite loop.
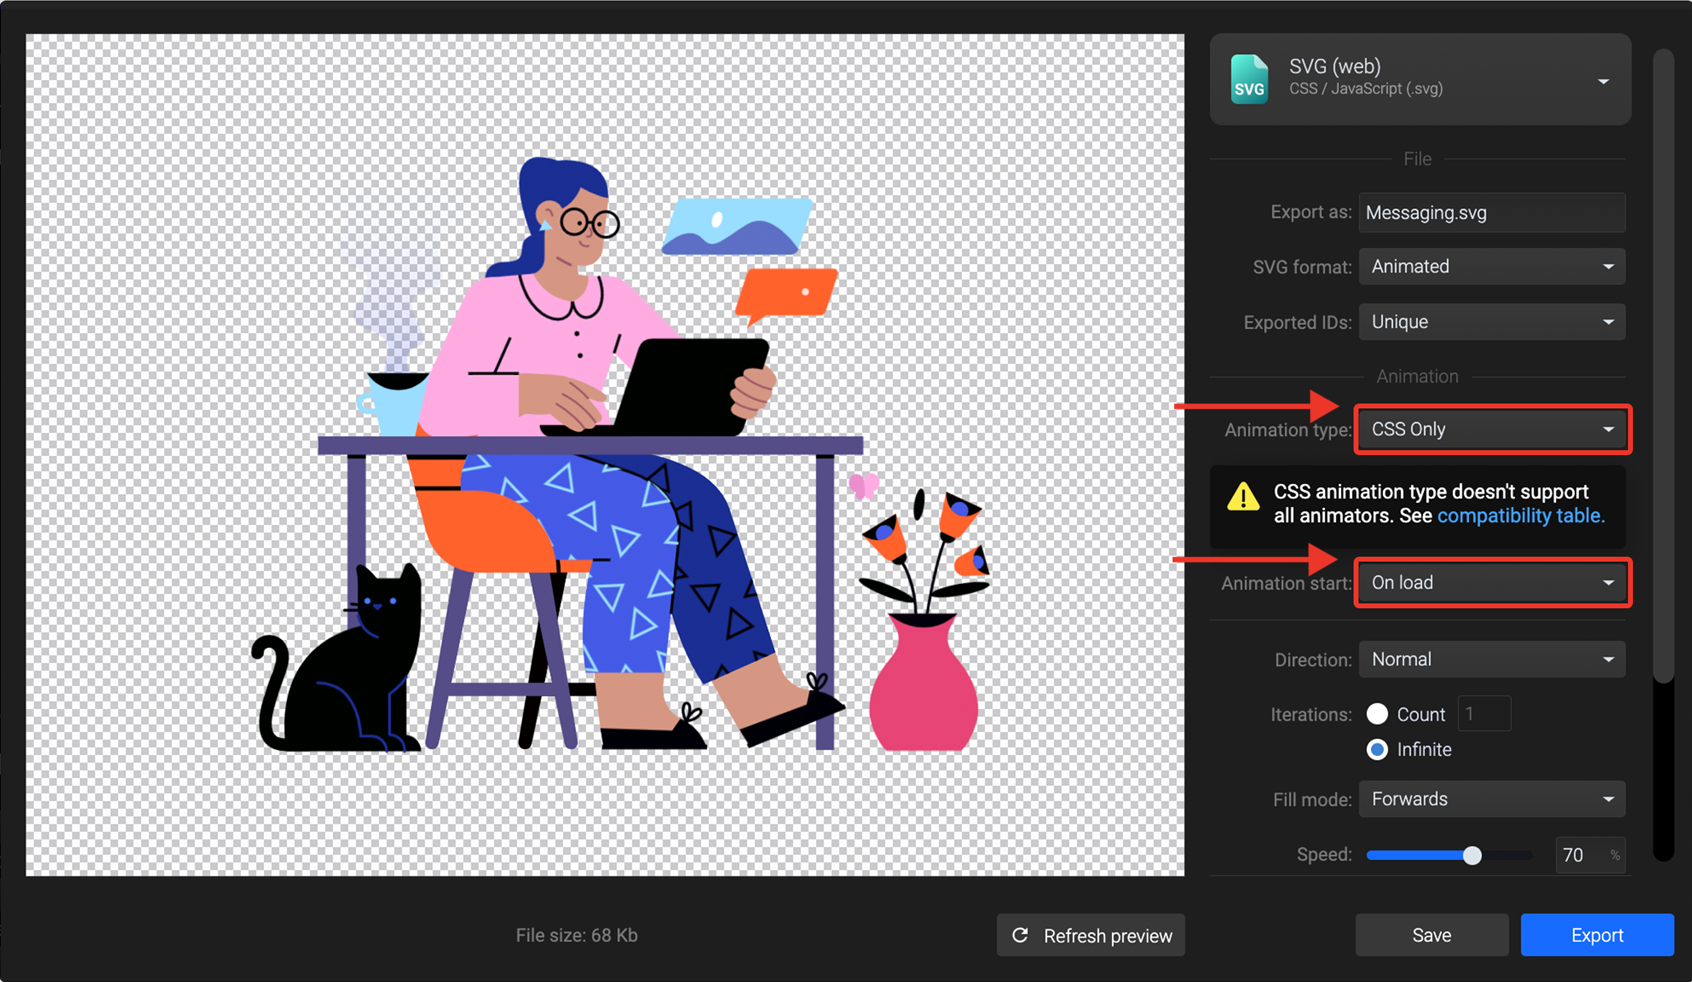
Note: Keep in mind that if you export your animation with Javascript as the animation type, it is recommended to use the external player option.
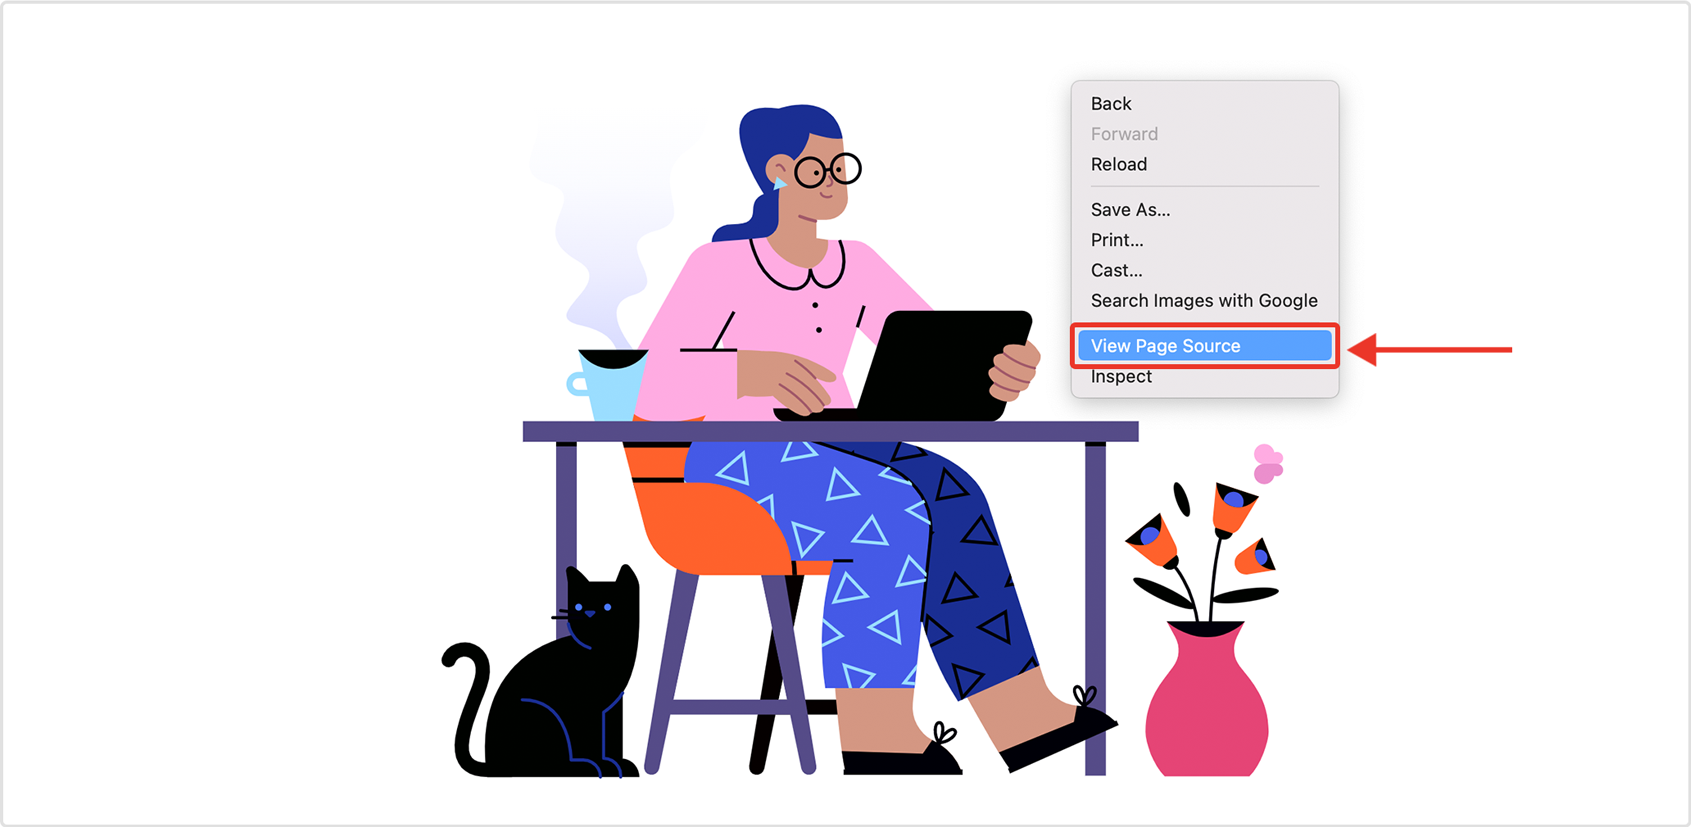
2. Open the exported animation in your browser, right-click it, and press View page source or CTRL+U to see its source
3. Copy the source code of your exported SVG animation

4. Go to the Wix editor and click on the Add Elements option from the left sidebar

5. Select Embed Code and then Embed HTML
6. Paste the code into the given box and press Update
7. Press Save and then Preview to see your animation

After upload, the SVG animation will look exactly like in the editor’s preview window.